- Home Old school pinball<1985
- Grand Prix (EM) 1976
- Firepower (SS) 1980
- Space Mission (EM)1976
- Genie (SS) 1979
- Magic Castle (SS) 1984
- Black Knight (SS) 1980 New school pinball >1985
- High Speed (Sys11) 1986
- Earthshaker (Sys11) 1989
- CFTBL (WPC) 1992 Arkad Projekt
- JK-Kabinett med MAME Contents Black Knight
- Playfield Refurbishing
- Playfield Painting
- Cabinet Refurbishing
- Electronics
- Before-After Pictures
- Refurbishing Diary
- Finished project
- Dokument - Flyer
|
Language |
|
|
Williams Black Knight SS Refurbishing project - Part I!
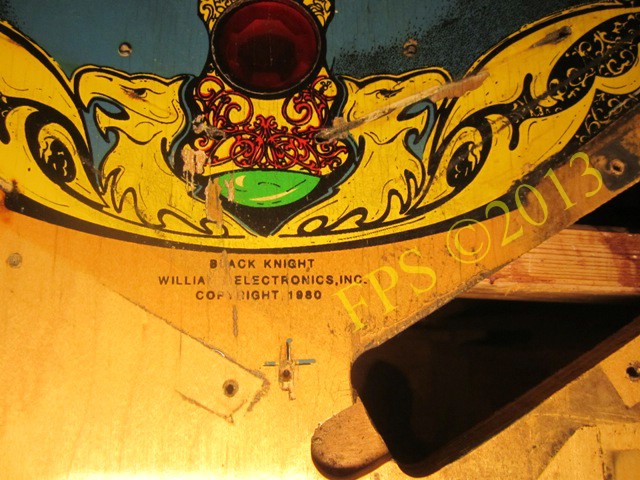
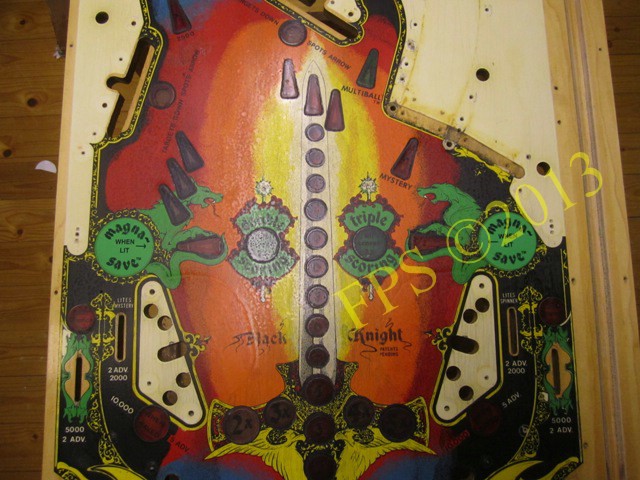
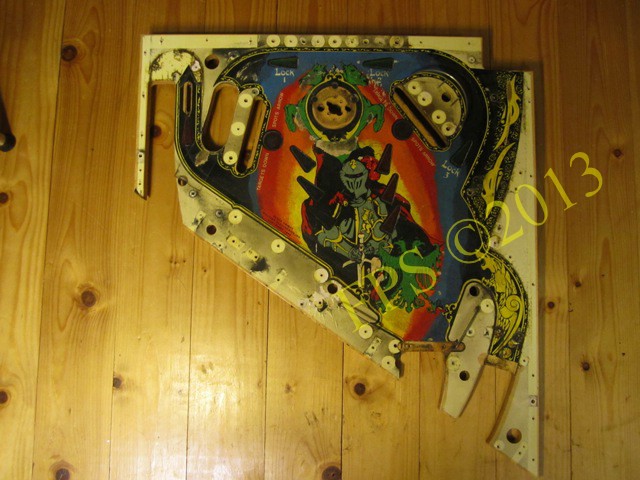
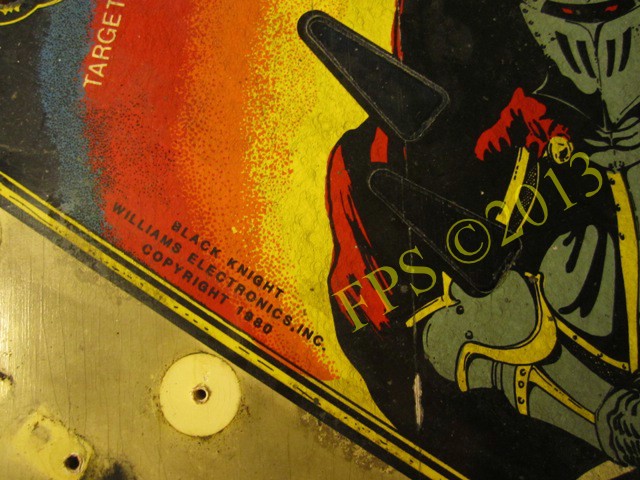
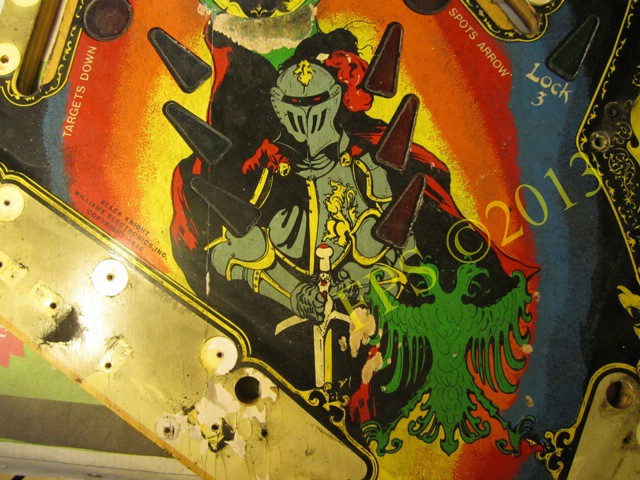
BLACK KNIGHT (SS) 1980 - PLAYFIELD REFURBISHING
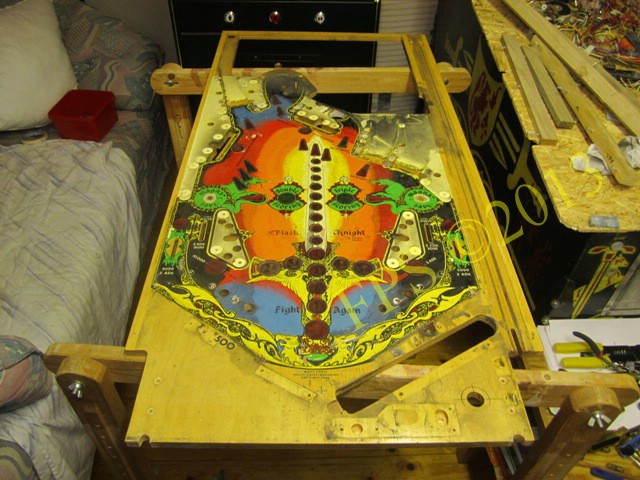
Below, a selection of images showing the playfield before the renovation.
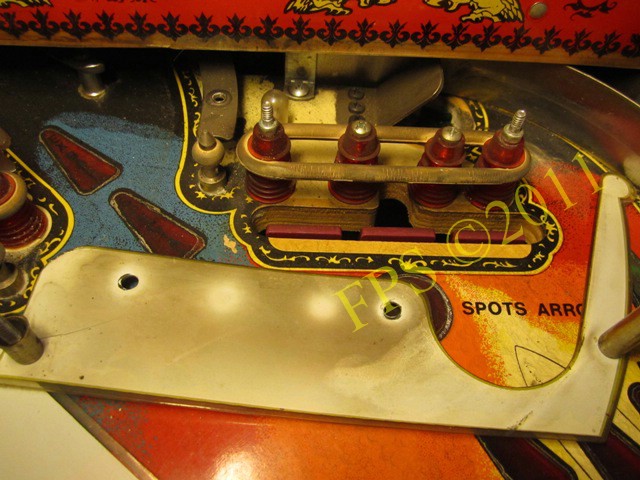
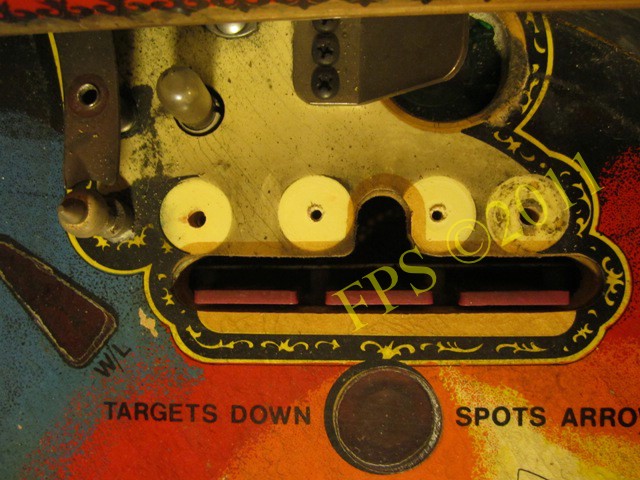
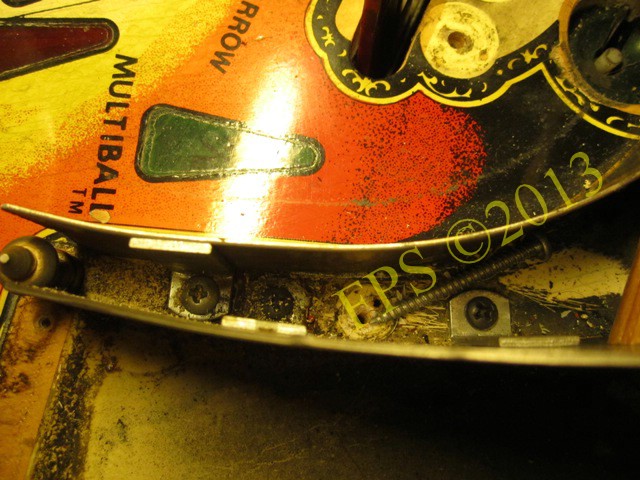
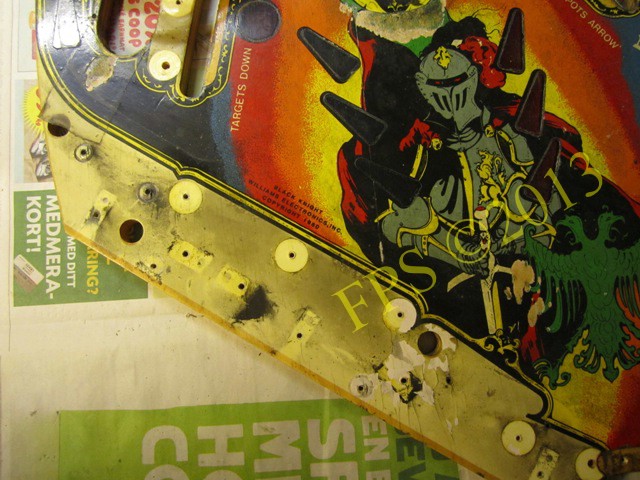
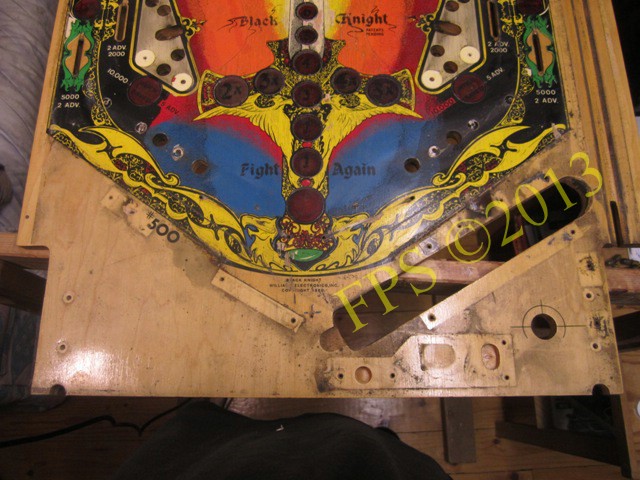
LOWER AREA OF PLAYFIELD
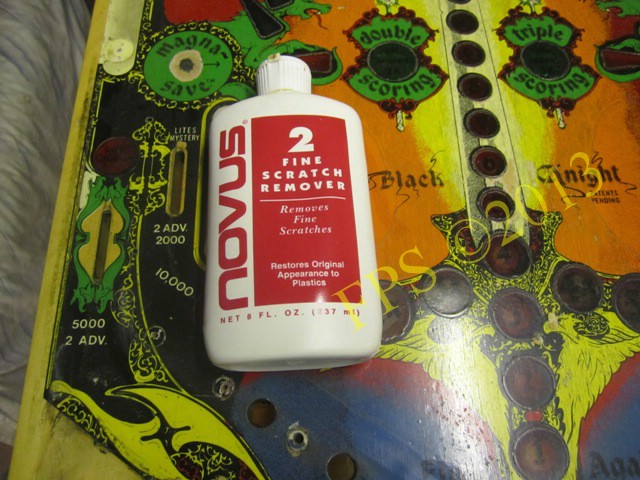
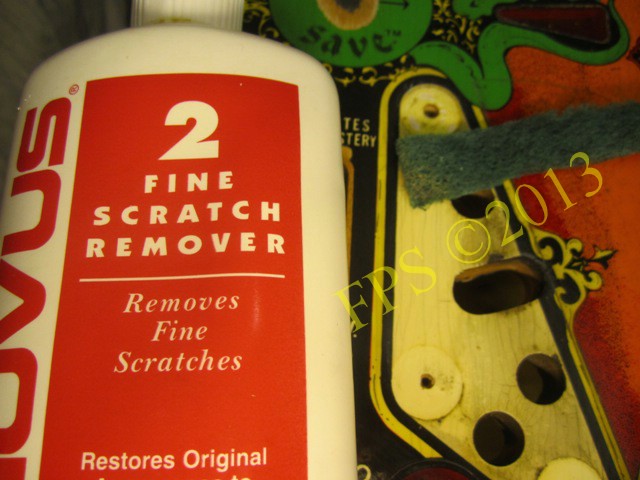
Something that I have mentioned in my other pinball projects is that the area underneath Apron attract a lot of dirt and operators/exhibitors rarely clean there. I removed all the ball tray parts and clean it with Mr Muscle, then I polish them with Autosol. Keeping the ball tray clean prevents the ball from pulling dirt up on the playfield in the future with risk of wear on the playfield. I clean the playfield with Novus 2, which I work in with a sponge and then wipe off with a cloth.


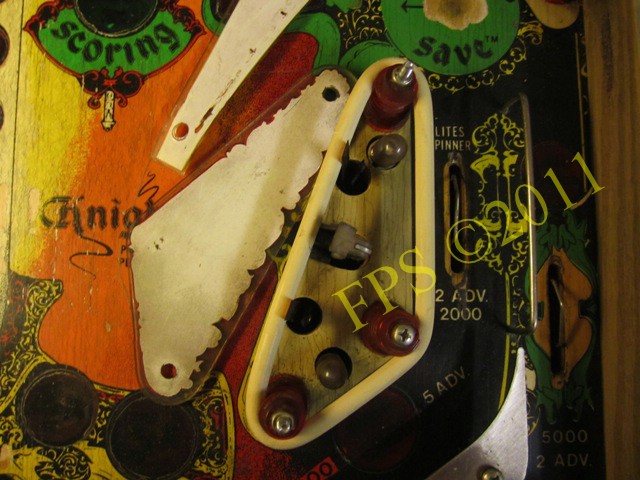

The surfaces at the slingshots were very dirty.
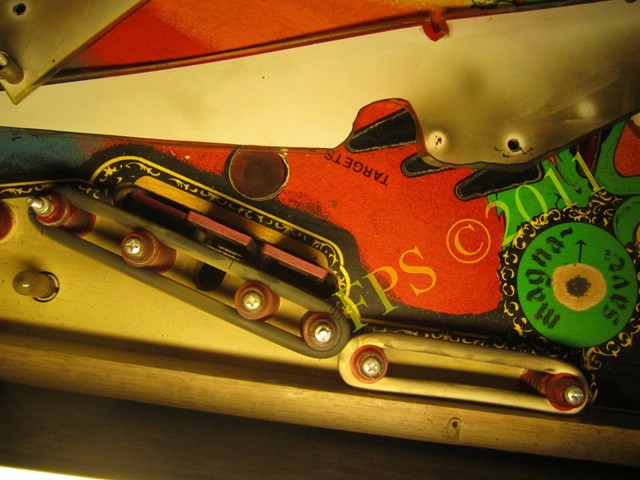
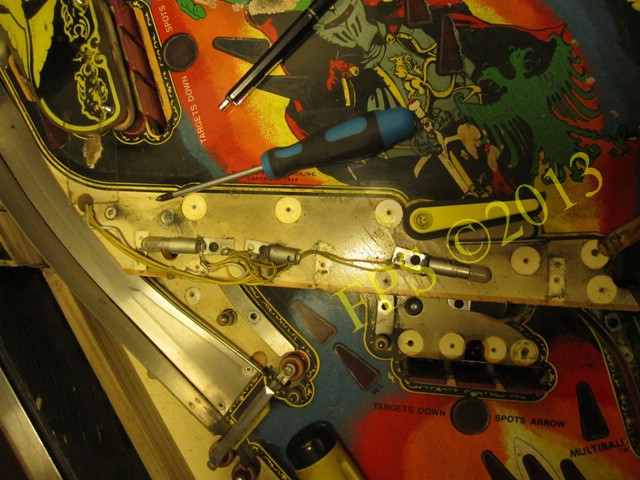
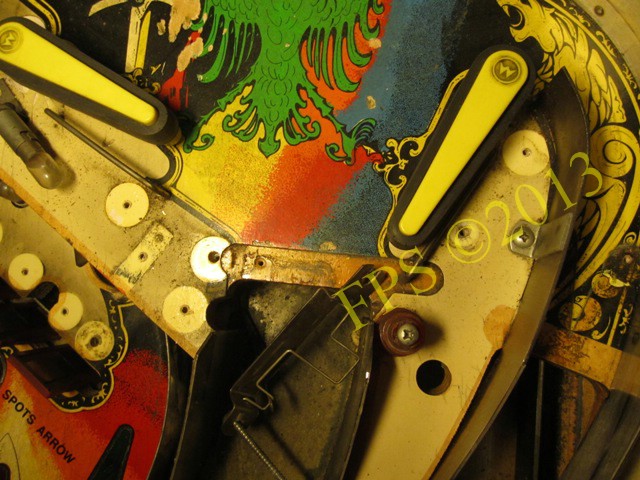
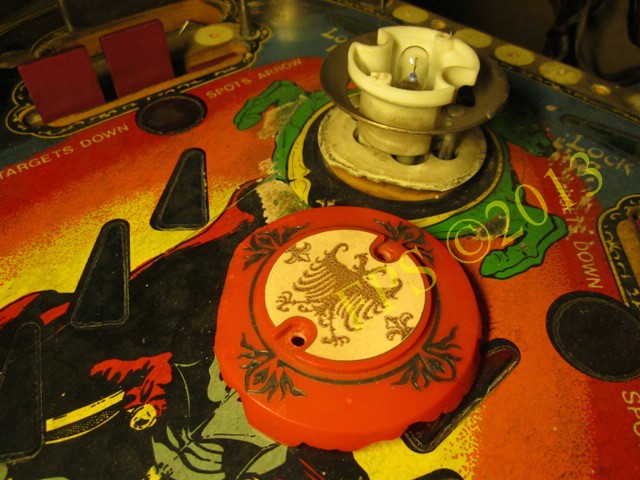
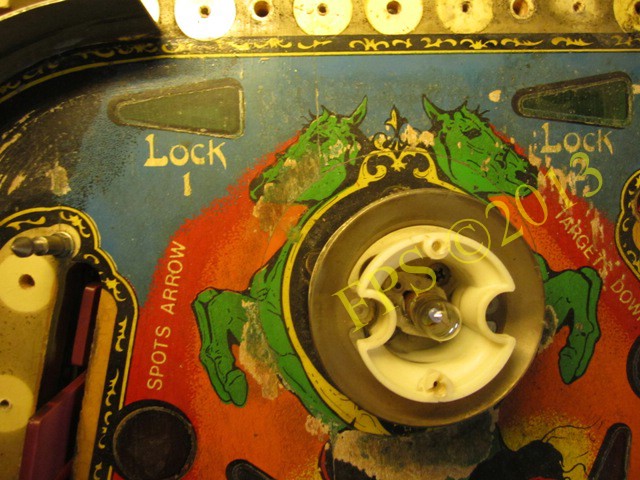
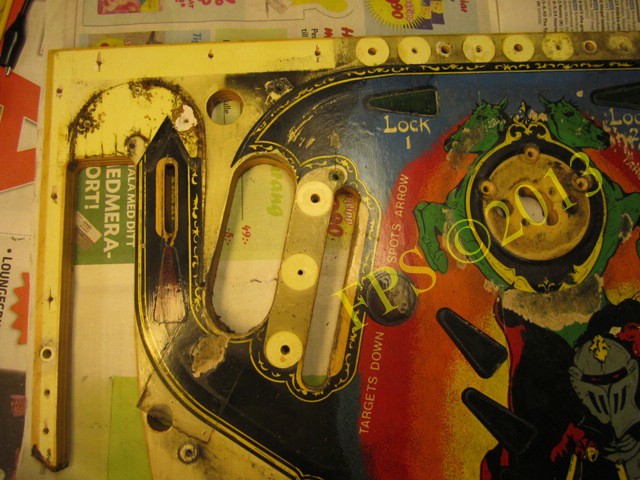
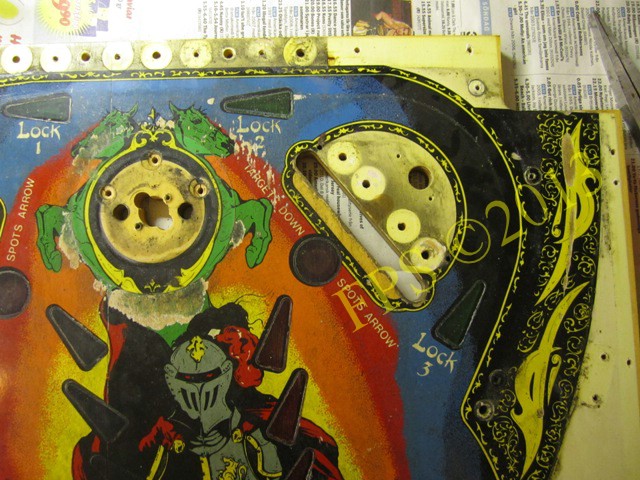
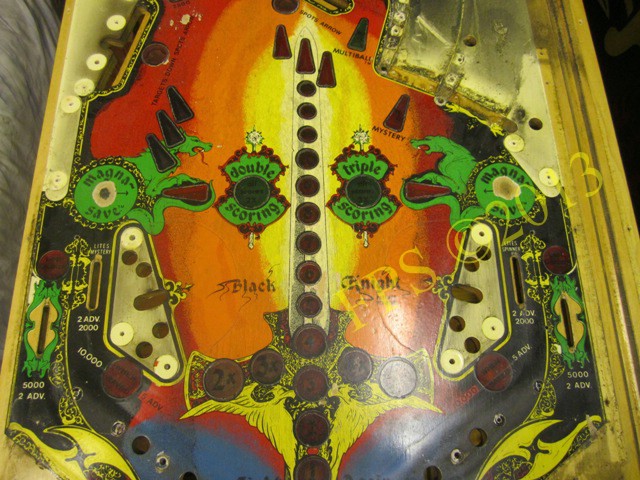
MIDDLE AREA OF PLAYFIELD
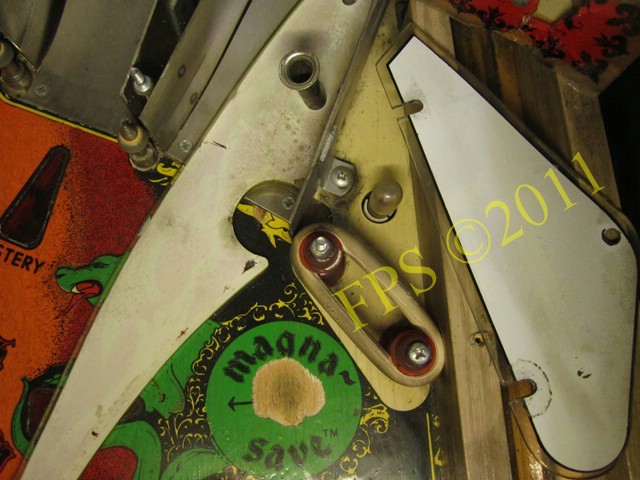
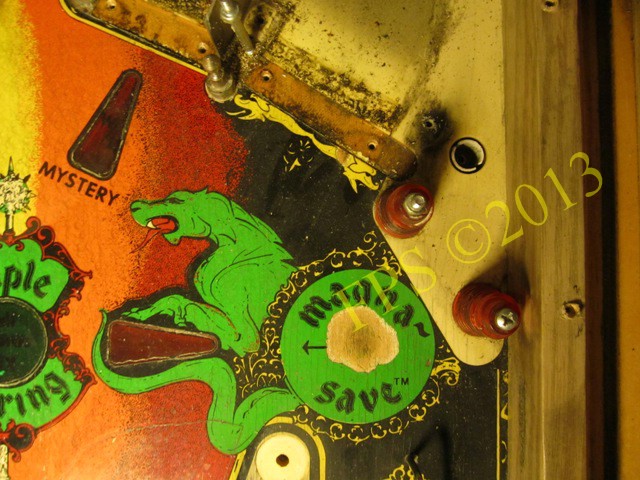
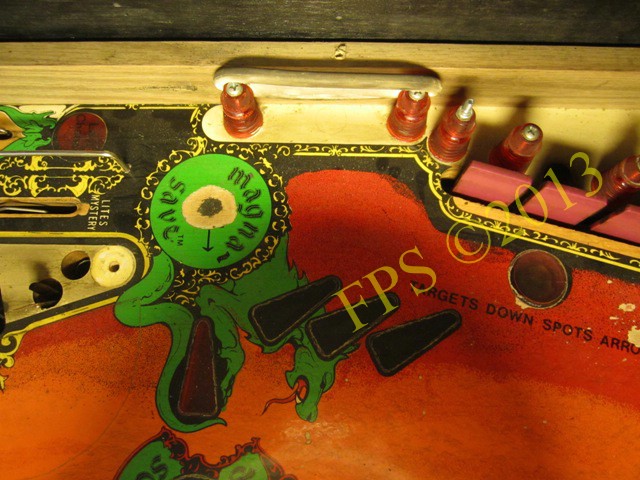
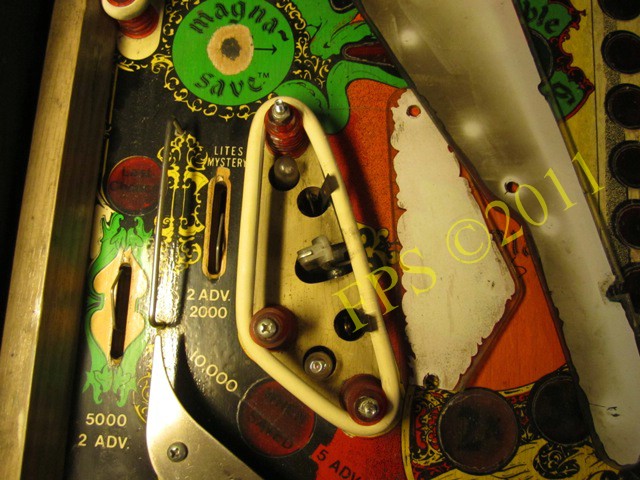
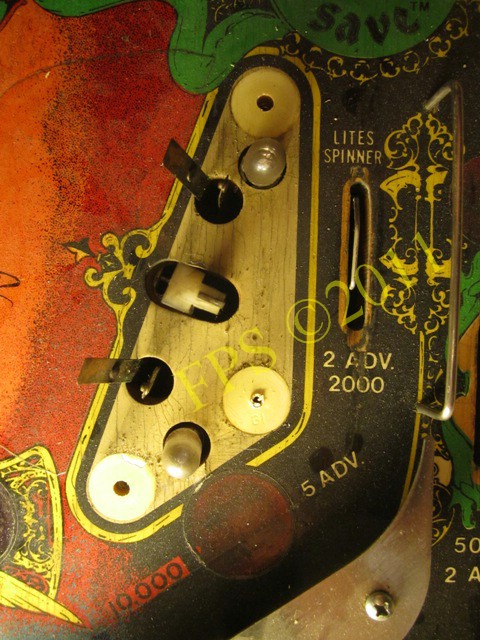
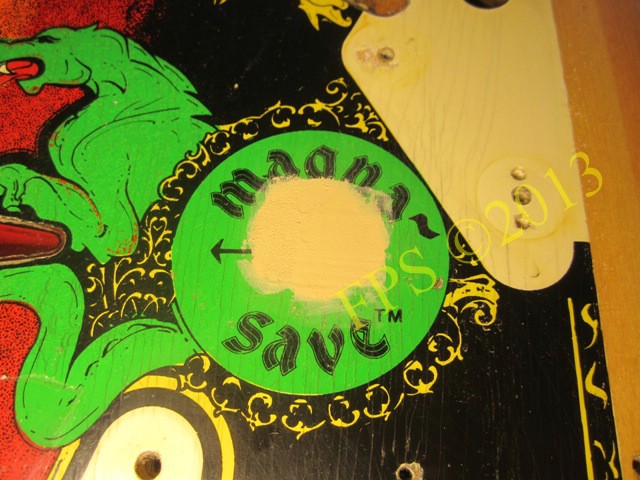
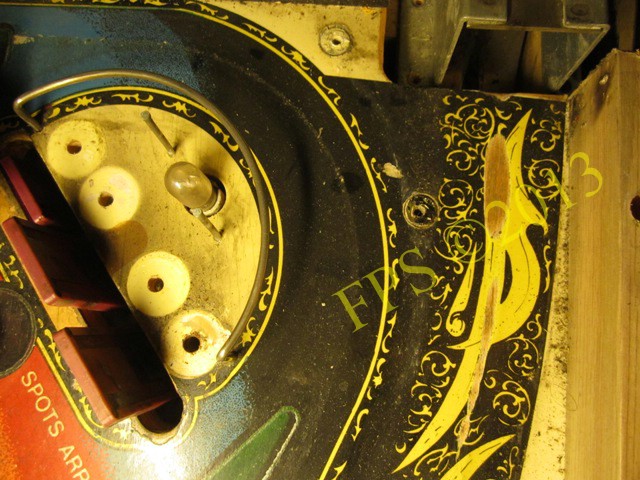
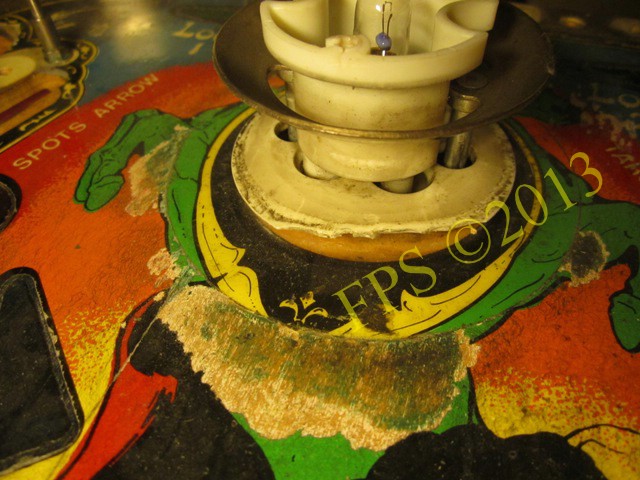
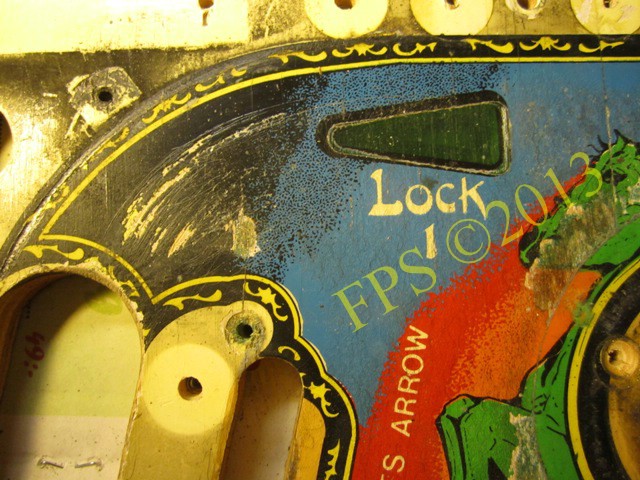
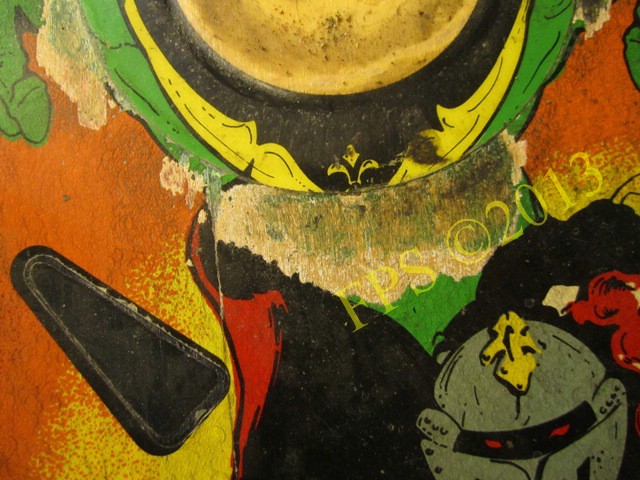
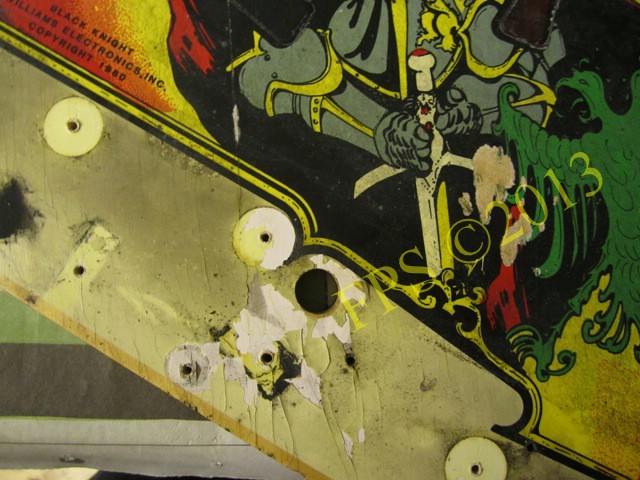
The paint has worn off in both MAGNA-SAVE areas.

Horse shoe loop.
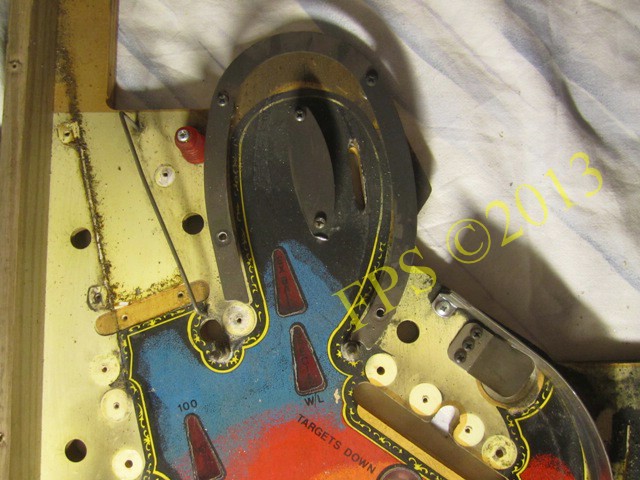


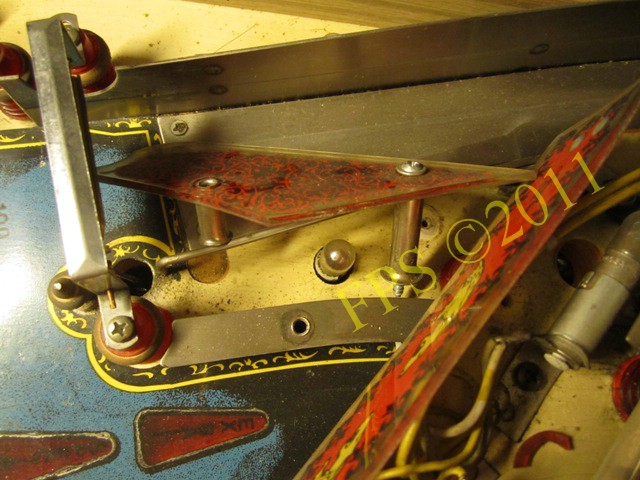
The whole playfield and all rubber rings were very dirty.
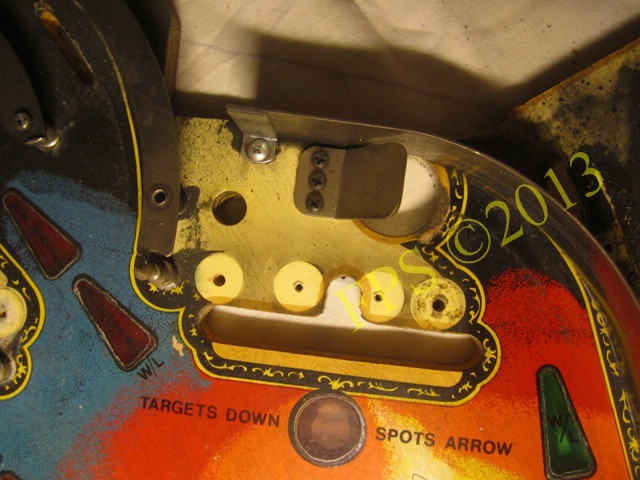
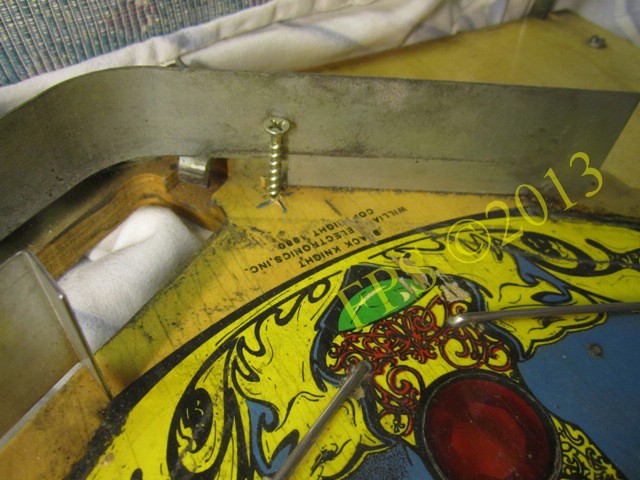
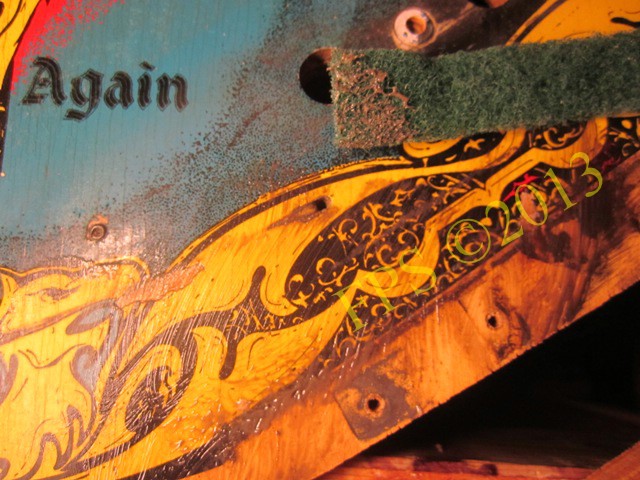
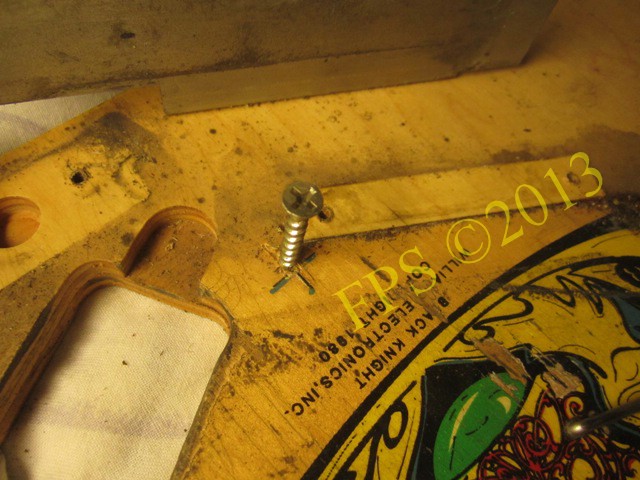
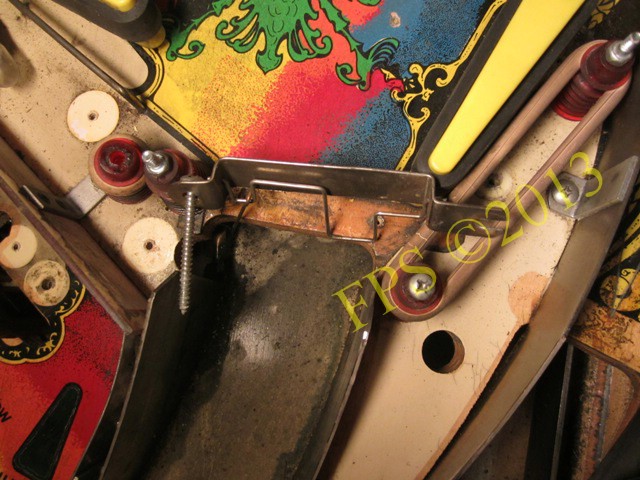
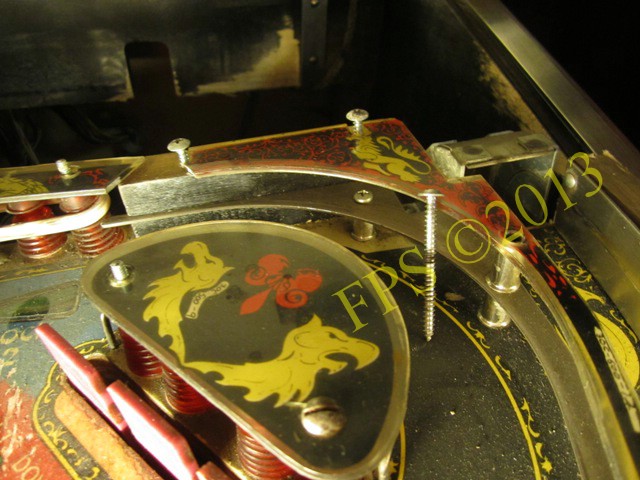
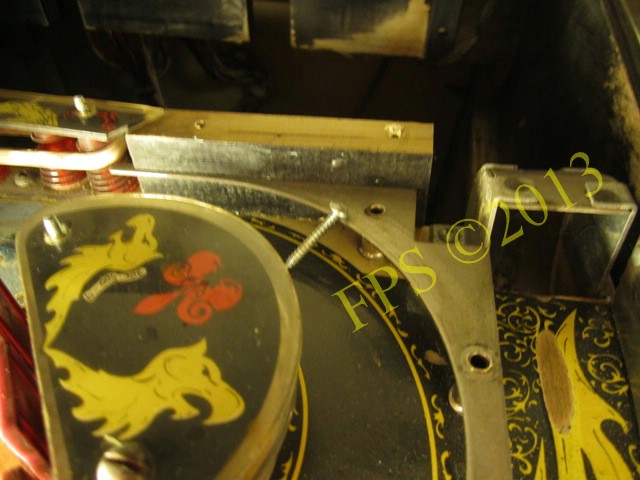
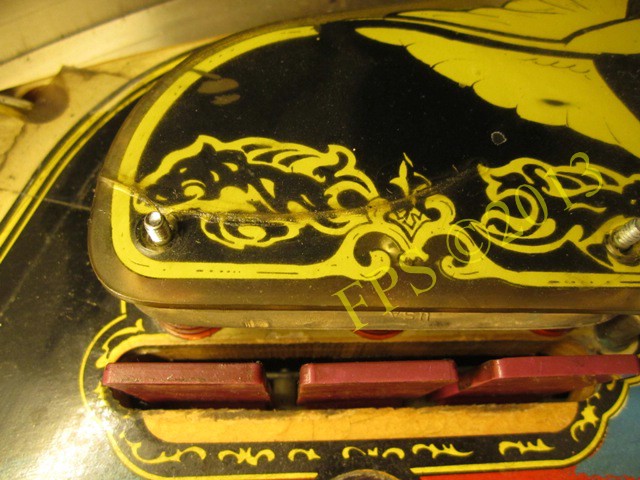
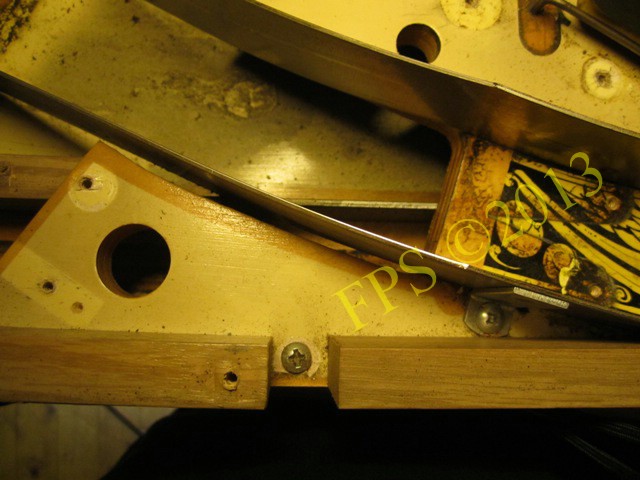
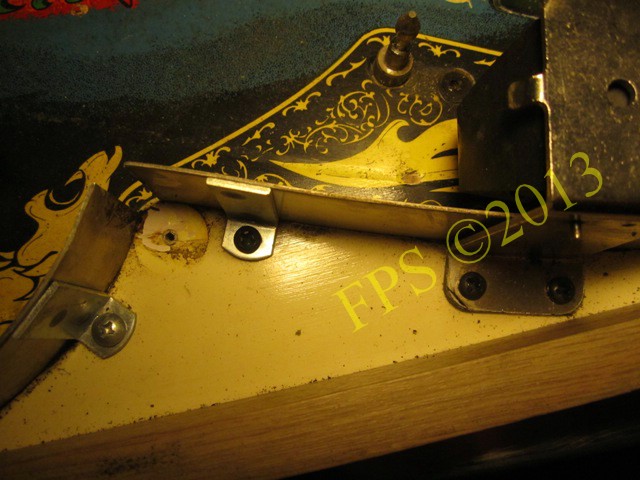
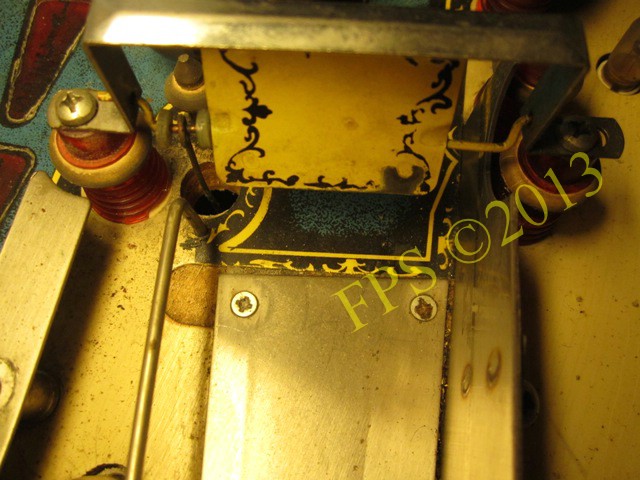
What in the world does the screw here? McGyver is a funny guy with the strangest solutions!
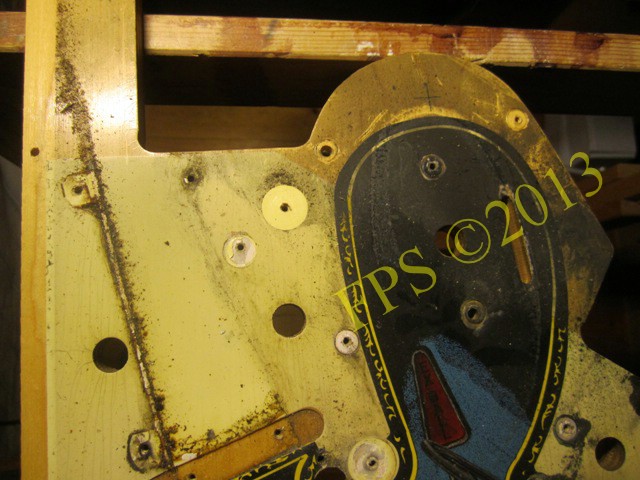
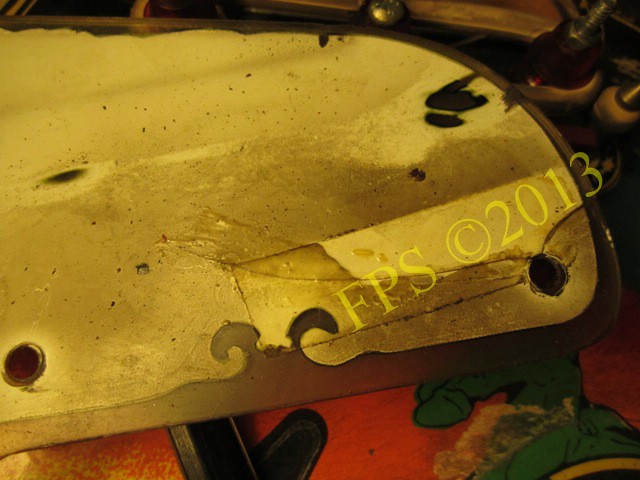
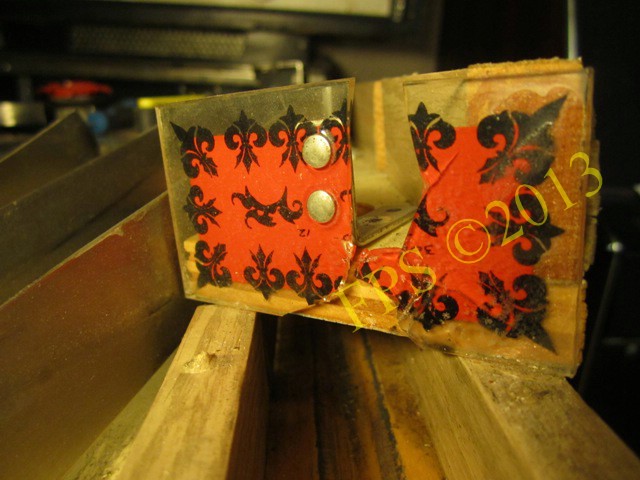
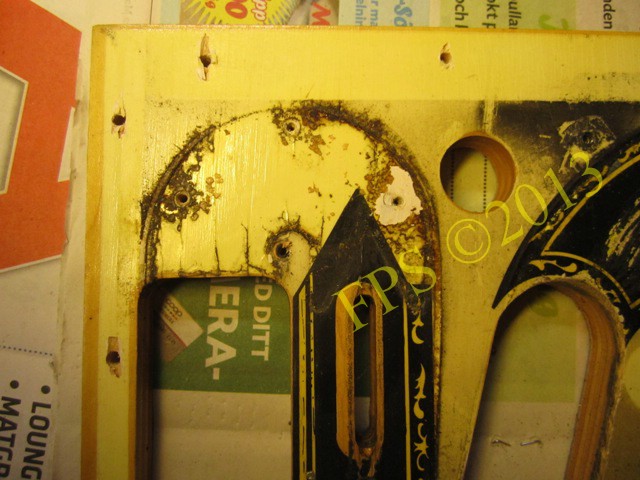
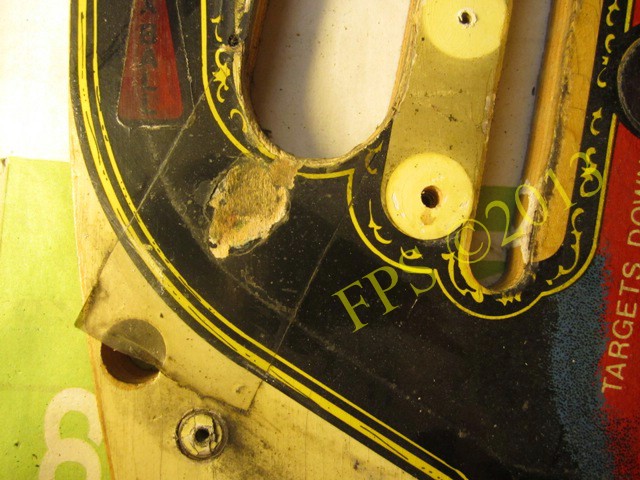
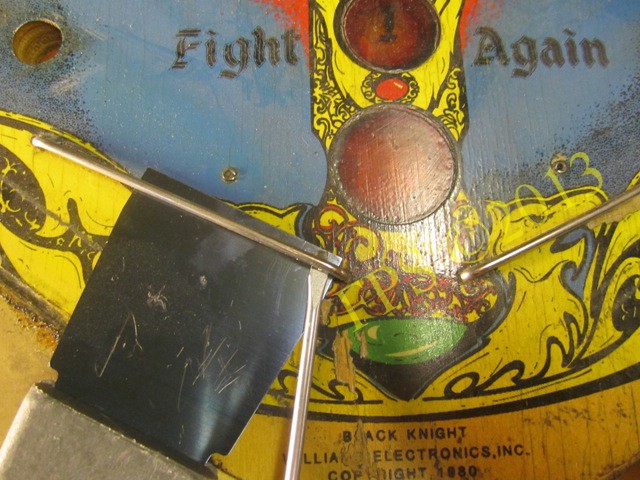
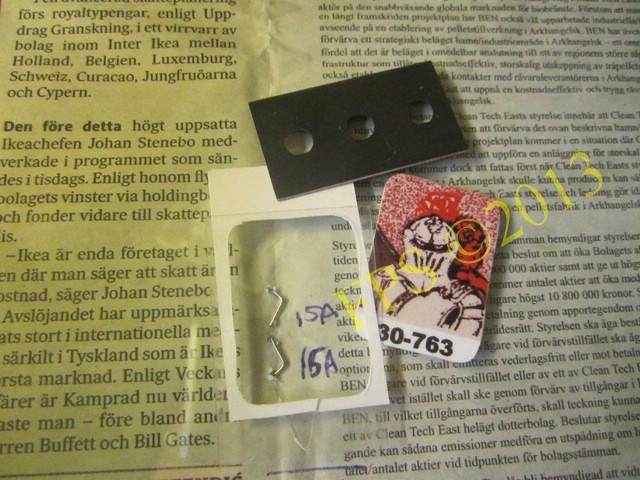
MAGNA-SAVE
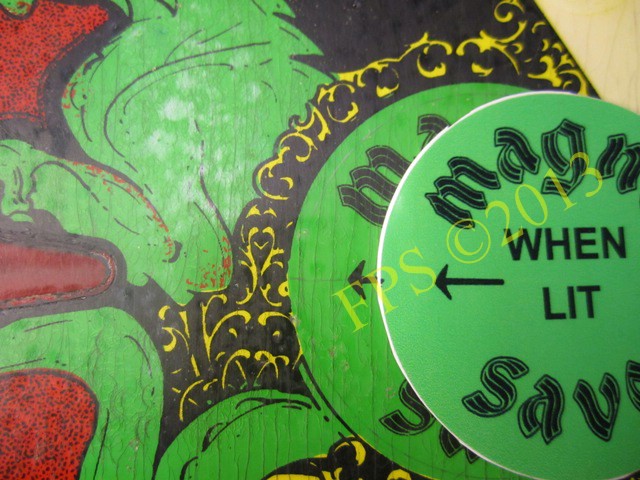
The damaged areas of the MAGNA-SAVE are replaced with adhesive decals.
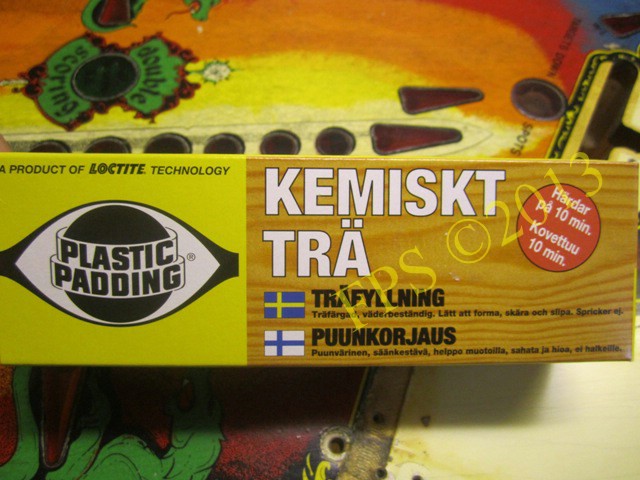
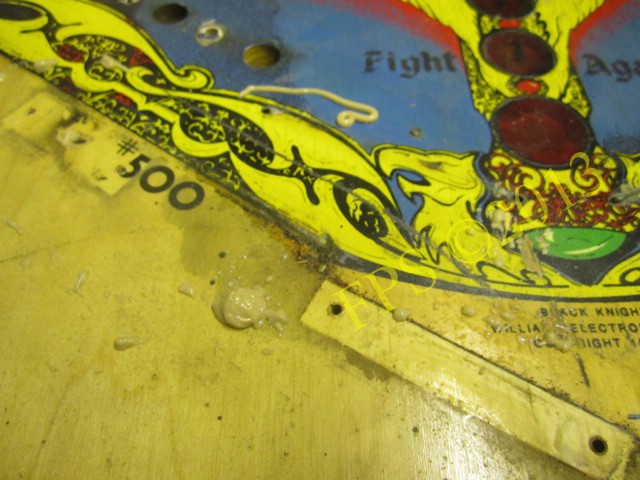
The worn MAGNA-SAVE surface is filled with chemical wood to get a smooth surface.

Sanding with fine sandpaper before applying the chemical wood.
Sanding with fine sandpaper after filling with chemical wood to get a smooth surface.
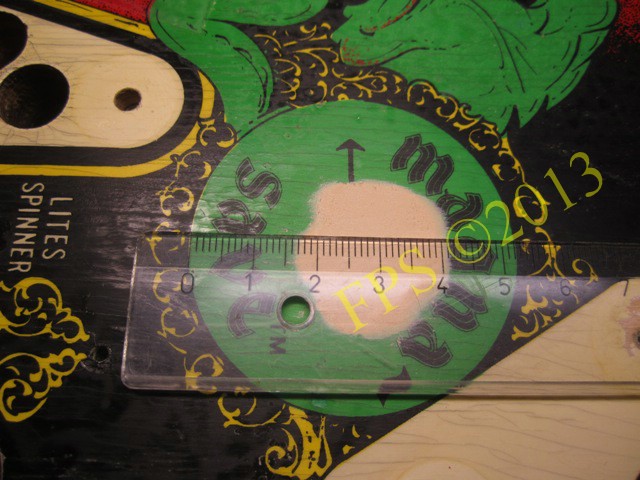
Mark the center of the circle with a ruler to easier position the decal in center.
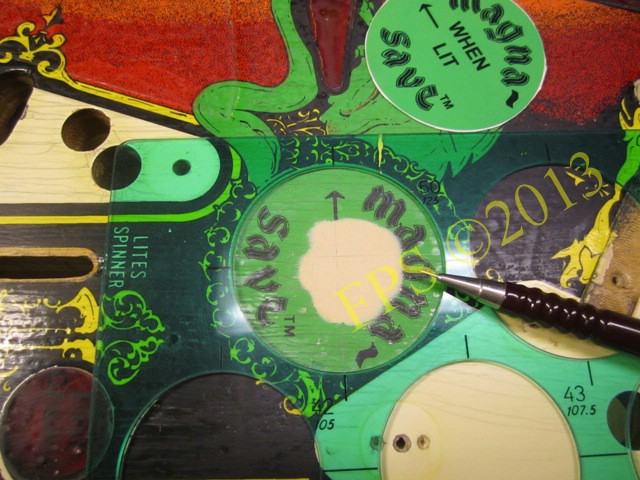
Draws a round help line with a lead pencil to help place the decal.
By putting a small black mark on the decal, I can get the decal in right position on the playfield.
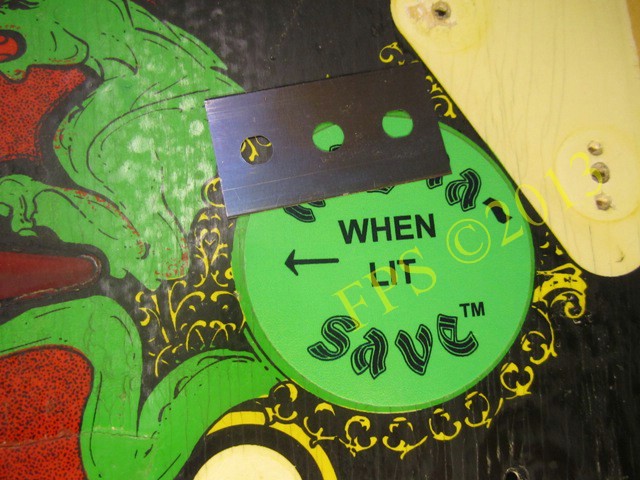
With help of a razor blade scrape gently away the black mark on the decal.


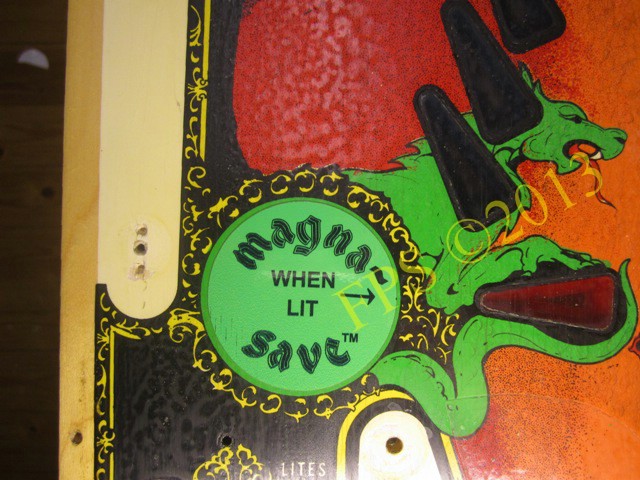
Also left MAGNA-SAVE decal in place.
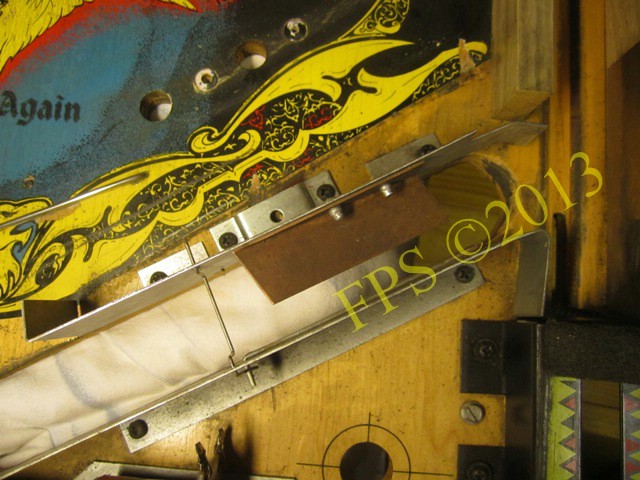
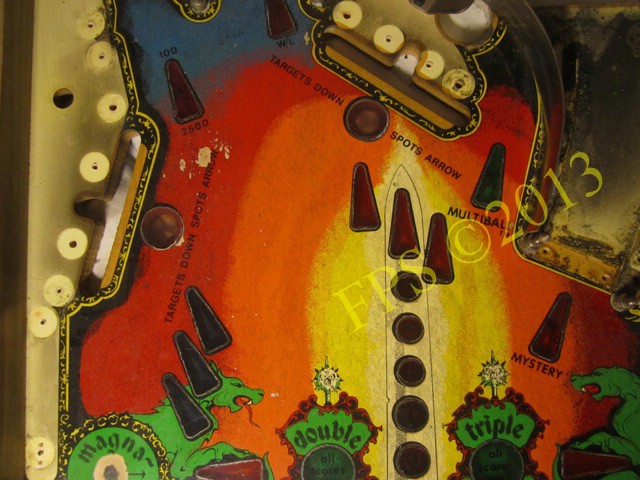
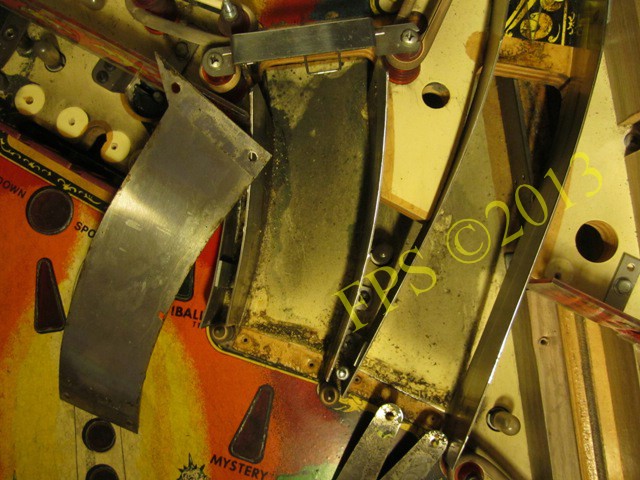
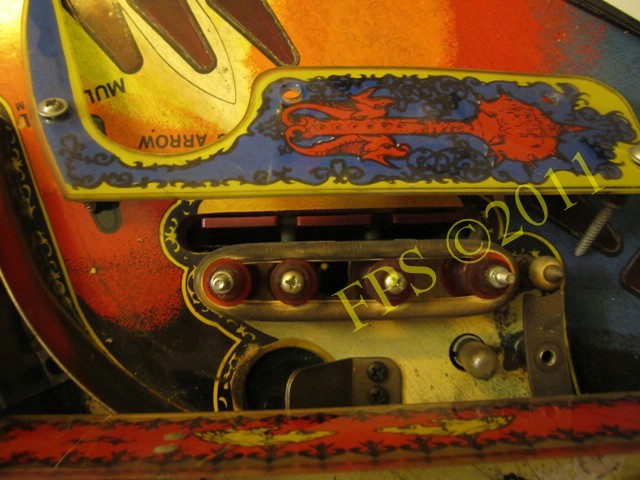
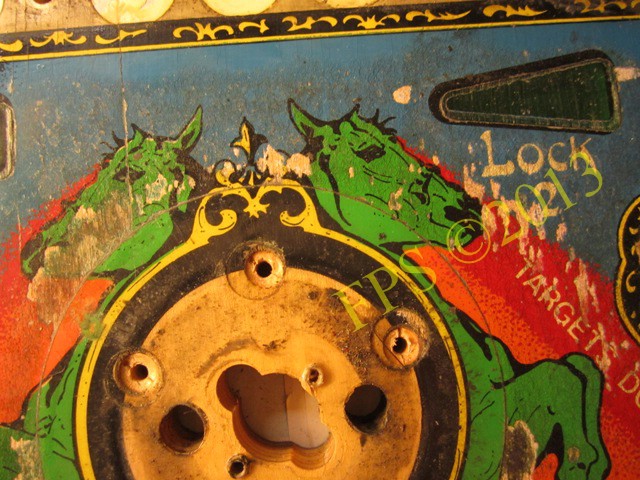
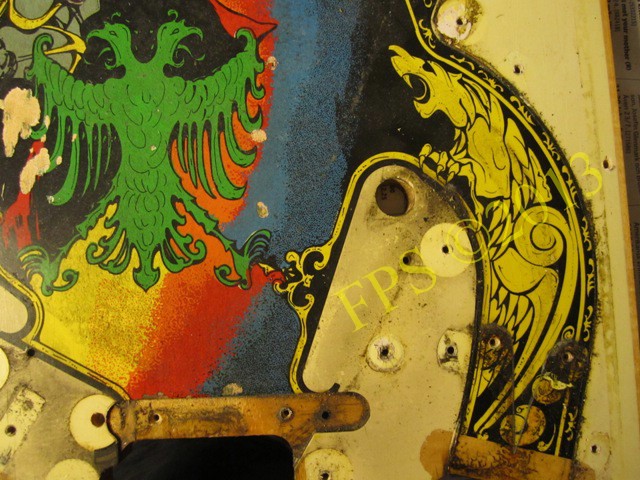
UPPER PLAYFIELD

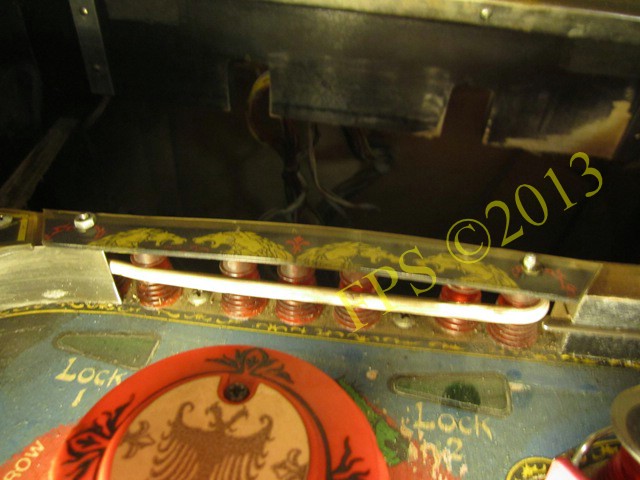
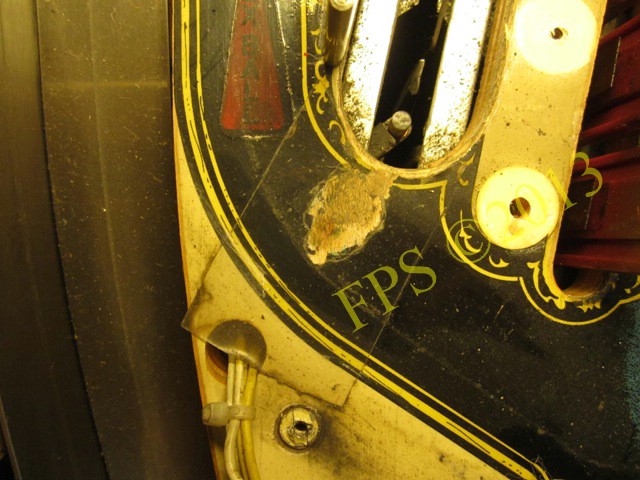
The playfield plastic above the upper playfield drop target bank was poorly repaired with glue and tape, ugly, (ugh MacGyver!!!)
This playfield plastic is beyond rescue!

Underneath the ramps have a lot of dirt been accumulated through the years.

Wear in the playfield in front of the scoop on the upper playfield.
A lot of small damages in the playfield with heavy wear around the pop bumper.
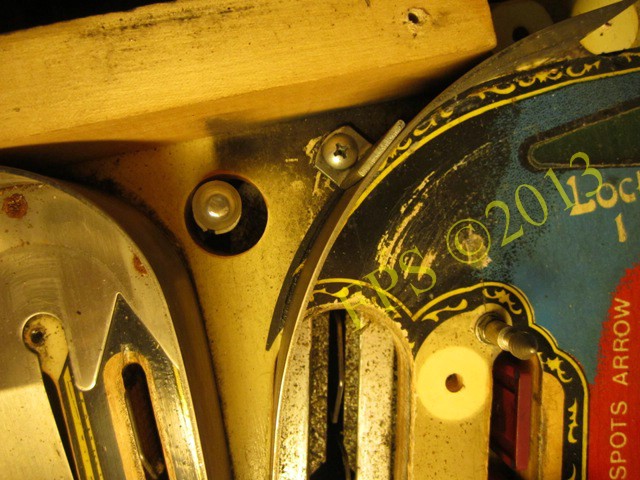
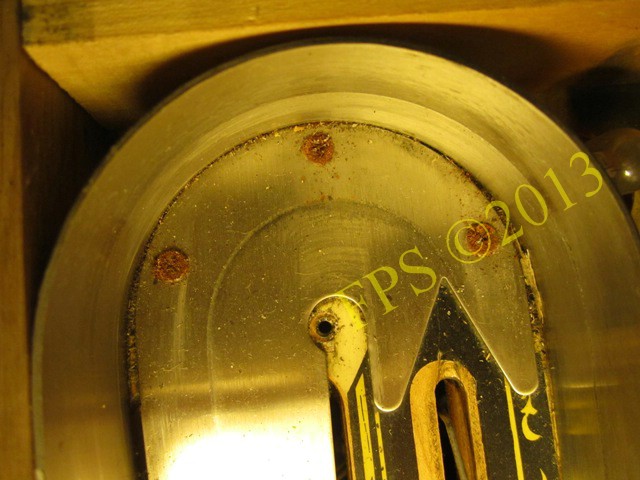

Rusty screws indicates that the Williams Black Knight pinball machine has been stored in a humid environment for a long time.
A piece of mylar are set above an existing damage in the playfield where the balls release during multiball.

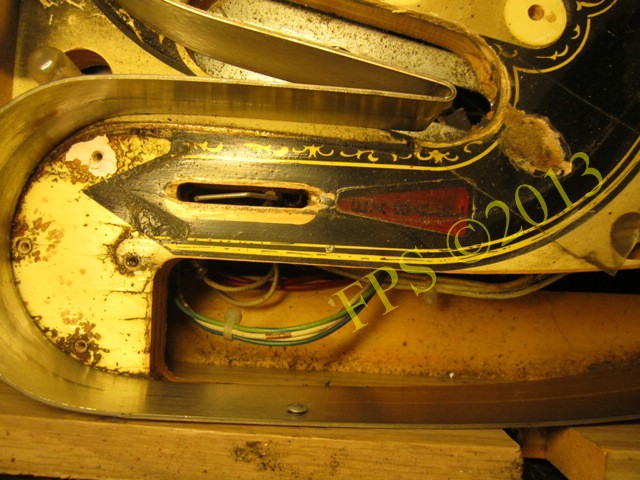

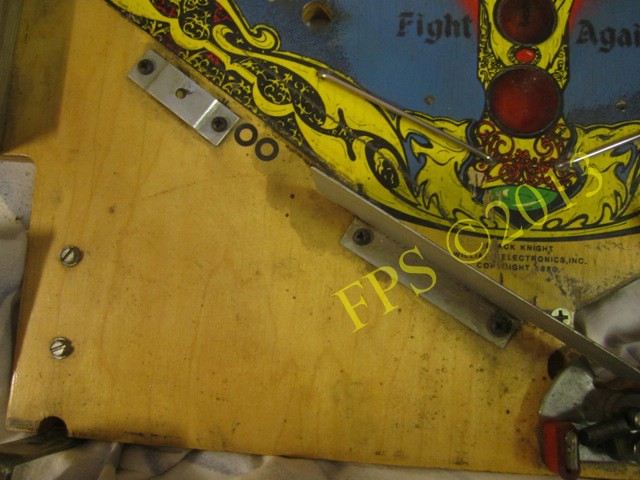
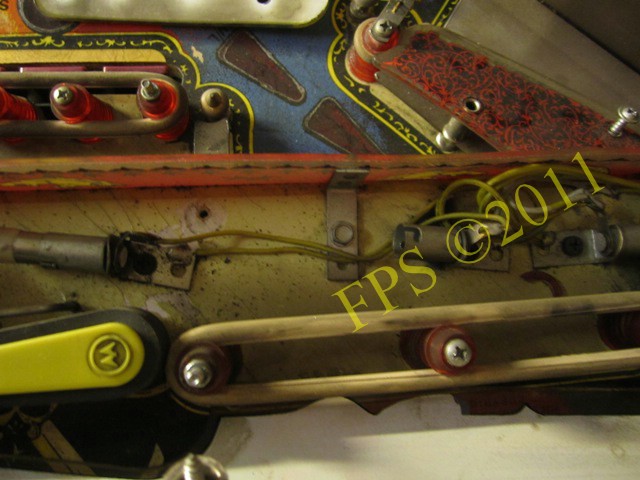
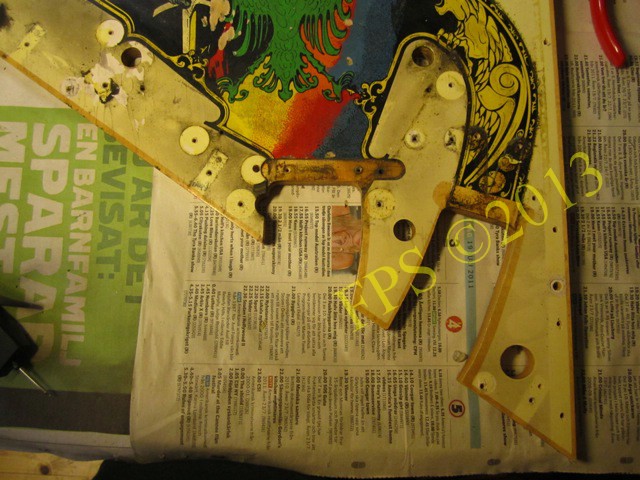
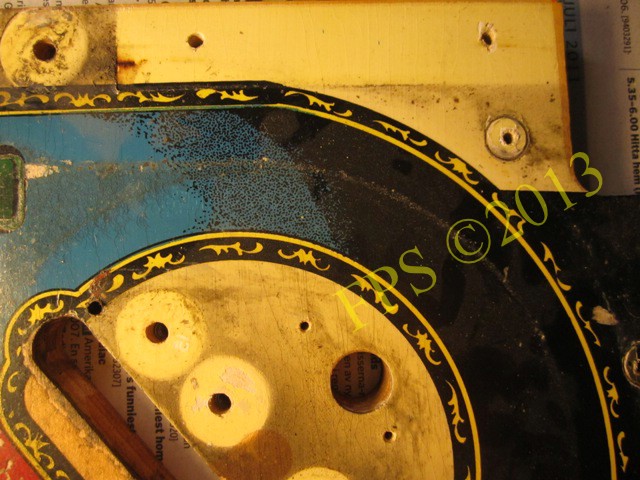
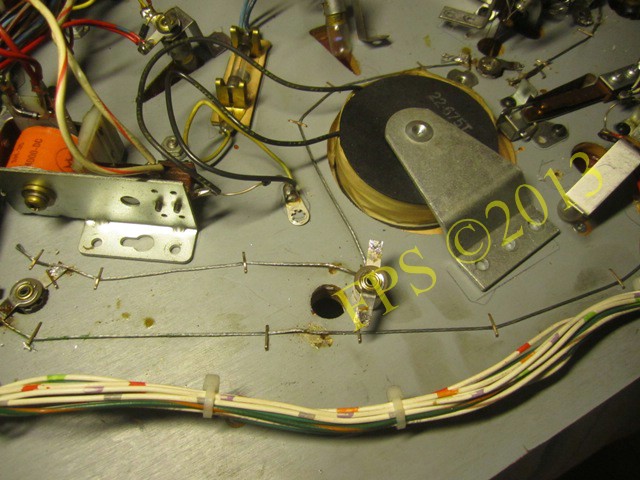
UNDERNEATH PLAYFIELD
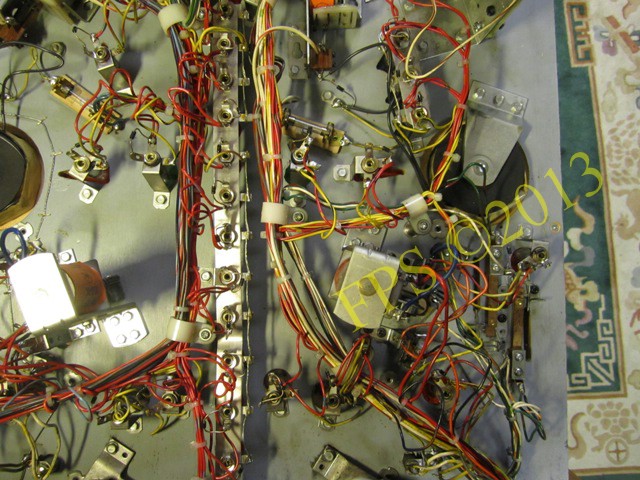

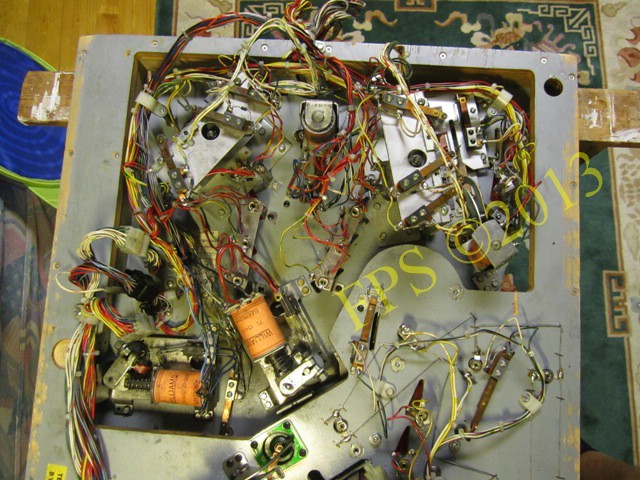


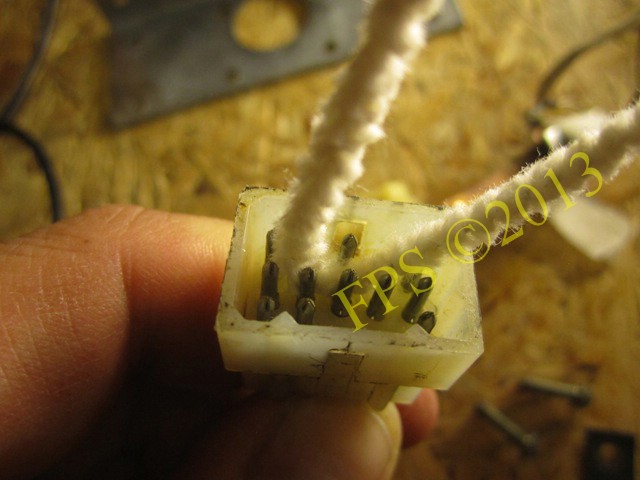
Contacts between the cabinet and the playfield was filled with lubricant, not good!

To remove all lubricant (oil) in the contacts I use electronics cleaning and blow clean with compressed air.
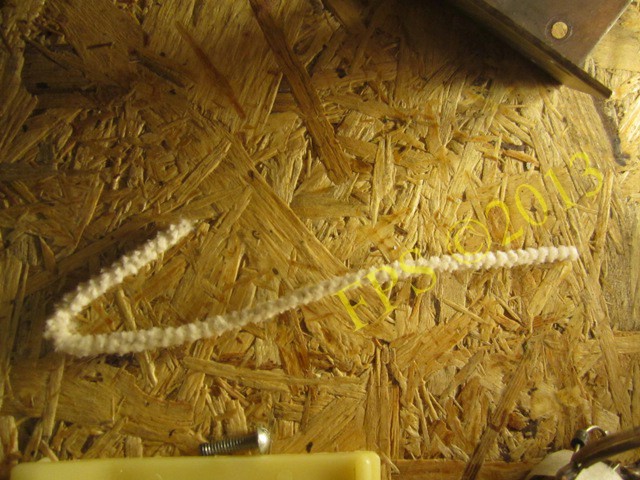
A bent pipe cleaners work well to clean between the connector pins.
Principle picture.
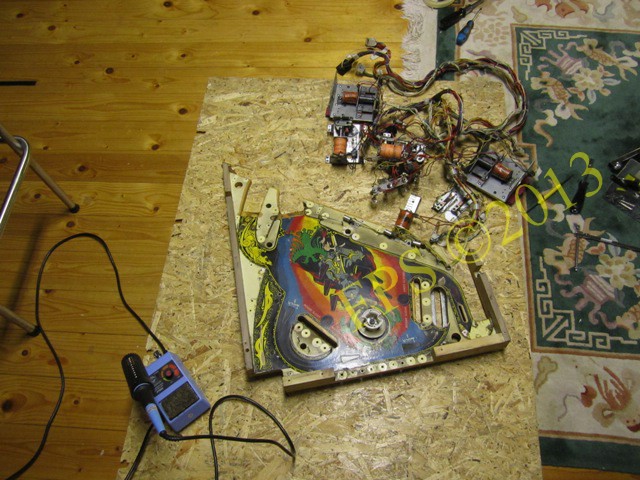
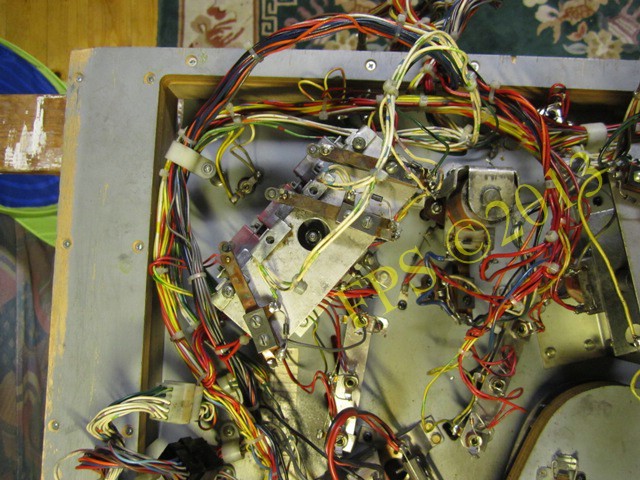
The whole wiring harness removed from the upper playfield.
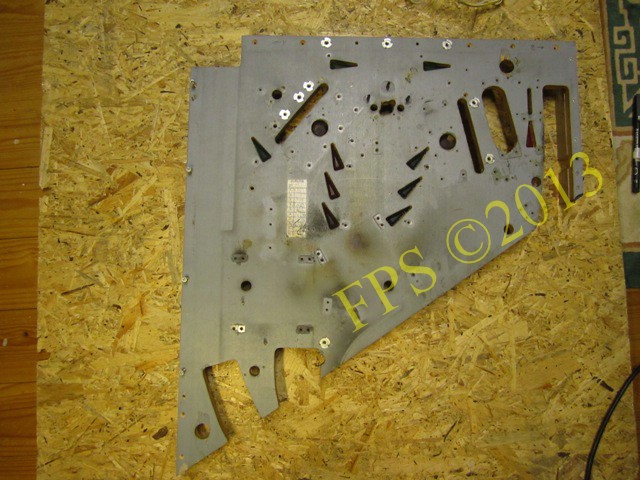
Bare bone upper playfield - under side.
Bare bone upper playfeild - upper side.
UPPER PLAYFIELD WEAR


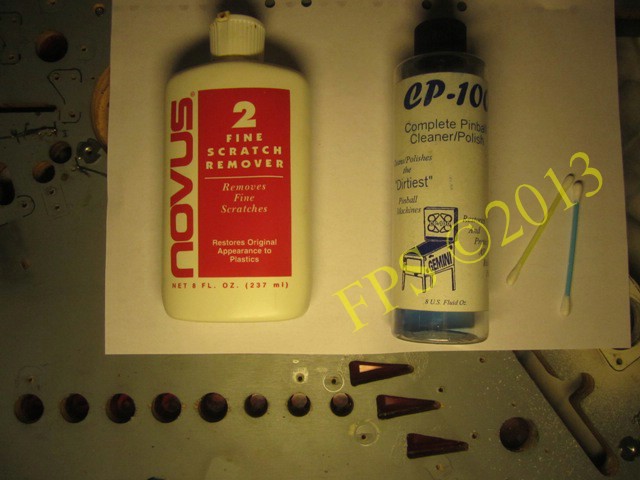
CLEANING PLAYFIELD - ESSENCE OF REFURBSHING
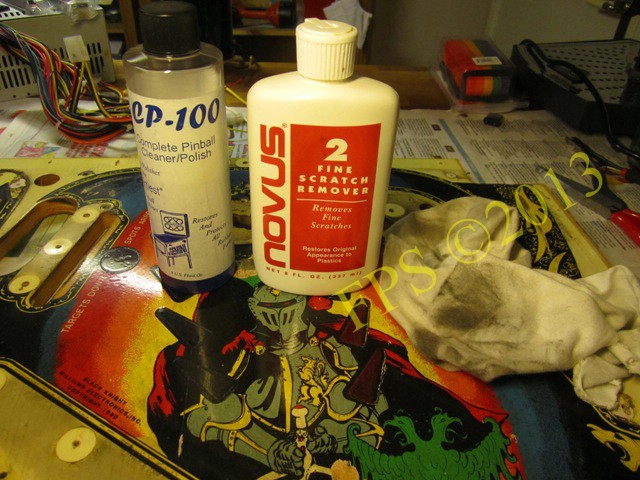
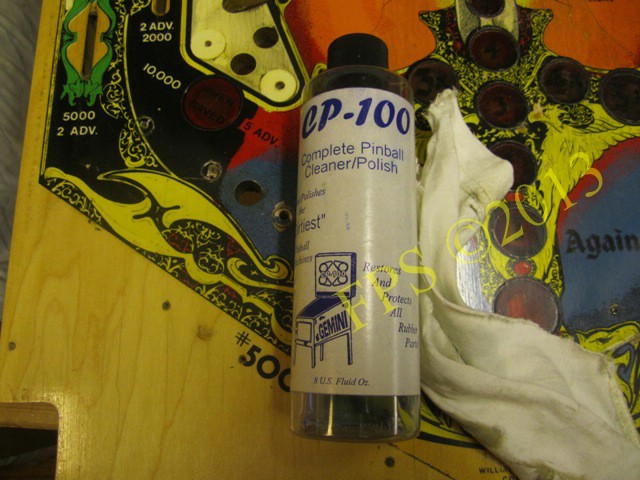
To clean the playfield used CP-100 and Novus 2. CP-100 removes the superficial dirt and adds luster to the playfield, works as well on rubber rings, Novus 2 removes dirt adhering harder and a little deeper in the playfield.

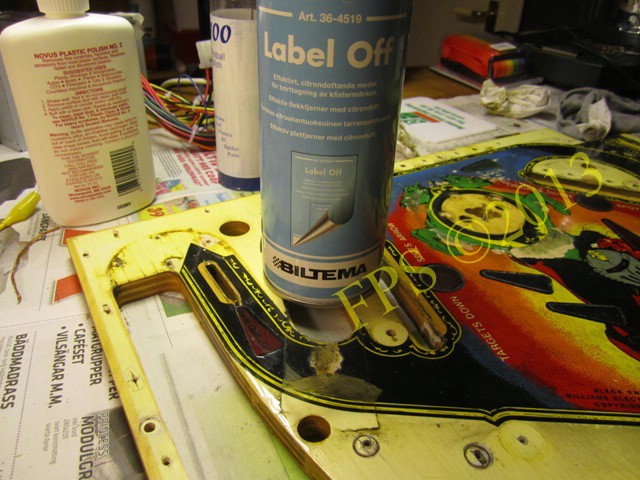
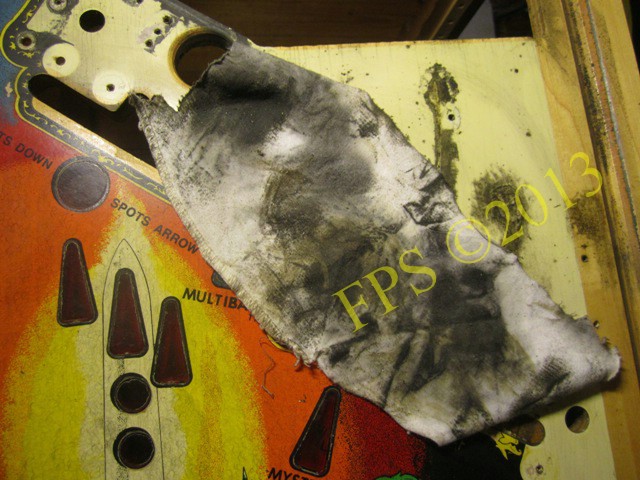
I use Label Off to remove the mylar from the playfield, is completely harmless to the playfield and will not dissolve varnish or paint on the playfield. Very effective for loosening the mylar, spray thoroughly with Label Off and drag slowly in small steps away mylar. Label Off is highly recommended.

Half part of mylar has come off from Williams Black Knight playfield.
TIME FOR REFURBISHING

ALWAYS CHECK FOR...
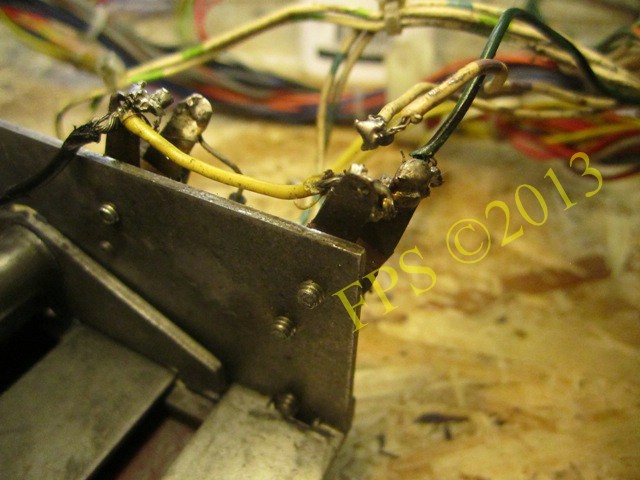
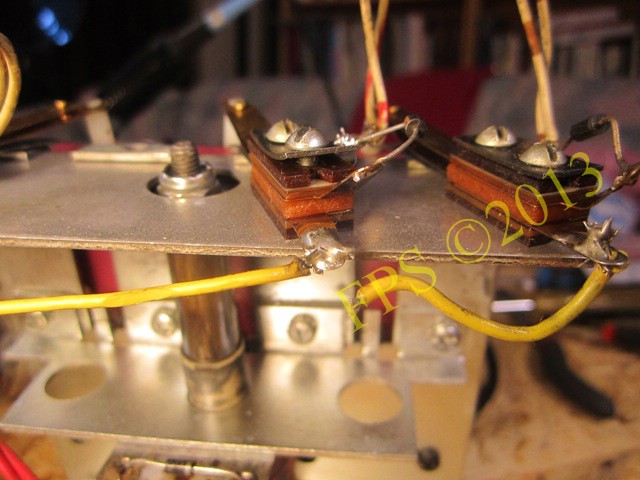
Always look carefully for solder joints that has been released or are about to devote, sometimes has the end of the wire a few strands left in the solder joint and can come off at any time. Here we see a wire that has released in the solder to the drop target bank, probably due to vibrations when drop targets moving up and down.
Another example, wire that has released from solder joint on one of the flippers (coil) on Williams Black Knight.
Another example - loose wire.
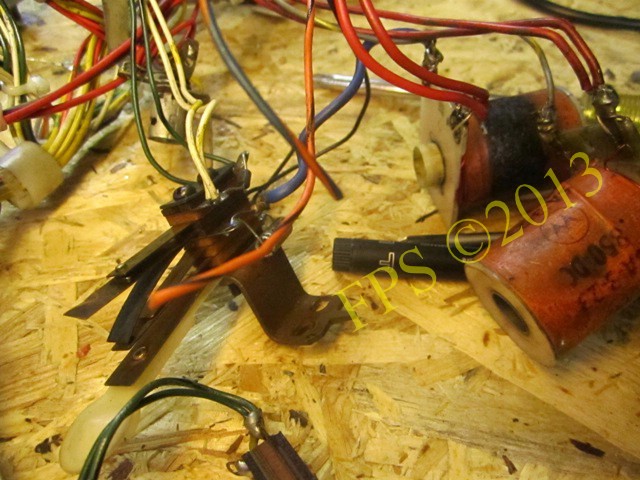
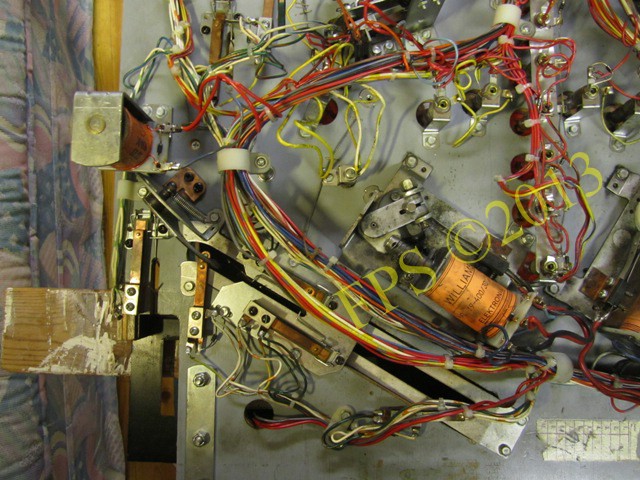
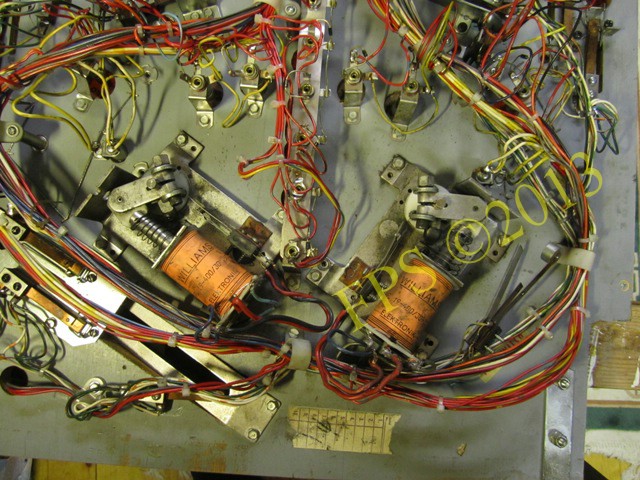
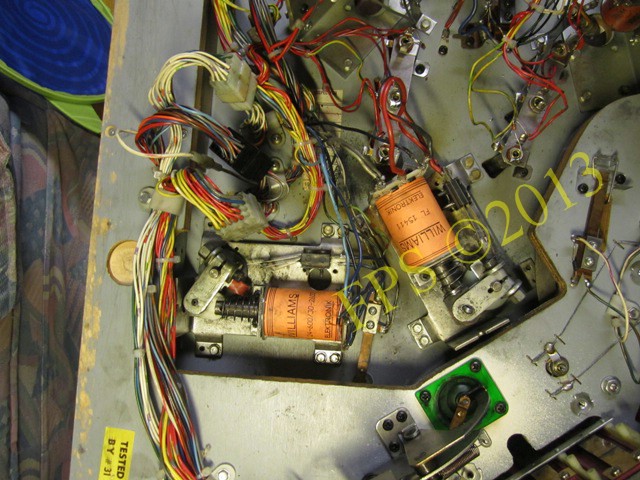
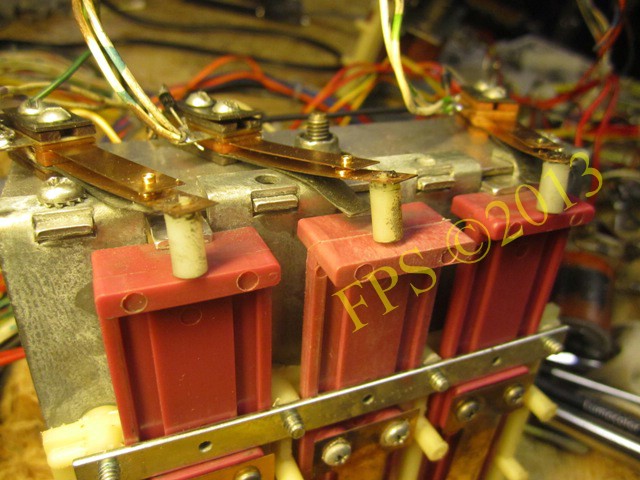
Check coils (solenoid) visually, if they appear to be burnt, measure the resistance or replace, if the measurement gives an Ohm value lower than 2.5 is coil "death". A resistance of 2.5 ohms or greater should be seen. Also, look for loose wires which often have been cut to prevent transistors to "shoot" on the driver board, often a simple "MacGyver" fix to avoid the problem.
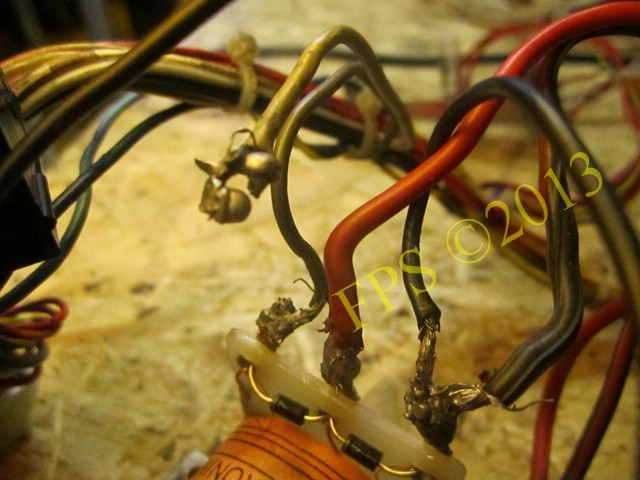
A coil diode having "exploded" on Williams Black Knight. MacGyver cut the wires to be able to play a moment more on the pinball machine with a dead drop target bank, fun - not!!

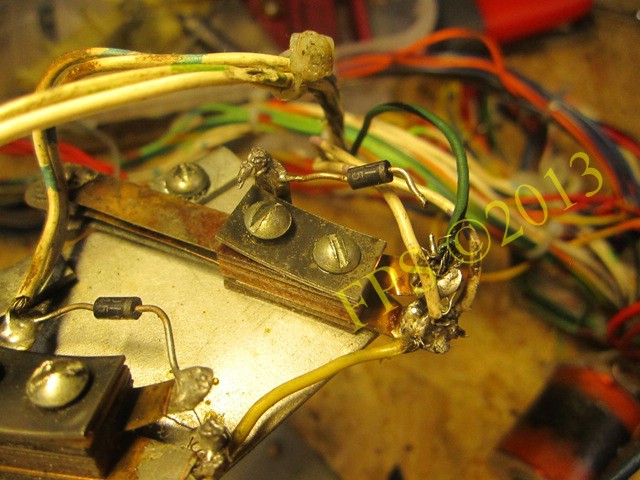
Examples of loose diodes on Williams Black Knight.
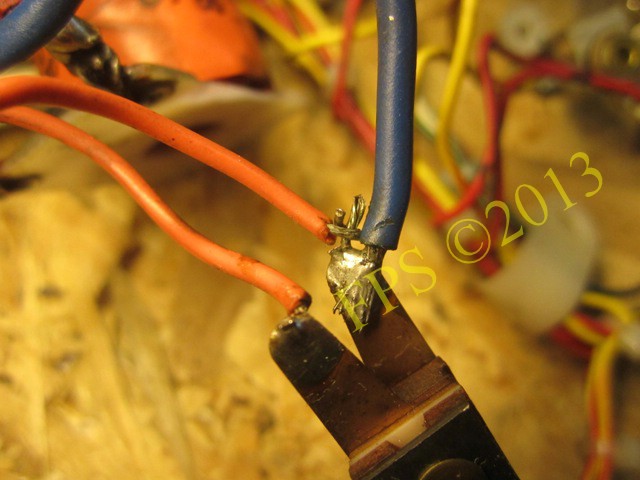
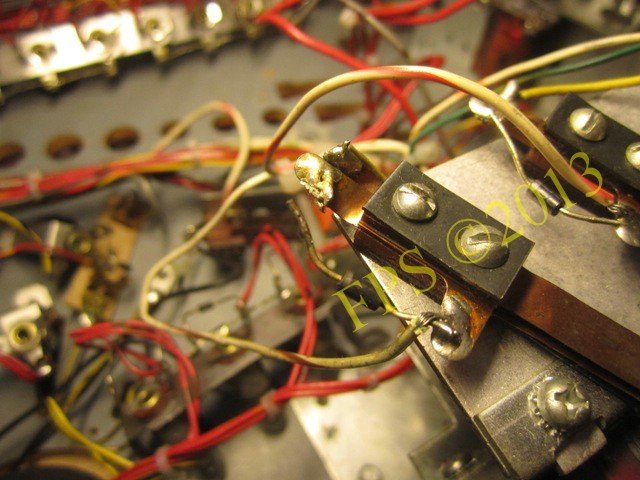
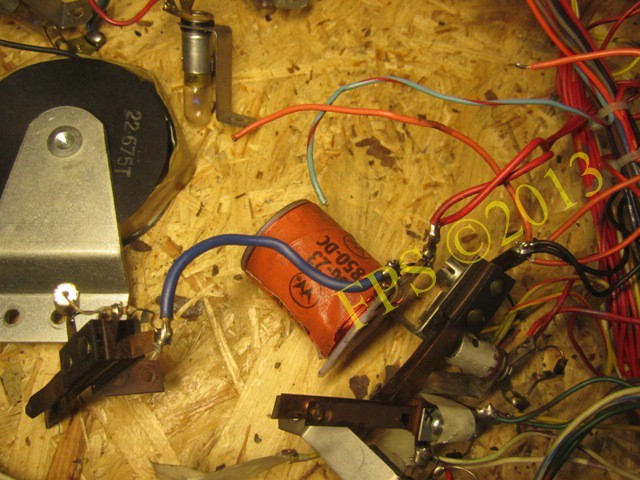
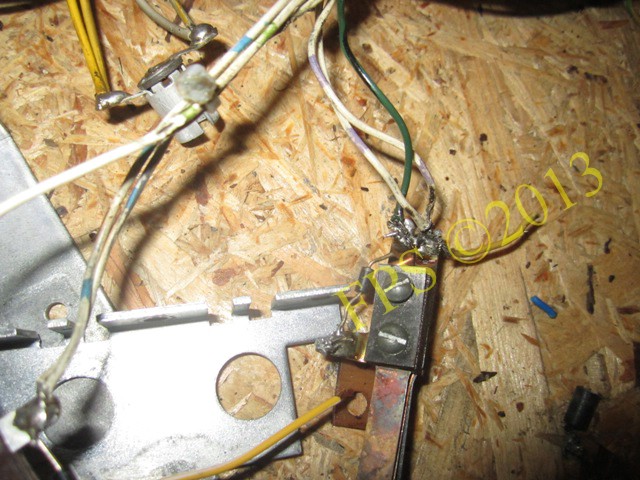
Another unpardonable MacGyver fix! The wire is wrapped to the switch solder lug without soldering, what was his thought here?
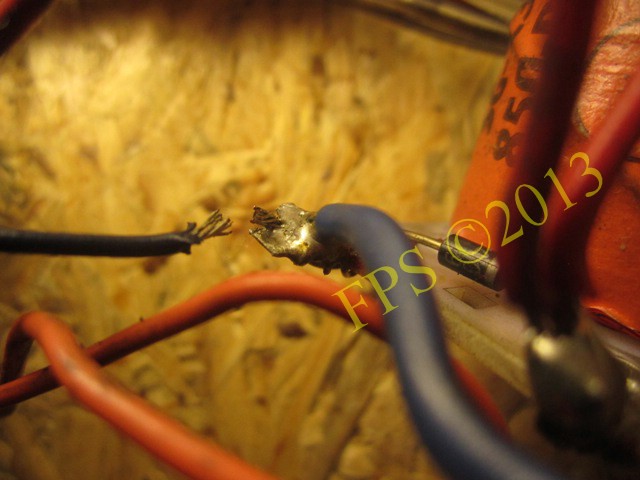
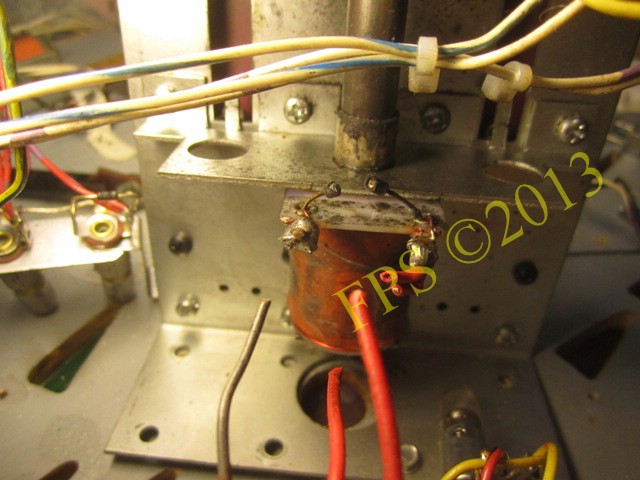
Solder pad has released from the coil when too much heat have been used when soldering.
Williams Black Knight was in very poor condition and I have never found so much loose wires and broken coil diodes on a pinball machine before.
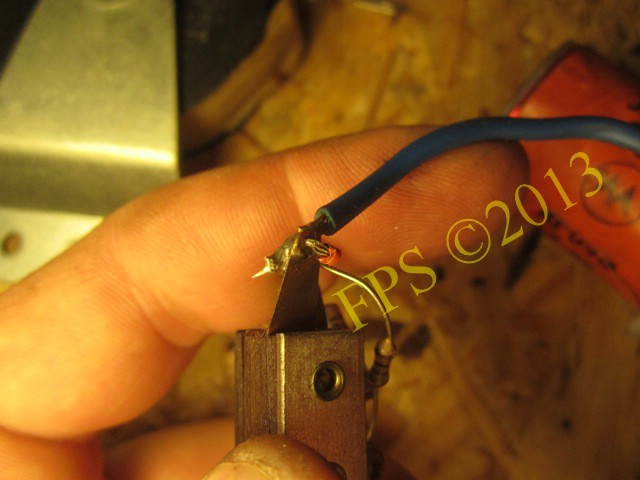
A clue about where the orange wire in the picture before shall be connected. We see only a stump of an orange wire on the switch solder lug. I verify that it will sit an orange wire on the switch lug by reading the wiring diagram in Williams Black Knight manual.
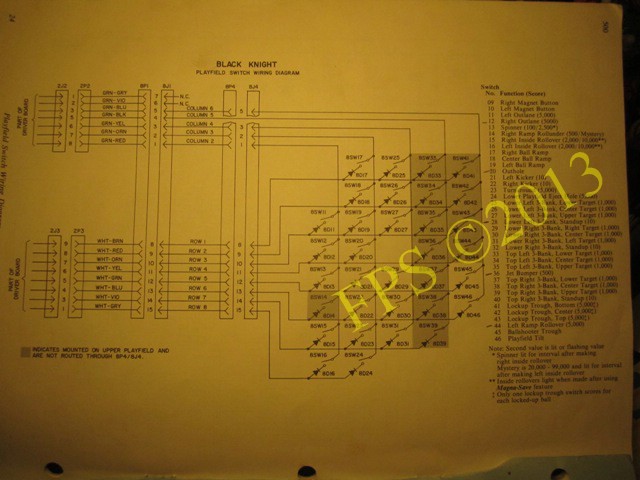
Williams Black Knight playfield switch wiring diagram.
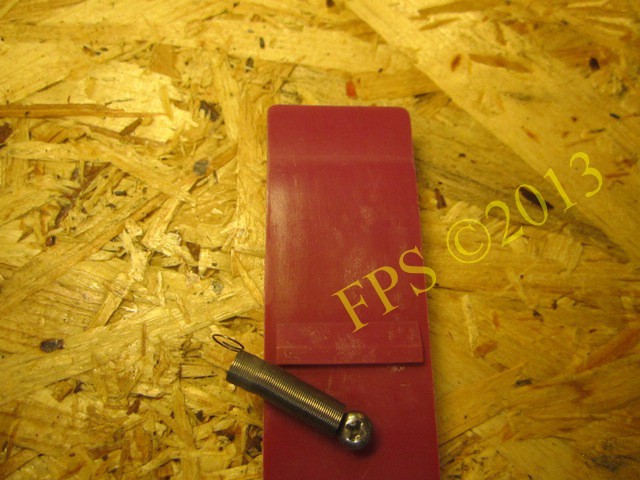
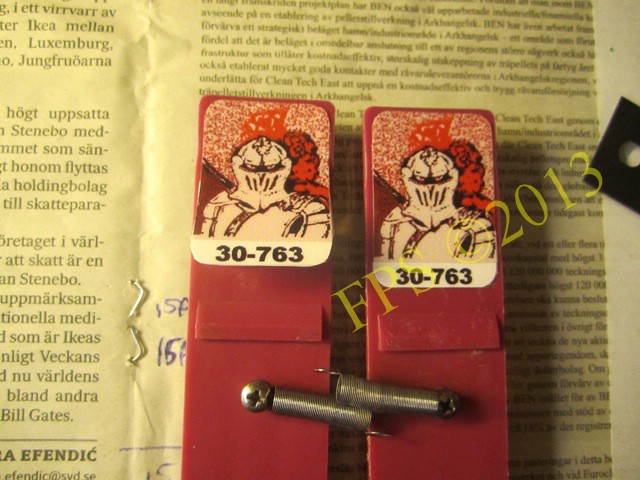
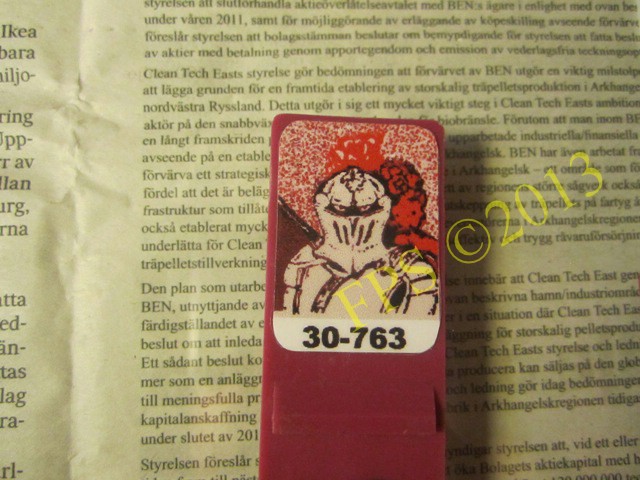
Offers another MacGyver solution, repair of flat T-shaped tensioner spring on Williams Black Knight drop target assembly.
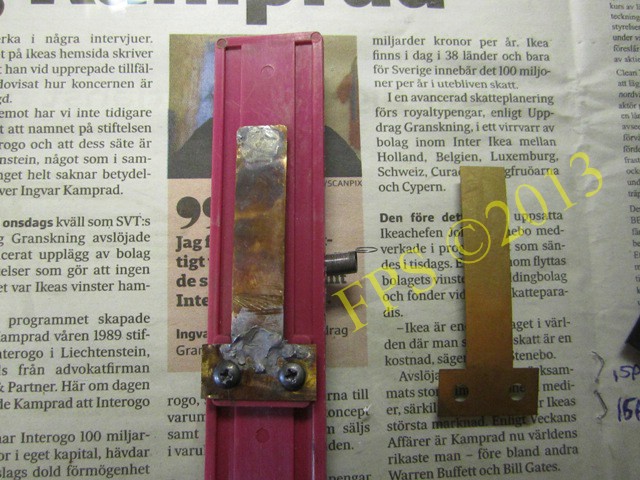
The spring is exchanged for a new one.
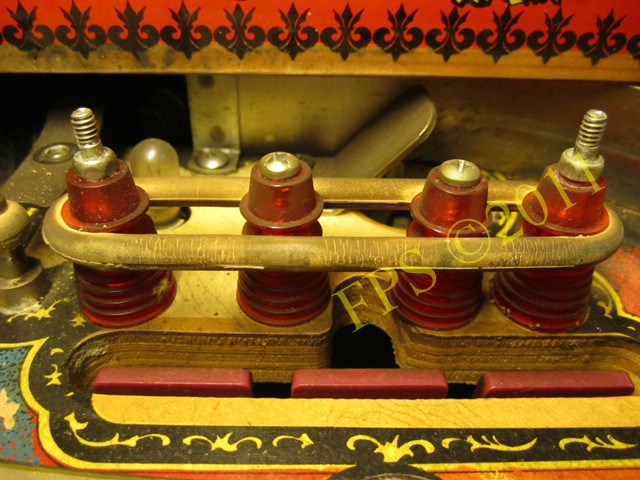
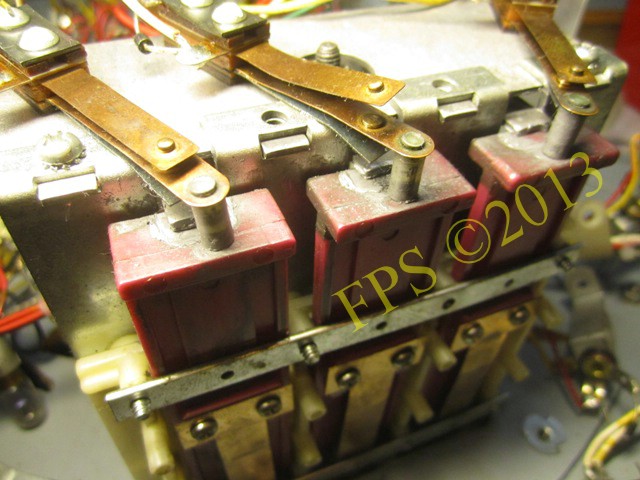
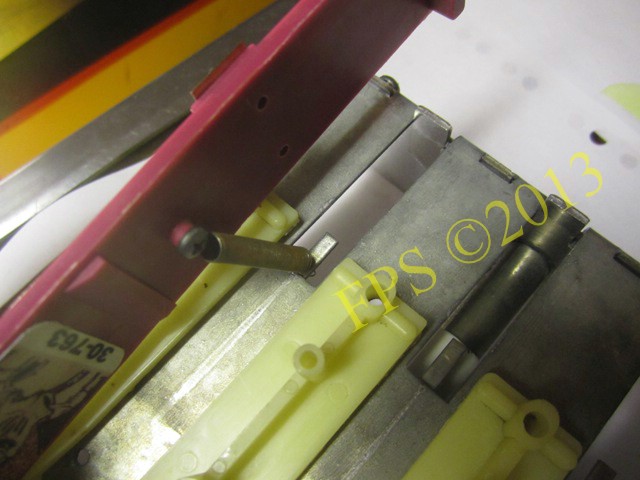
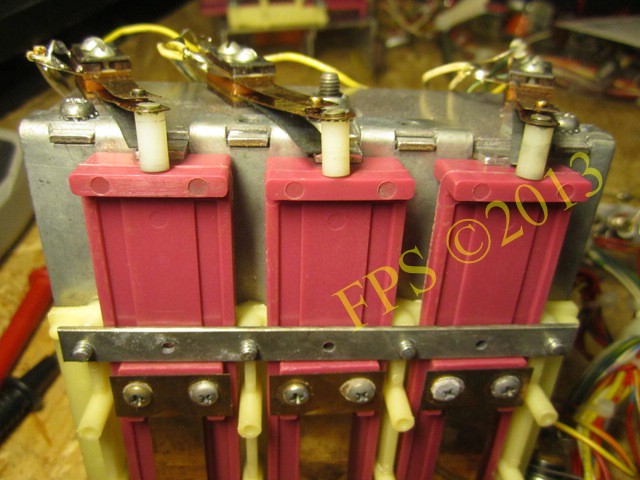
BAD SWITCHES

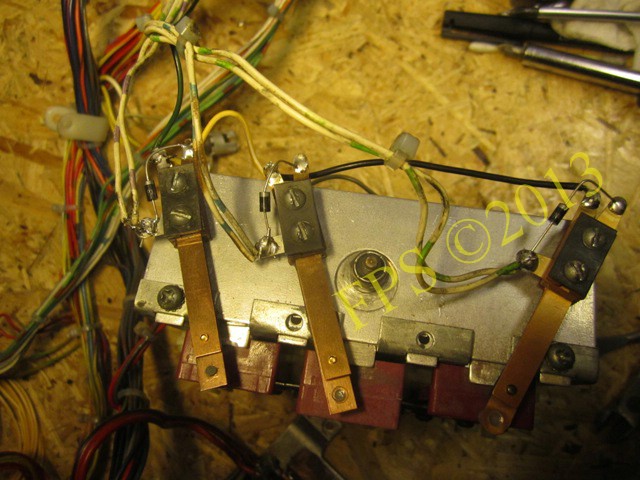
The lower leaf blade of the switches were bad on one of the 3-bank drop target assembly.

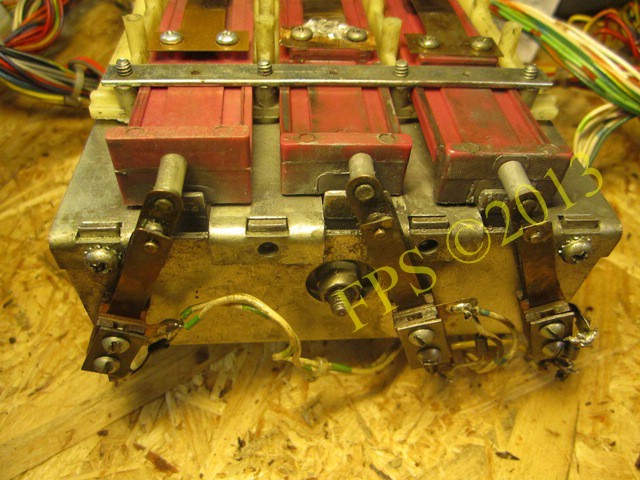
MacGyver tried to recreate the contact point on the leaf blade by heating on a ball of solder.
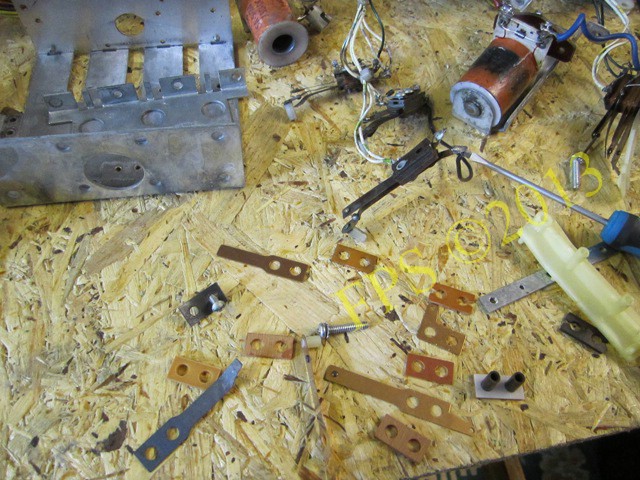
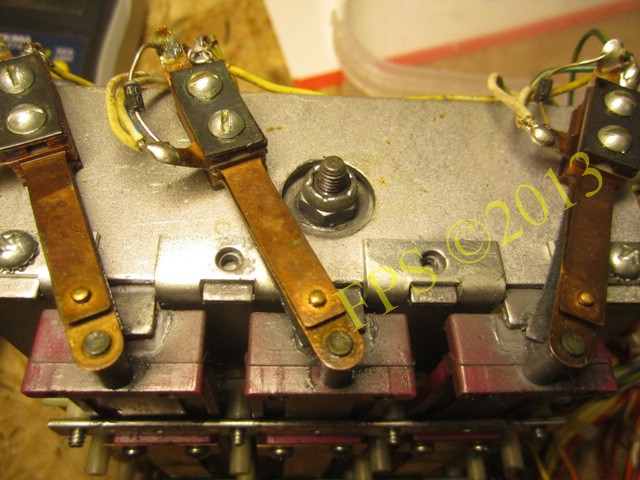
The bad switch leaf blades are replaced by picking apart the switches and build them back together.

One of three switches refurbished with new leaf blade.
The lower switch leaf blades replaced.

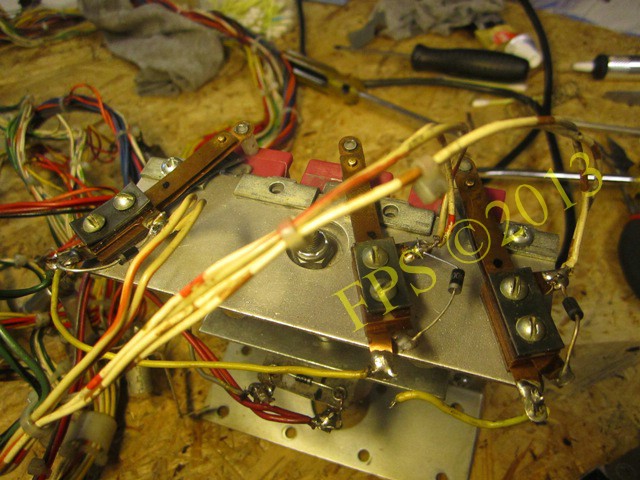
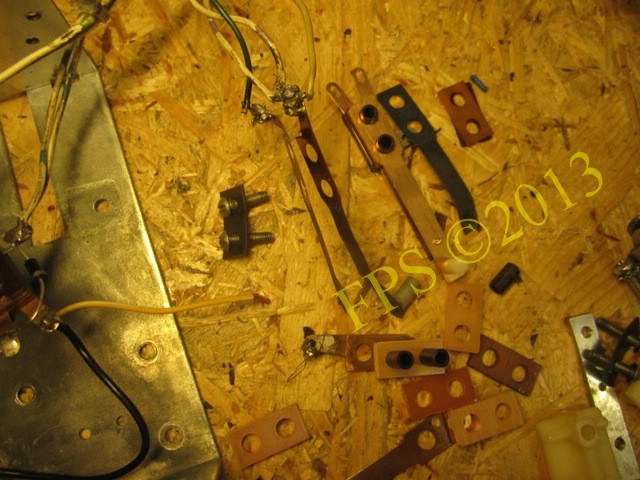
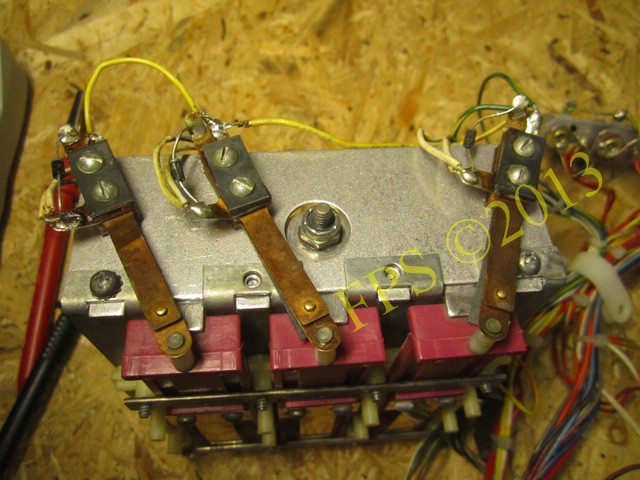
New wires are installed between the switches and diodes (1N4004) has been exchanged.
BAD, BAD COIL DIODE - A RISK!
I always change out all diodes (1N4004) on all solenoids (coils) to avoid any bad diode or will be bad in the future, no great cost besides work to solder. Coil diodes are exposed to a lot of vibration which can crack or damage them, and sometimes I have been able to crush a diode by grabbing it´s body with mine forefinger and thumb. A bad coil diode usually results in one or more "killed" tranistorer on driver board. The coil diode prevents a coil´s collapsing voltage from flowing back to the associated driver transistor, which could damage the driver transistor.

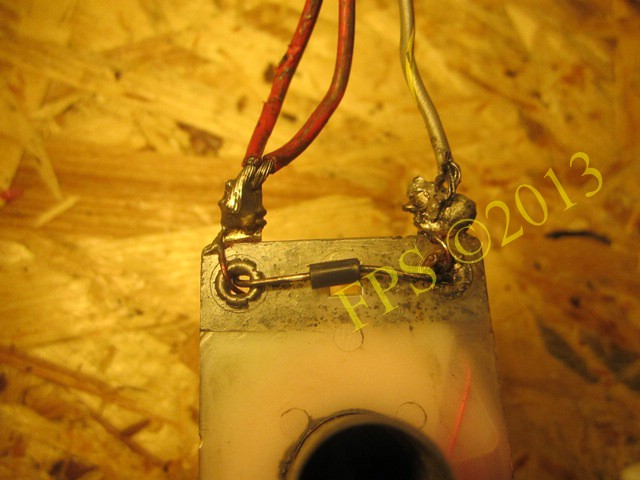
Mark with a black line in which direction the diode's band should fit as you avoid the mistake of turning the diode in wrong direction. The banded lead of the 1N4004 diode shall be connected to the coil power lug, lug with red thicker daisy chanied power wire attached in the picture.
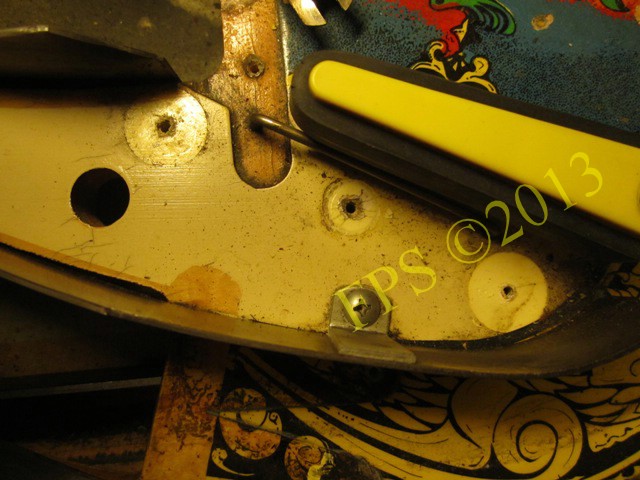
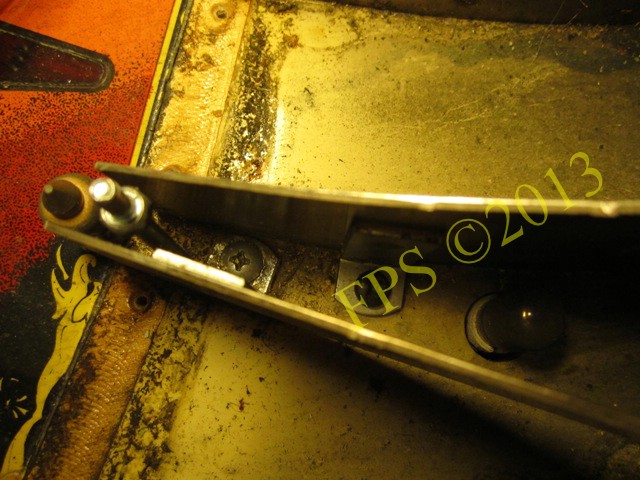
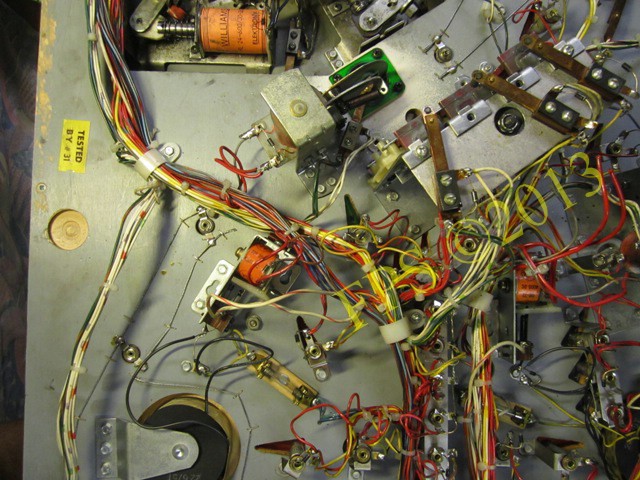
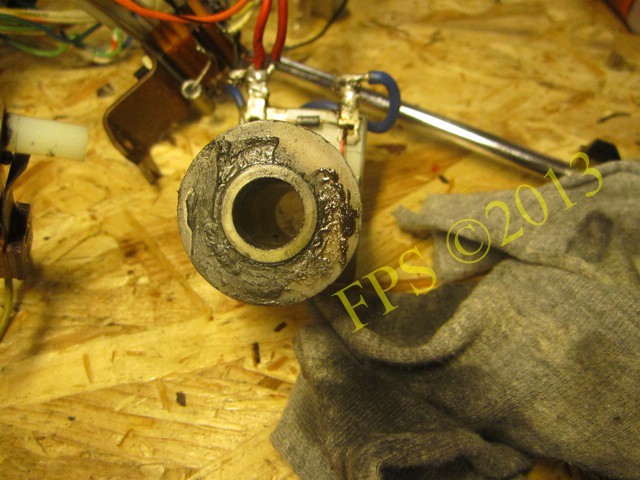
CAUTION - NEVER, EVER GREASE OR OIL A UNIT!


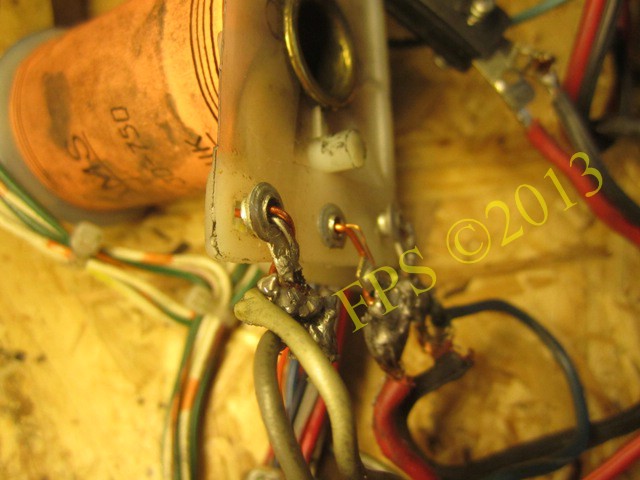
Has MacGyver used graphite grease here?!?

Want to issue a warning that you should never, under any circumstances, oil or grease a unit in a pinball machine, this can not be said too many times. A pinball machines units are made to move without grease, usually metal parts against plastic parts that needs no addition of lubricant.
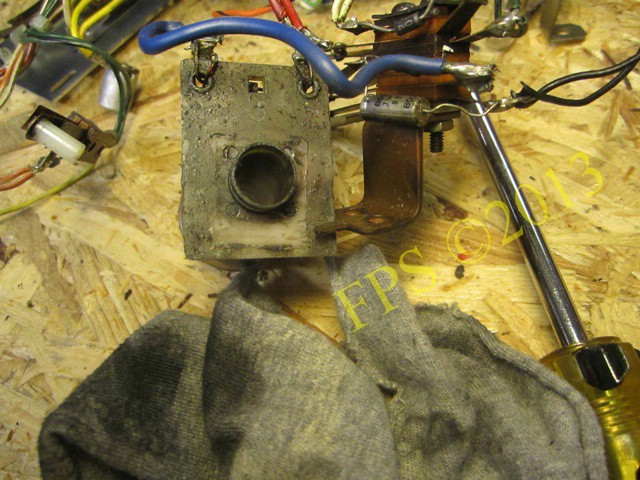
What do we said about graphite grease?
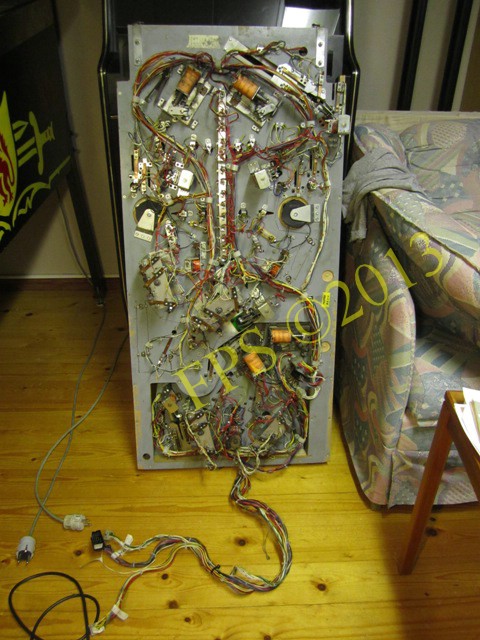
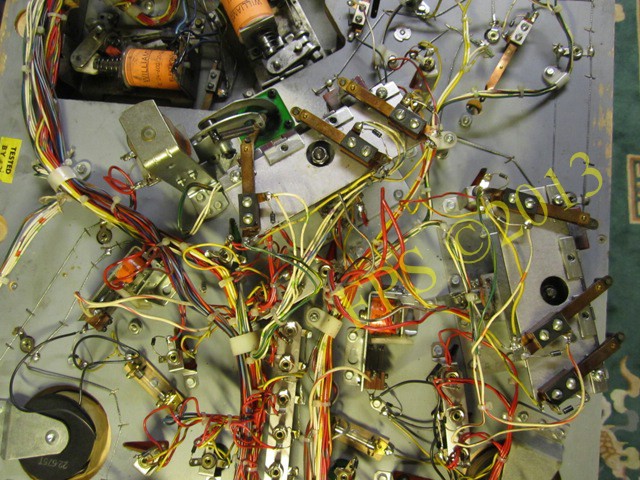
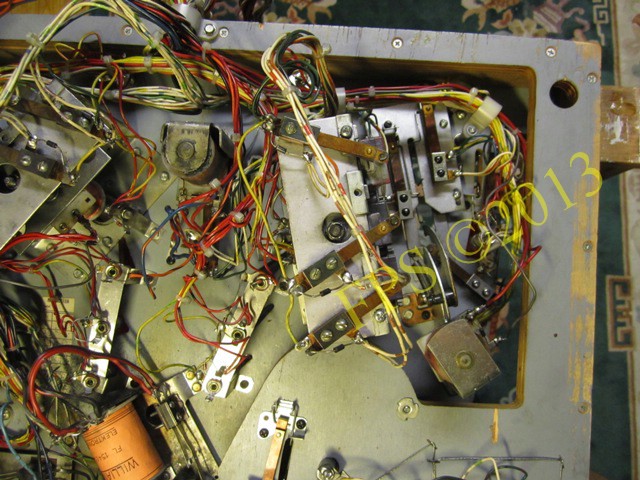
REMOVING WIRING HARNESS


A soldering iron is needed to remove the wire harness from the underside of the playfield, screwdrivers, nose plier and a camera to take a lot, lot of pictures for memory's sake.

The underside of the inserts (the transparent inlaid plastic windows in the playfield) are first cleaned with Novus 2 and then with the CP-100. A lot of dirt and soot is collected here! Williams Black Knight was the first pinball machine ever to employ faceted inserts in the playfield.

The whole wiring harness with all units removed from the underside of the playfield.

To remove the wire form from the board I use a spatula and a screwdriver. I gently push wire form upwards with a screwdriver. I push a little at a time out of each end of the wire form to get the wire form to loosen from the playfield.


The whole playfield is stripped from the parts and getting ready for paint touch-ups of surfaces with wear.
But first cleaning with Novus 2.
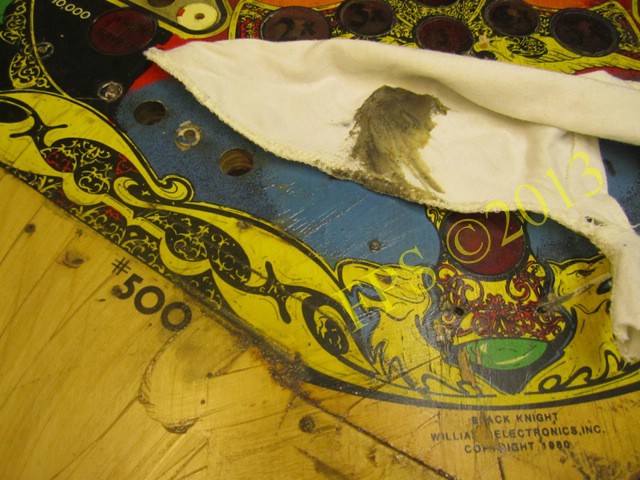
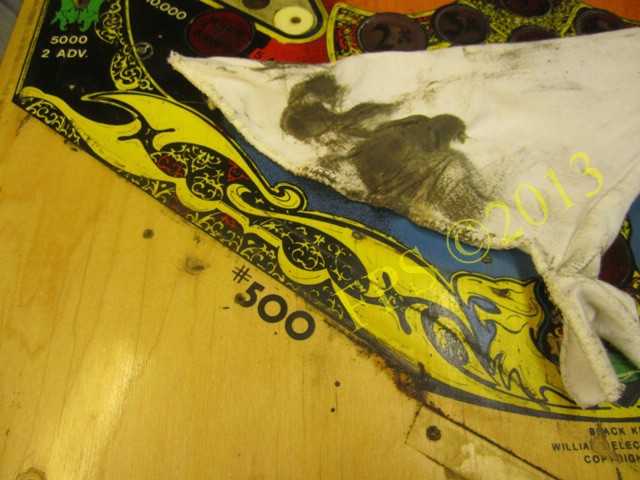
For heavily soiled areas, as the slingshots I use Novus 2 and a piece of a scotch brite pad.
Then I clean with CP-100.

Before I begin the painting of the playfield it will be sanded with sandpaper 240 grit. By sanding playfield´s surface all residues from polish, wax, silicone will be removed so that the varnish (clear coate) will adhere.
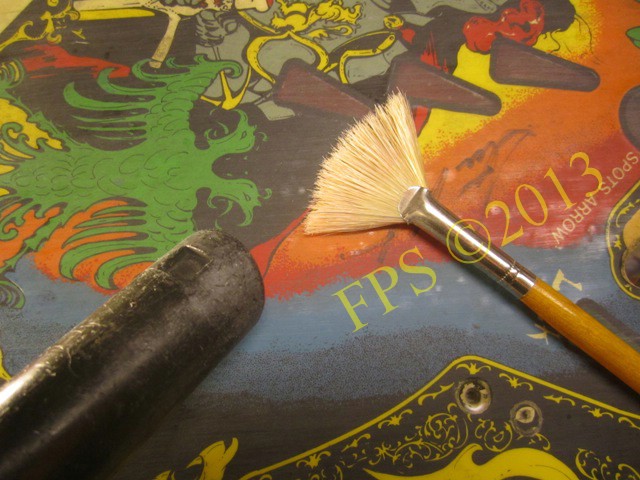
Use a vacuum cleaner and a broad brush to capture all dust from sanding , finally wipe the playfield with a damp cloth.
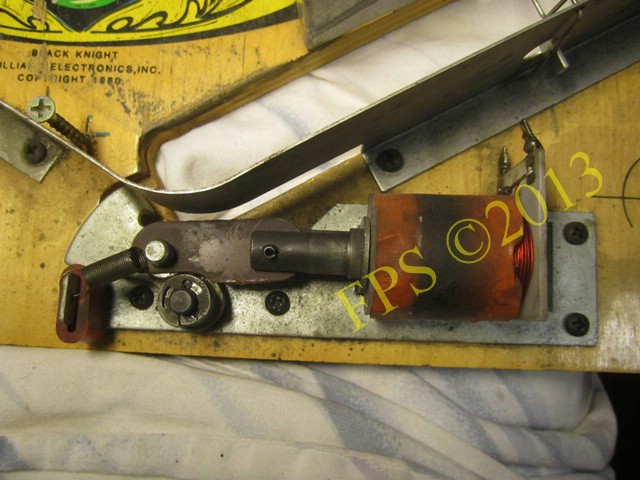
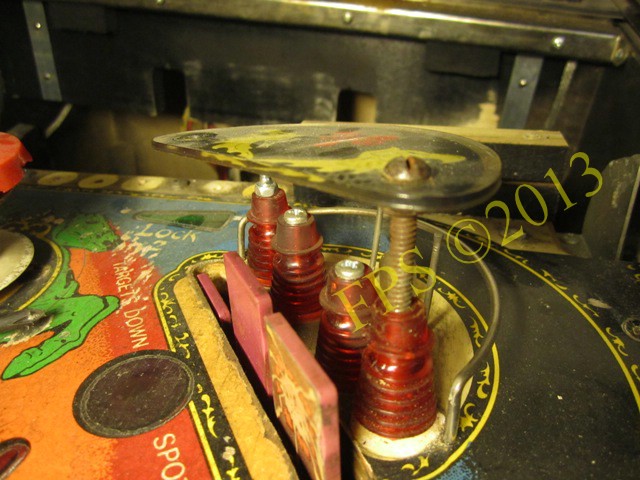
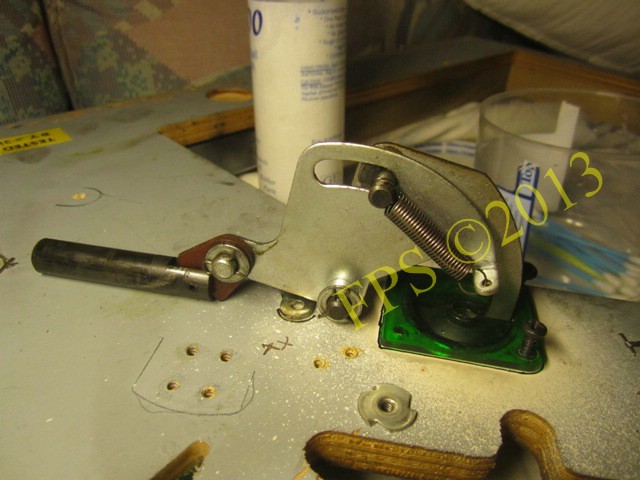
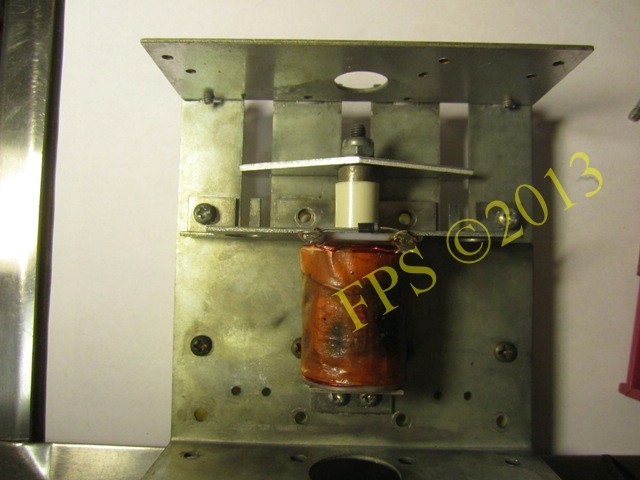
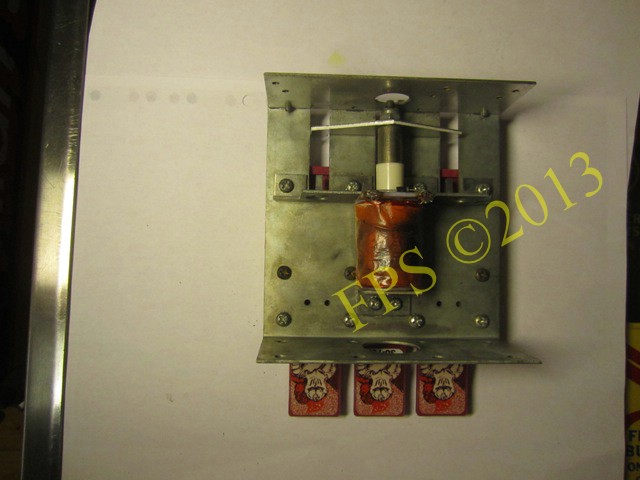
RE-ASSEMBY BALL EJECT UNIT
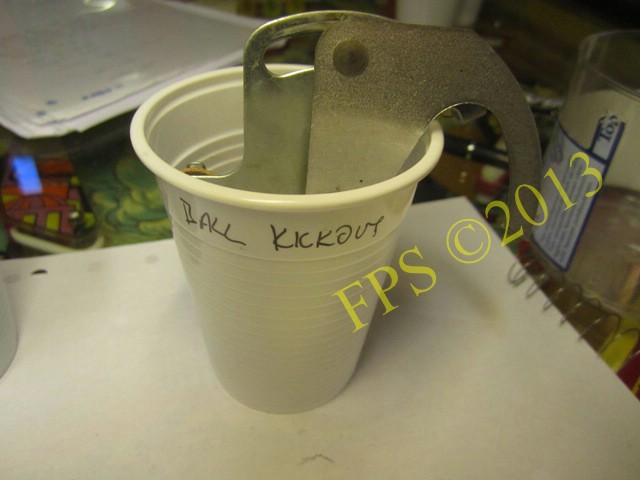
Once the units have been removed from the playfield, I keep them in labeled plastic cups.
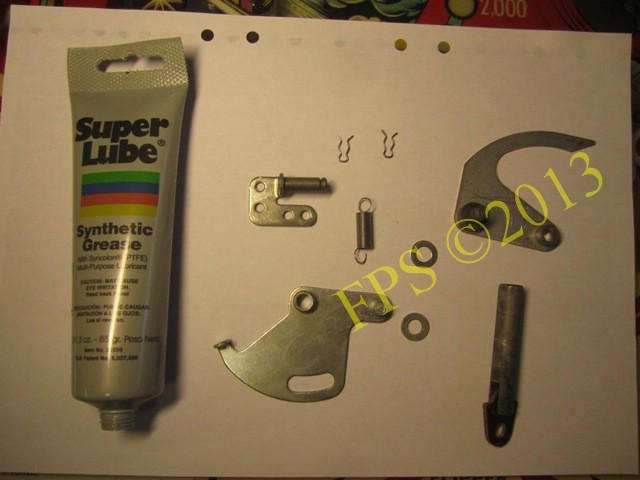
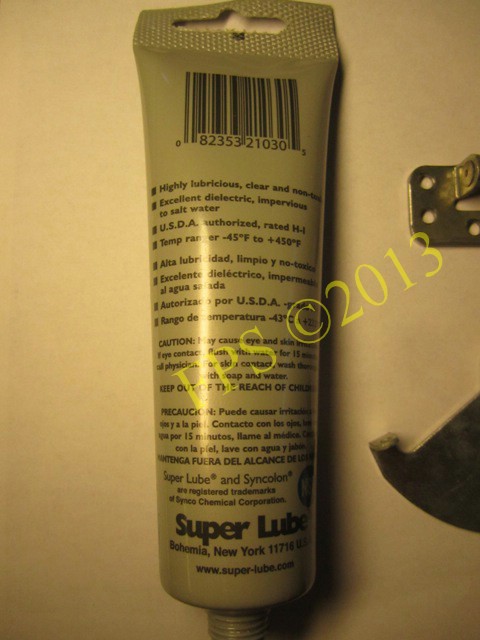
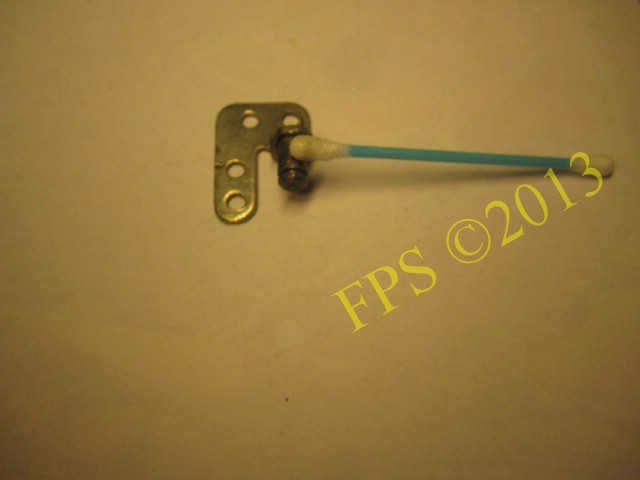
Super Lube is used to VERY FRUGALLY lubricate moving parts, metal to metal details.
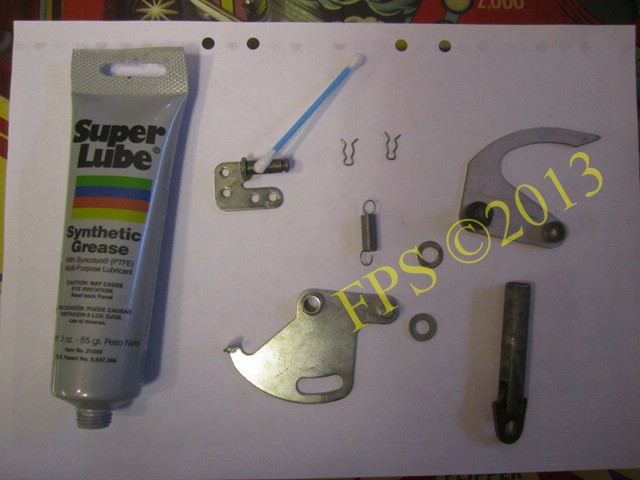
A Q-tip is used to apply Super Lube on the mounting bracket axle.
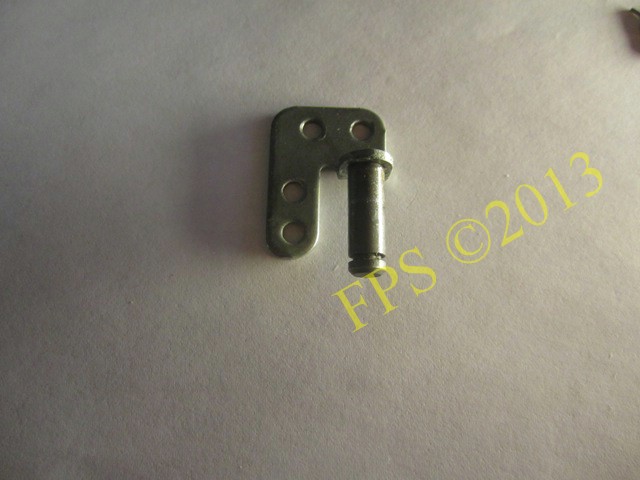
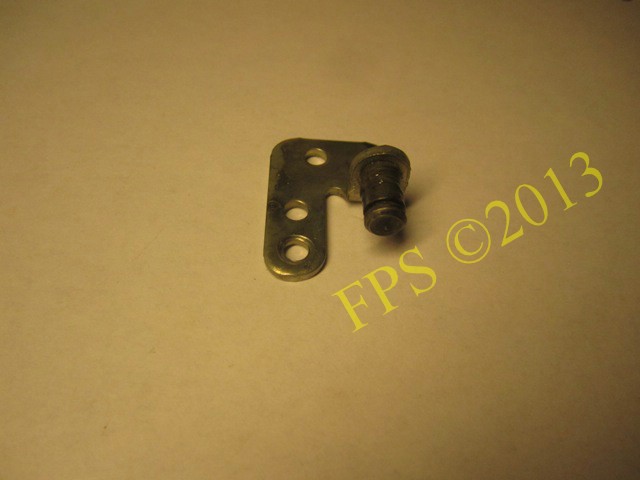
Mounting bracket assembly.
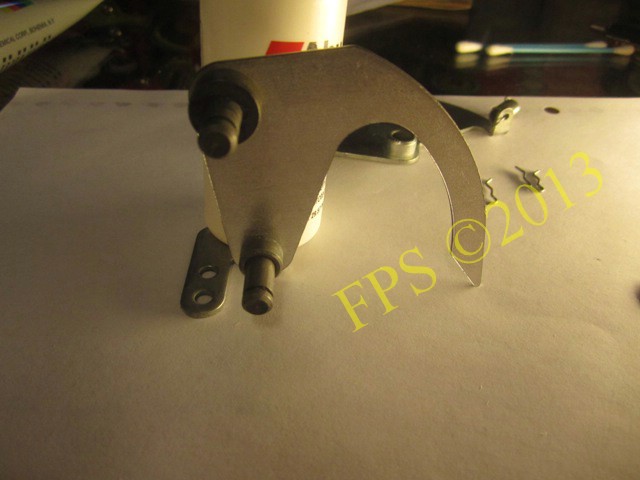
Install eject cam on the shaft.
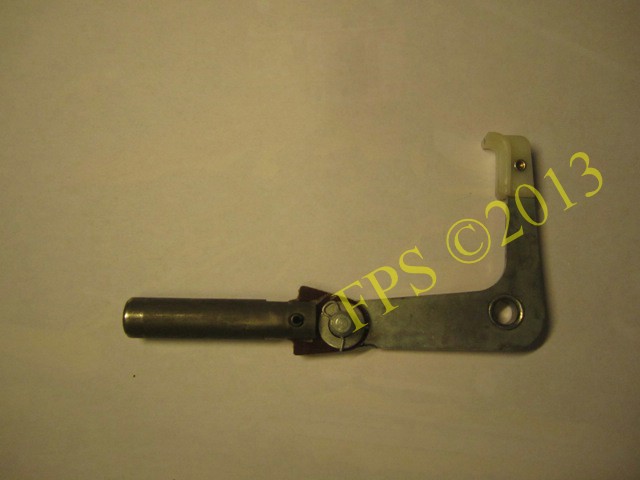
Attach the plunger and spring on spring plate assembly.
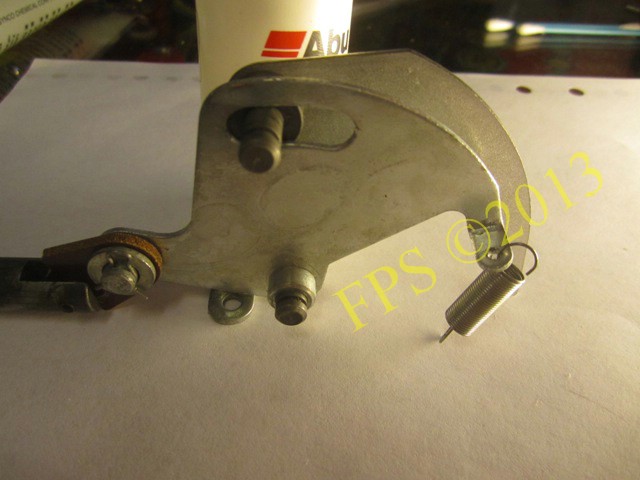
Finally fit the spring plate assembly to eject cam and lock with a harelkin pin and tension the spring.

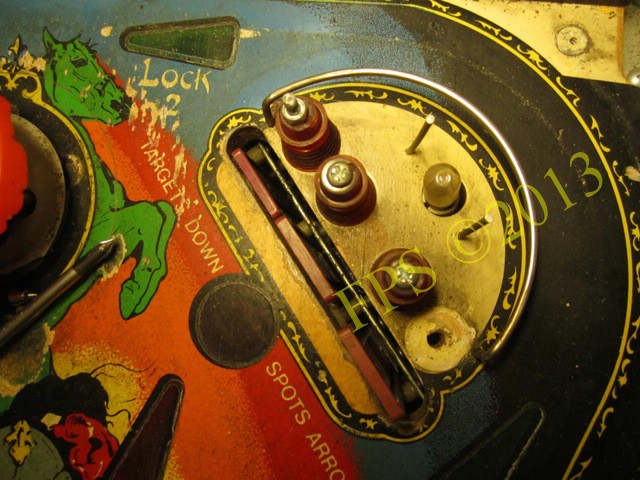
Eject hole base cleaned with CP-100.
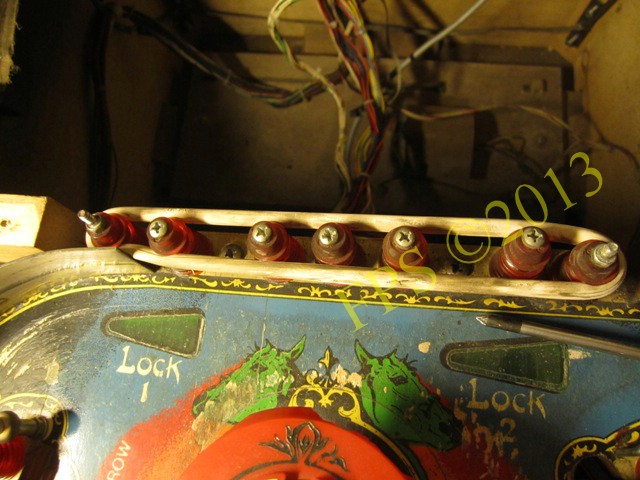
ROLL OVER WIRE ASSEMBLY
Wire forms for rollover switch on the lanes were heavily oxidized and had some rust. To remove all the oxidation, I used wet grinding paper P1000 grit and then Autosol to get them shiny again. First it was cleaned in the ultrasonic washer.


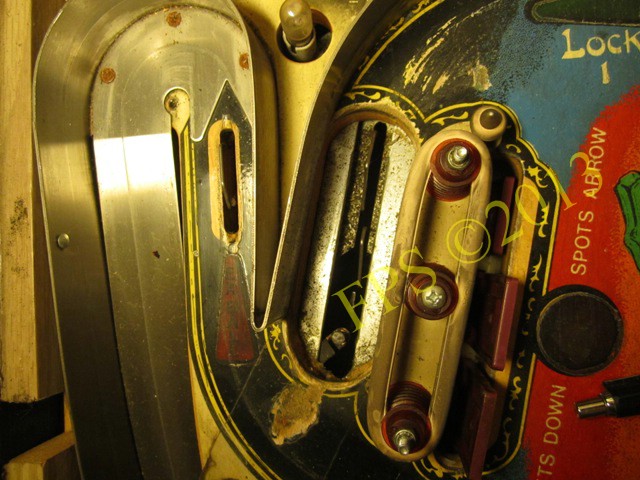
Here we see that the rollover wire assembly is shiny and fine again.

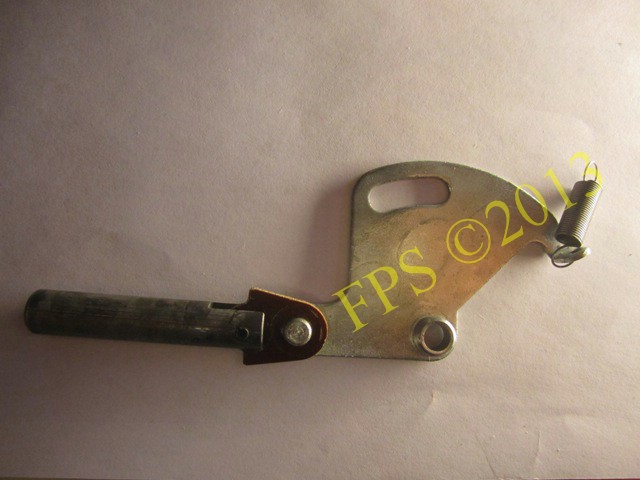
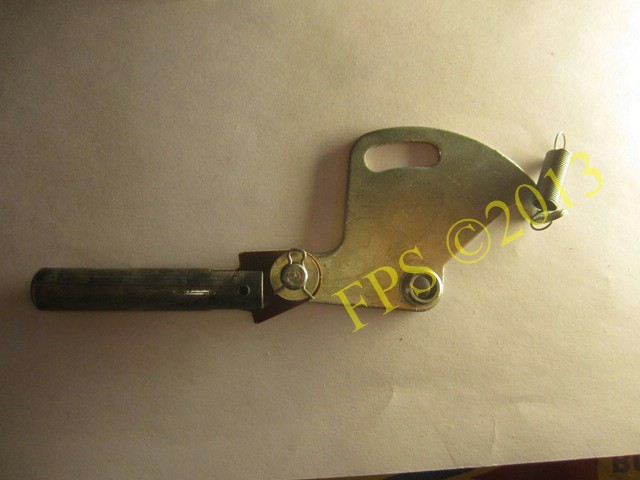
Acetone is used to clean the ball kicker arm, also used to clean the solenoids (coils).
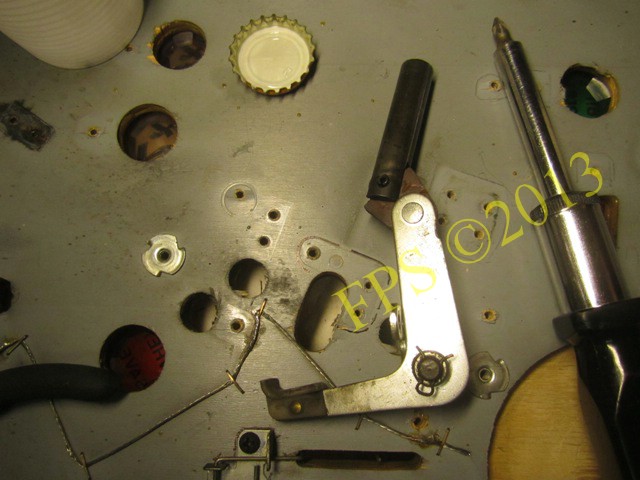
RE-ASSEMBLY BALL KICKER UNIT

A Q-tip is used to apply Super Lube on the pivot bracket axle.
Attach the plunger on the kicker arm.
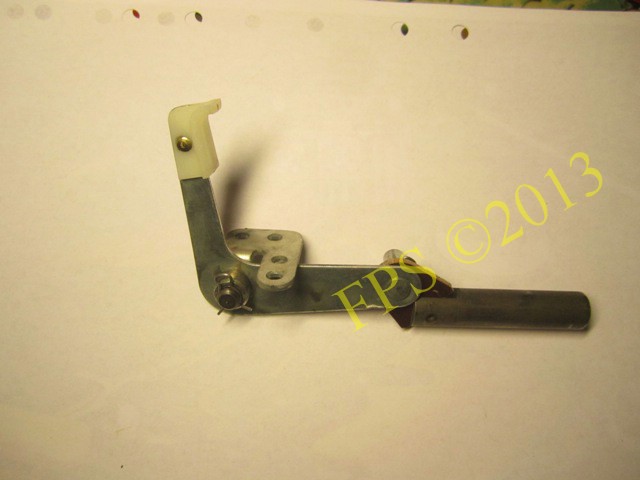
Attach the pivot bracket assembly on kicker arm.
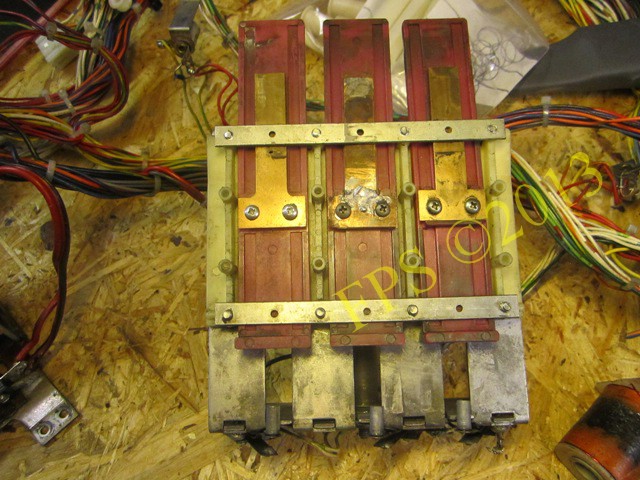
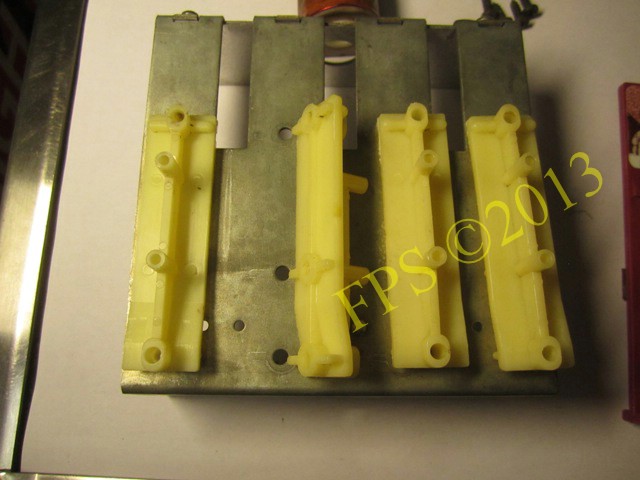
RE-ASSEMBLY 3-BANK DROP TARGET UNIT
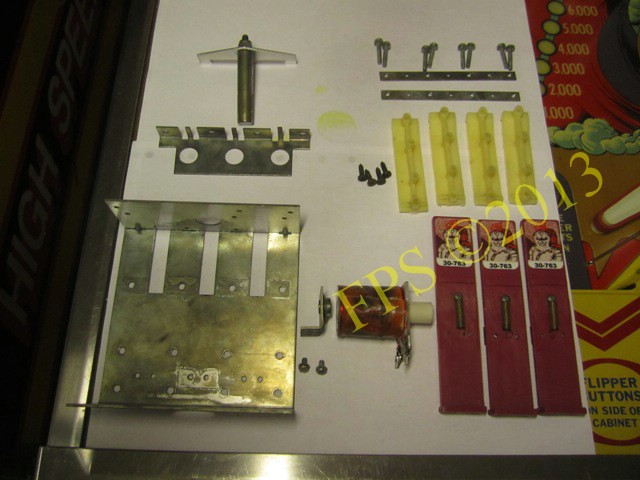

Screw the coil stop to the frame.
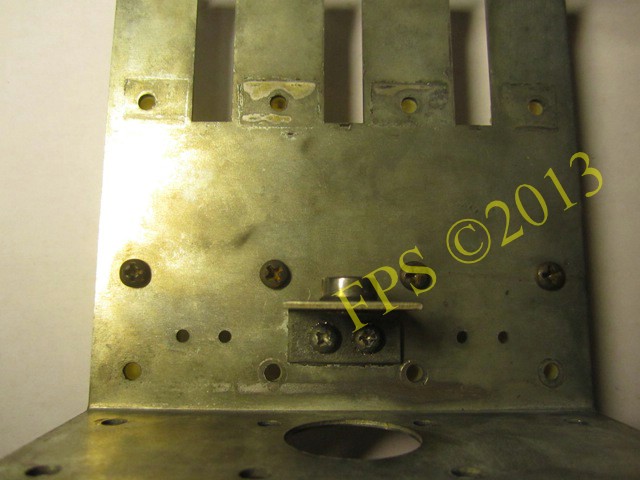
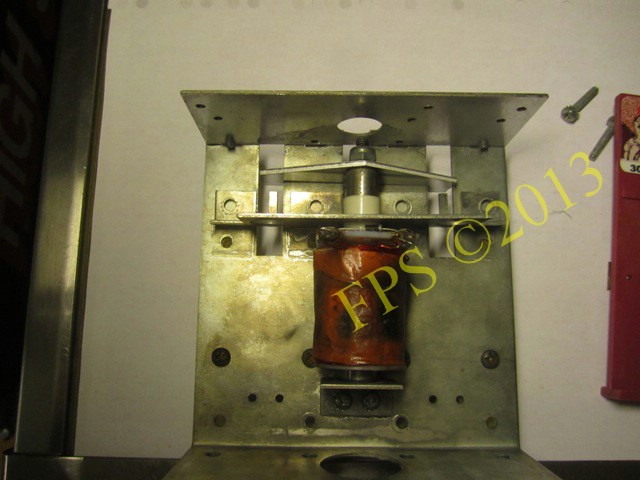
Attach the coil support bracket with screws.
Fit the drop target spring to the frame.
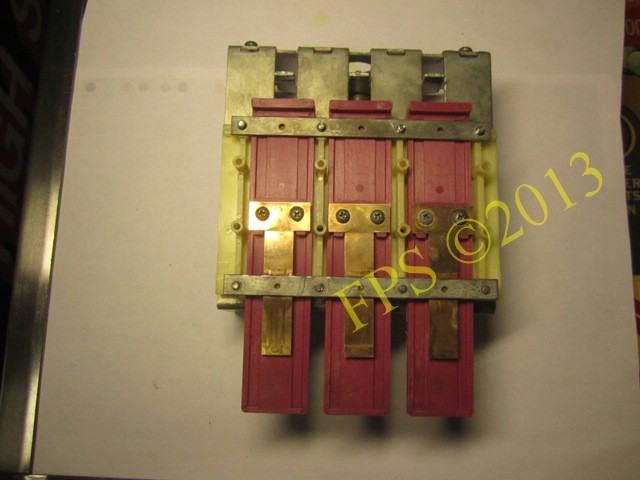
Attach the retaining bar over drop targets with screws.
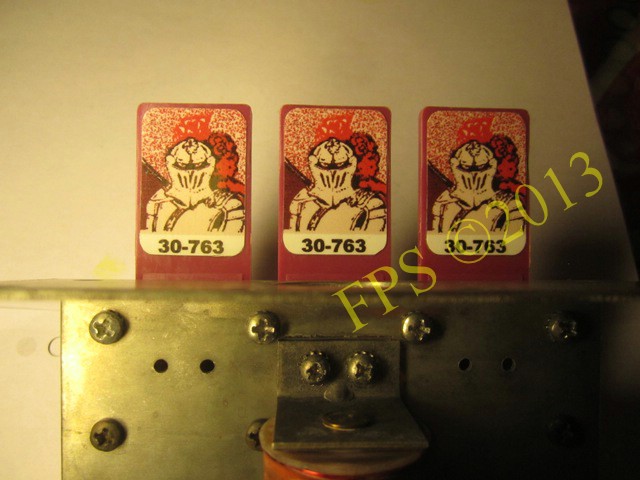
New decals "tapes" on the drop targets.
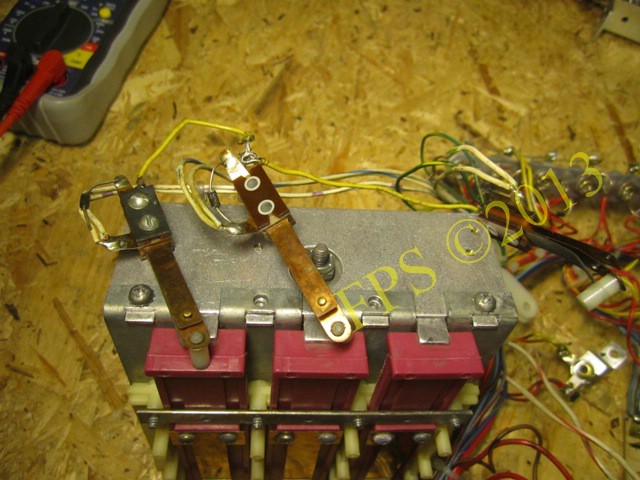
The switches are screwed to the frame.
The switches are cleaned and diodes (1N4004) are replaced with new ones.
TARGET DECALS
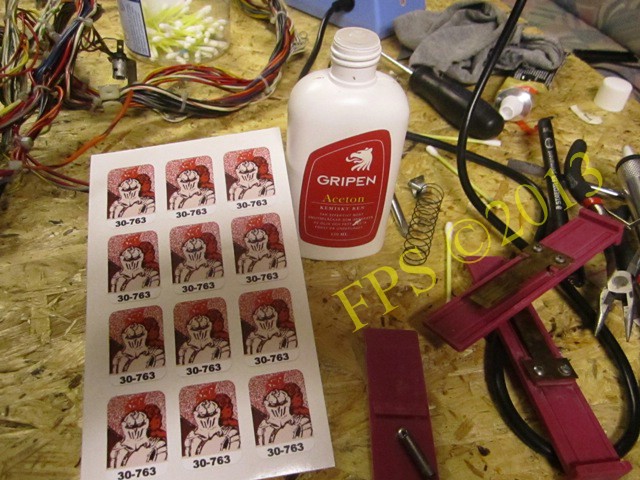
Drop targets missing decals and new will be applied to the targets.
Clean the surface with Acetone where the decal will be fitted.
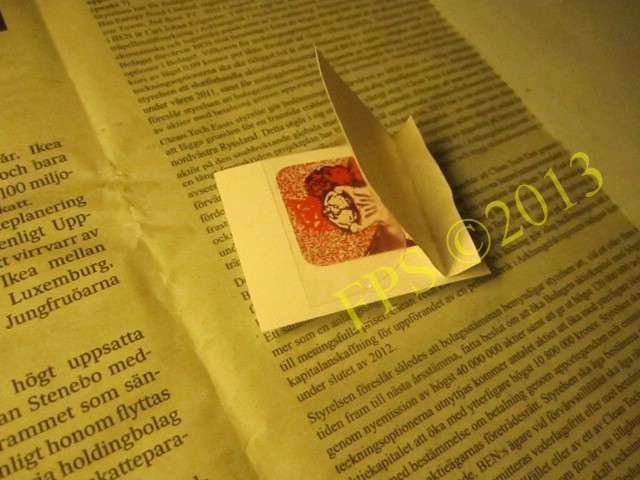
To protect the decal an additional mylar is placed over the entire surface.
With a glass plate as underlay decal are cut out using a razor blade.
Look how nice it became!
Pleasure and Pinball
| © 2007-13 FPS. All rights reserved. | Page Last updated:
2013-08-22 |