- Home Old school pinball<1985
- Grand Prix (EM) 1976
- Firepower (SS) 1980
- Space Mission (EM)1976
- Genie (SS) 1979
- Magic Castle (SS) 1984
- Black Knight (SS) 1980 New school pinball >1985
- High Speed (Sys11) 1986
- Earthshaker (Sys11) 1989
- CFTBL (WPC) 1992 Arcade Project
- JK-Cabinet with MAME Contents Genie
- Playfield Refurbishing
- Playfield Painting
- Cabinet Refurbishing
- Electronics
- Before-After Pictures
- Refurbishing Diary
- Finished project
- Dokument - Flyer
|
Language |
|
|
Gottlieb Genie SS Refurbishing project - Part II!
GENIE (SS) 1979 - PLAYFEILD PAINT TOUCH UPS
And now to the fun part of this project, playfield paint touch ups.
|
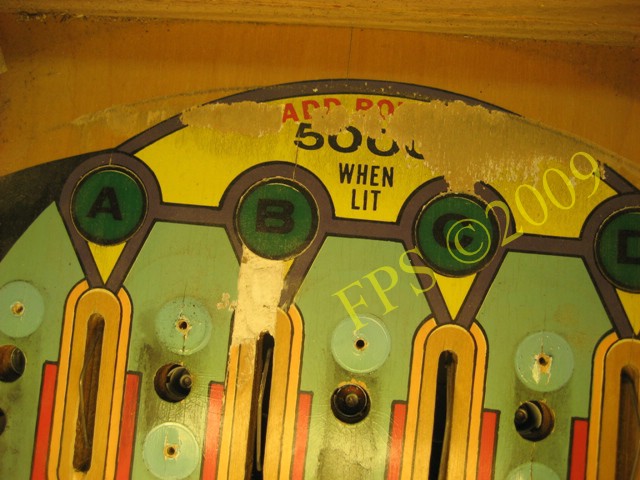 |
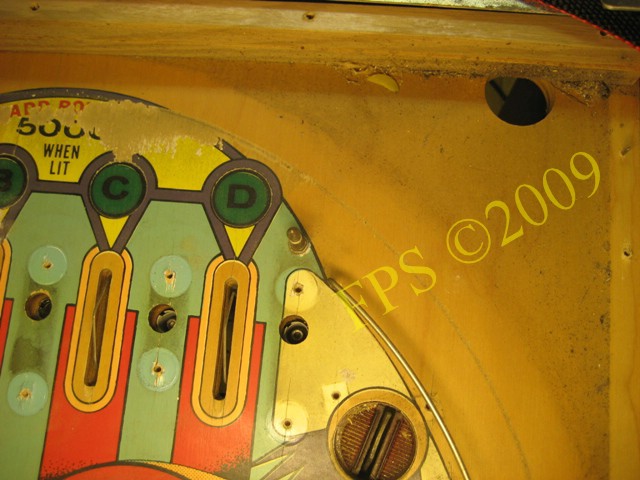
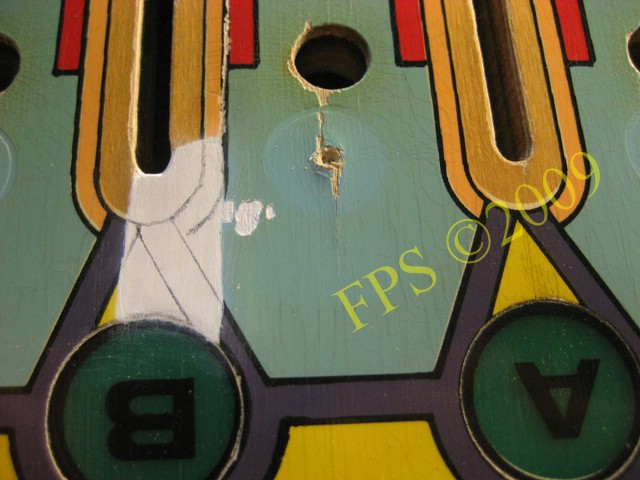
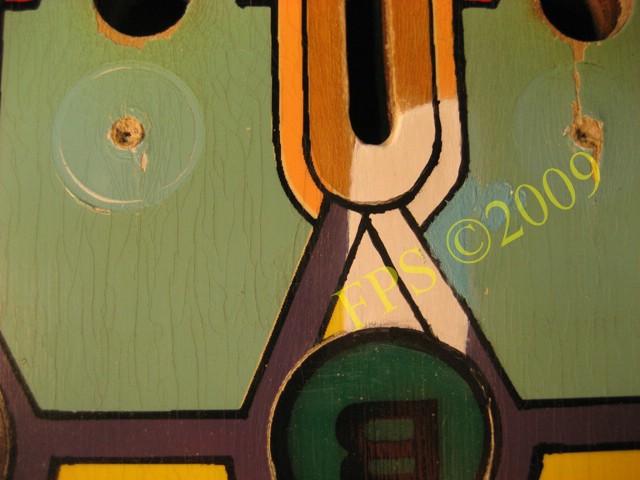
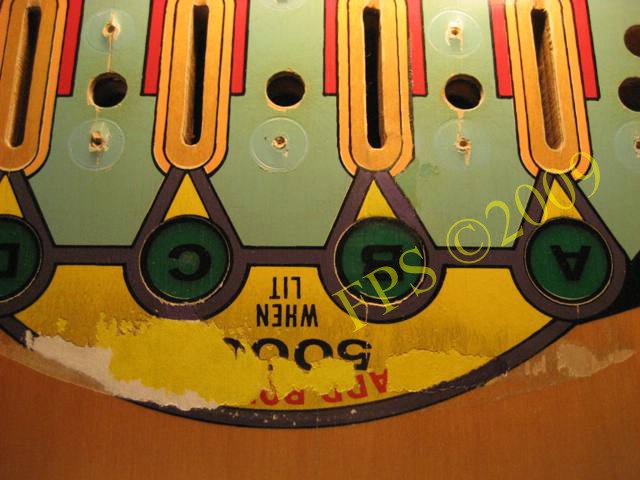
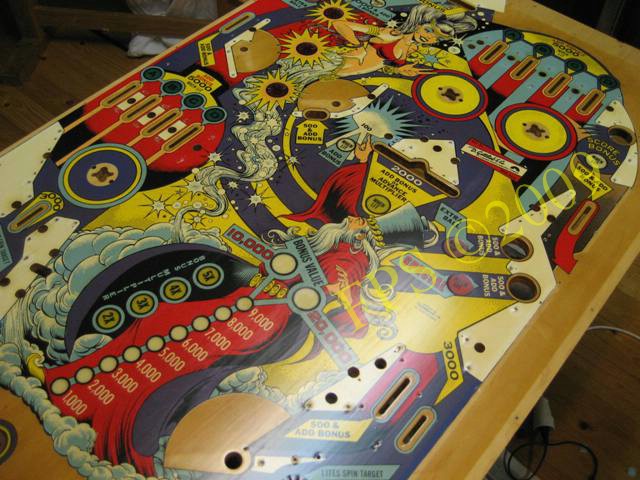
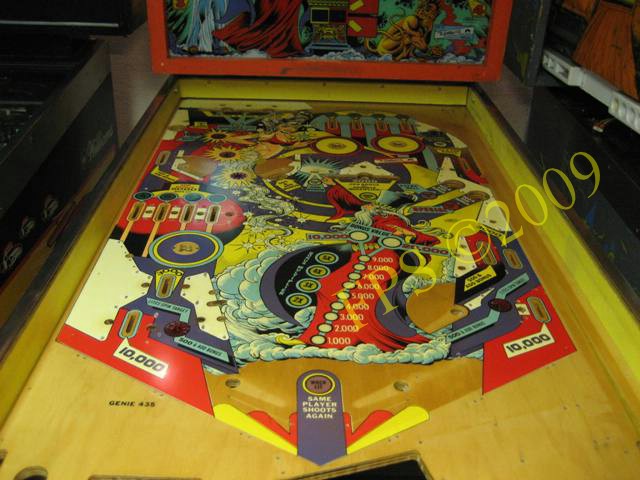
The playfield is in good condition except for the two damages in the pictures above. In the picture to the left, we see that there is a substantial damage in the playfield below insert "B" and above the inserts "A-D" color has come loose.
 |
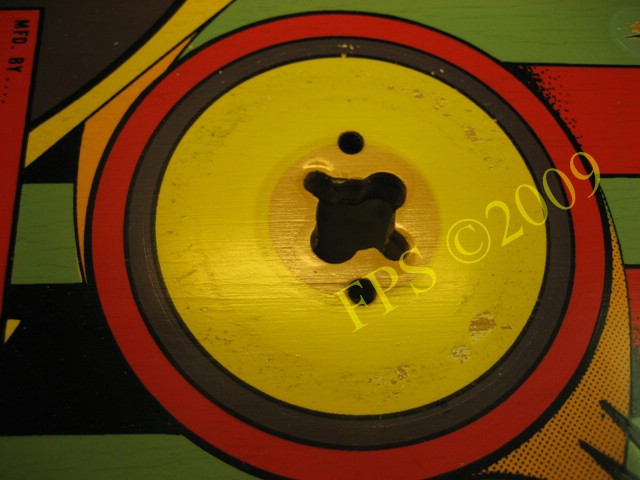 |
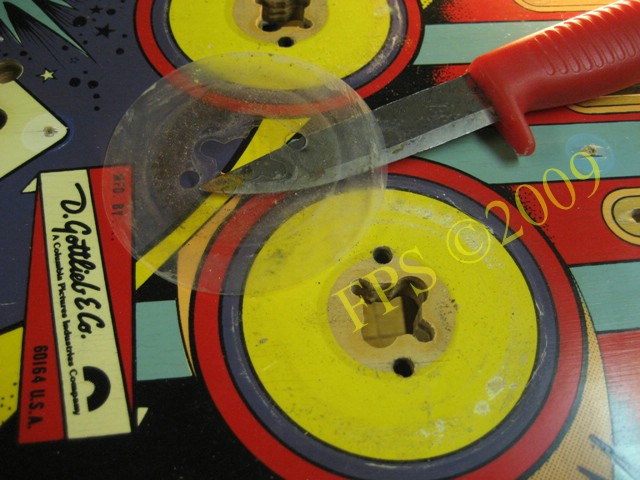
All three bumpers mylar had become detached and there was some color lift off in these areas.
VARNISHES SPILL
 |
 |
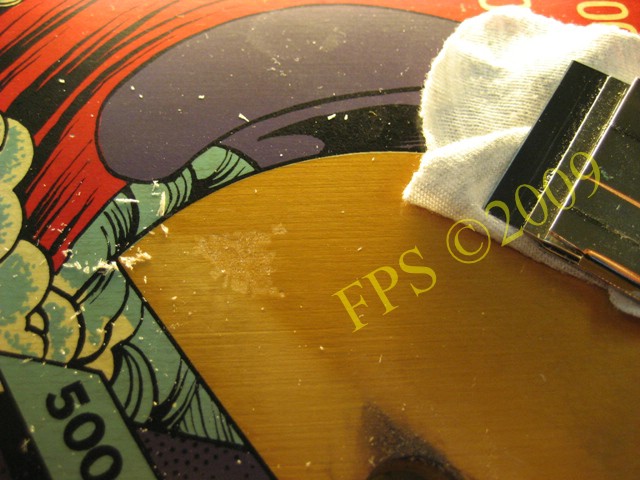
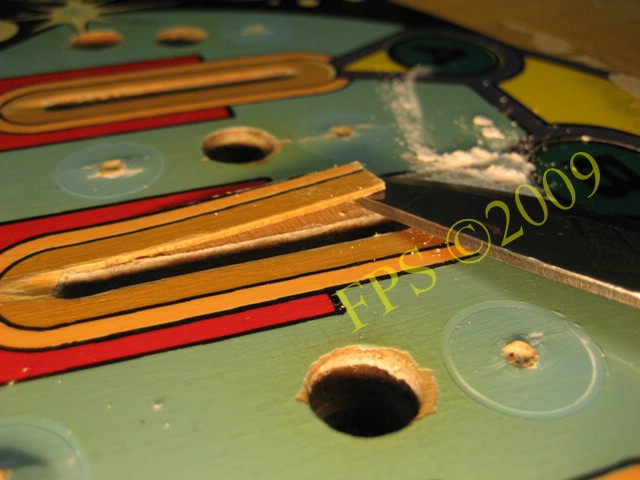
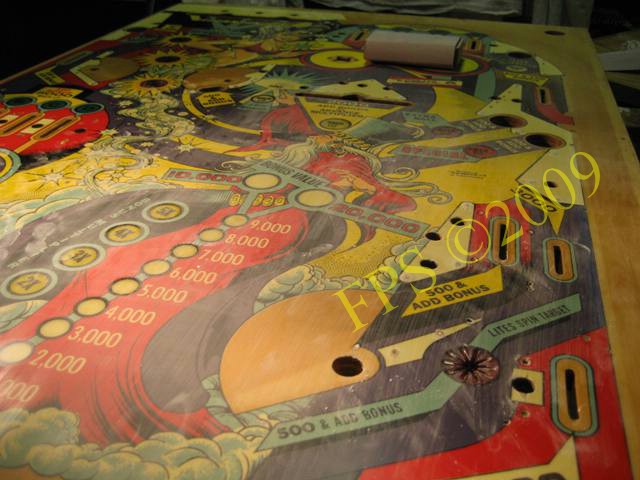
Underneath the right lower flipper there was an elevation in the playfield probably caused by varnish that has been spilled on the playfield or due to an attempt to mend any damage. I gently scraped away the varnish with a razor blade and there was no major damage underneath instead only small pores which probably has occurred from the varnish when applied once in time in this area. Afterwards, I polished the surface with Novus 2 and now there is no trace of this elevation.

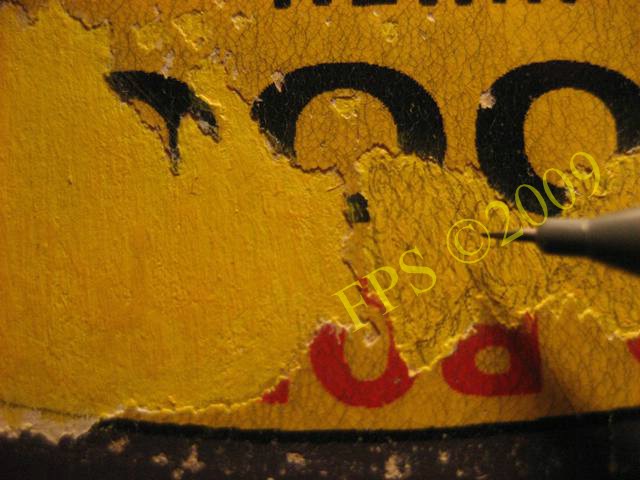
Also on insert "9000" there was a large drop of dried varnish.
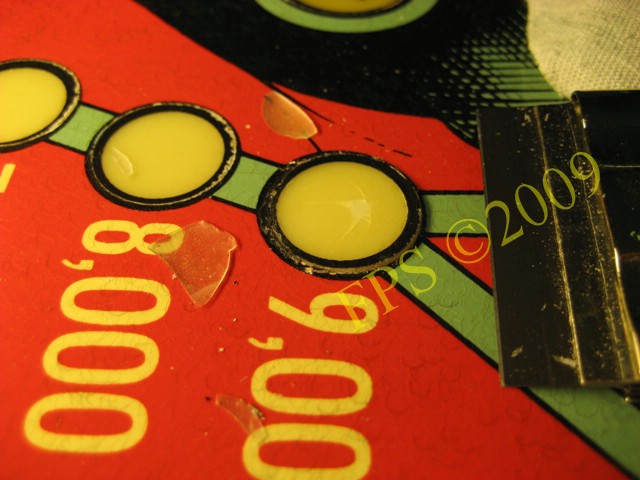
Also here i made an attempt to gently scrape away the dried varnish and it came off in two large pieces, but unfortunately followed a bit of the inserts surface with the varnish, which is visible in the picture above.
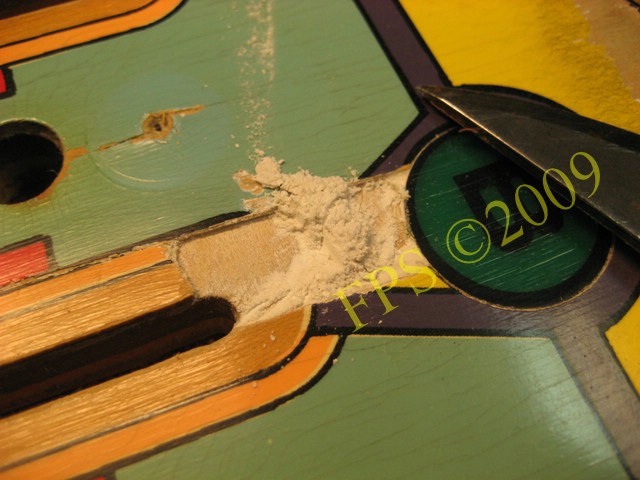
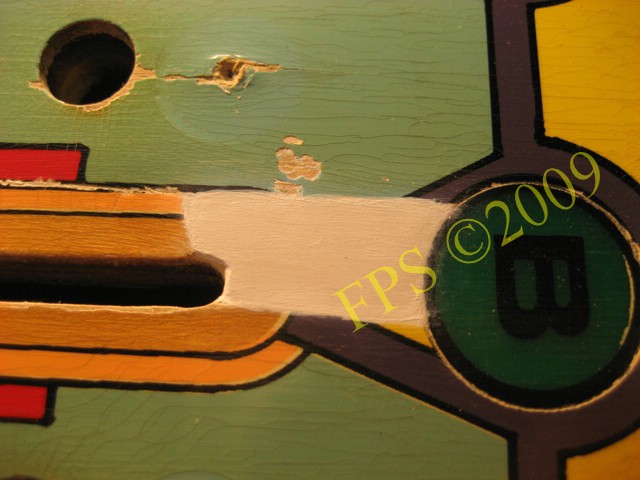
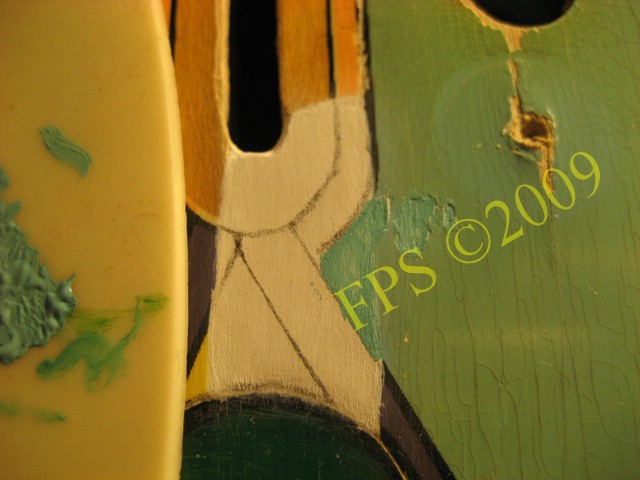
DAMAGE AT INSERT "B"
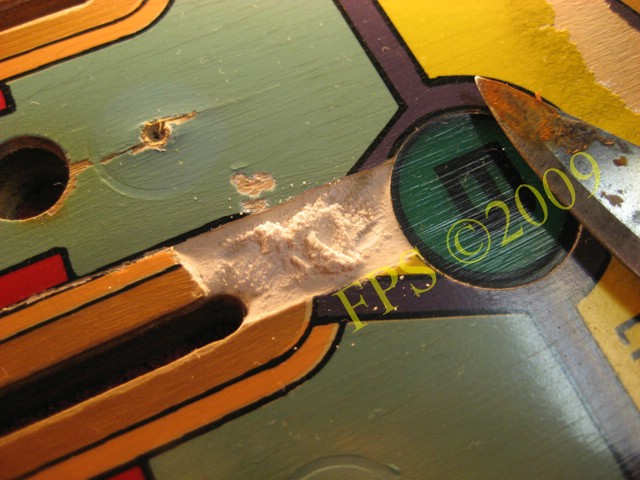
- Oh-no, McGyver has been around again with a real bad repairing of a damage in the playfield. Apparently, to repair a piece of the playfield that has come loose plaster was used.
 |
 |
I scrape off all plaster with a knife and then polish the surface with sandpaper before I fill the damage with a better medium then plaster.
A piece of the playfield was released so that I had to glue with wooden glue.
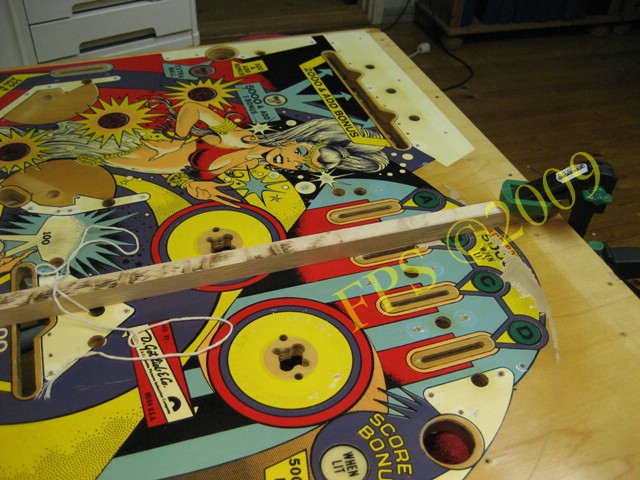
To keep pressure on the glued part while the glue dried I used a wooden bar who I put above.
It went out well after gluing, flat and nice.
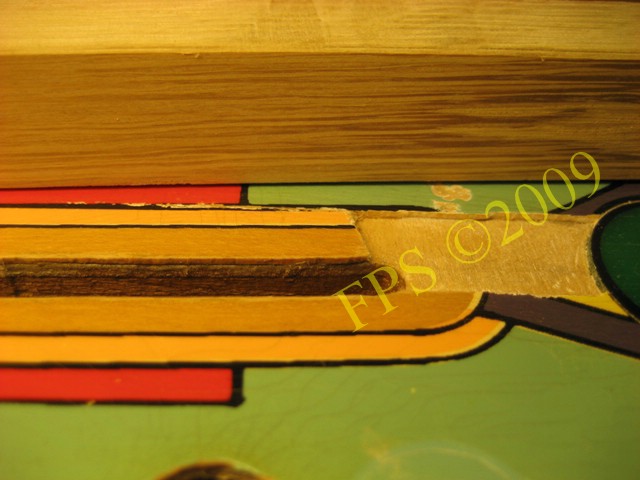
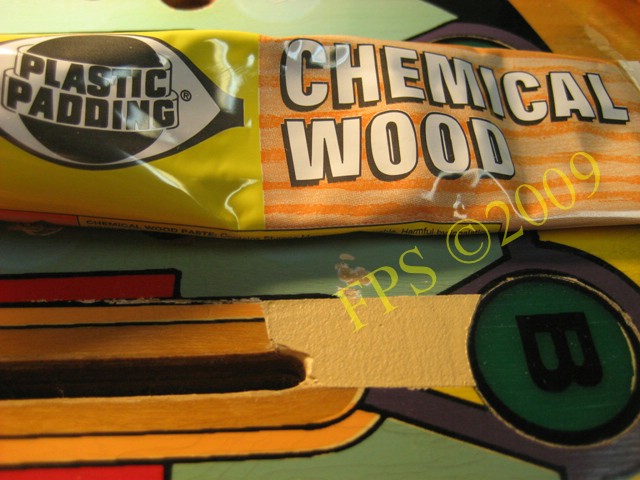
Chemical wood is a two component chemical wood which hardens and gives a hard and solid surface. It draw well to the surface and is easy to grind after curing. Here we see the first fill.
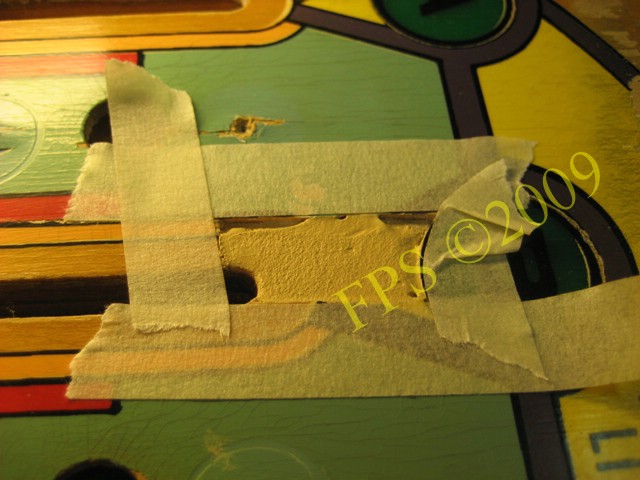
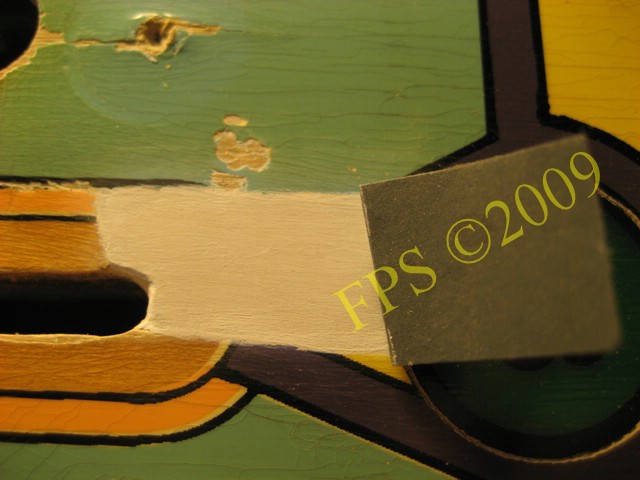
Before second filling with chemical wood I mask of the area which shall be filled with tape so that surrounding surfaces is protected.
Second filling done and the tape is remove before the chemical wood is hardened. Work fast because the chemical wood is stiffen pretty fast when the hardener is added.
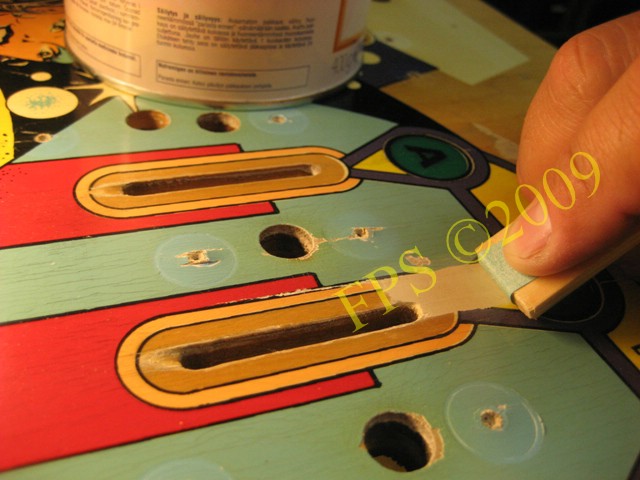
Then I smooth the surface with sandpaper P240 grit.
Here are the result of the filling with chemical wood after sanding. After sanding, i put the playfield on another pinball machine and let a pinball roll over the repaired surface at different speeds, this to see how it behaves over the repaired surface and to see if the pinball will stuck in some roughness or edges.
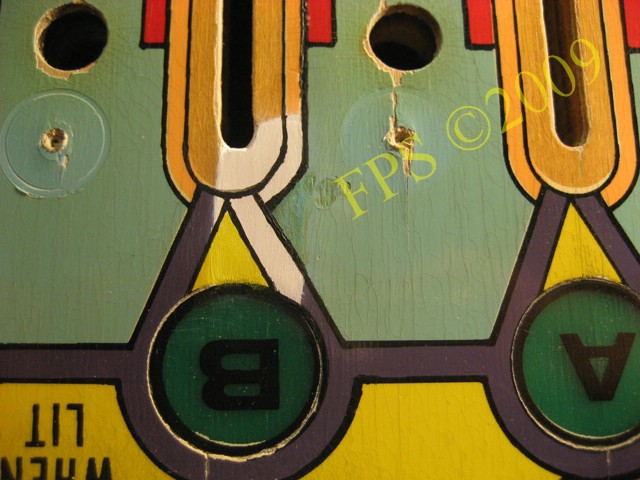
PAINT TOUCH UPS AT INSERT "B"
The reason I believe that one should do paint touch ups of a damage or wear on the playfield even if they result are not entirely perfect is that it is better than to leave the areas on the playfield with clean wood. If the paint touch ups are not quite perfect this will usually not be detected by a viewer or player, but a damage or wear in the playfield where there are no motives or colors will be far more conspicuous and in some cases also affect the play negative.
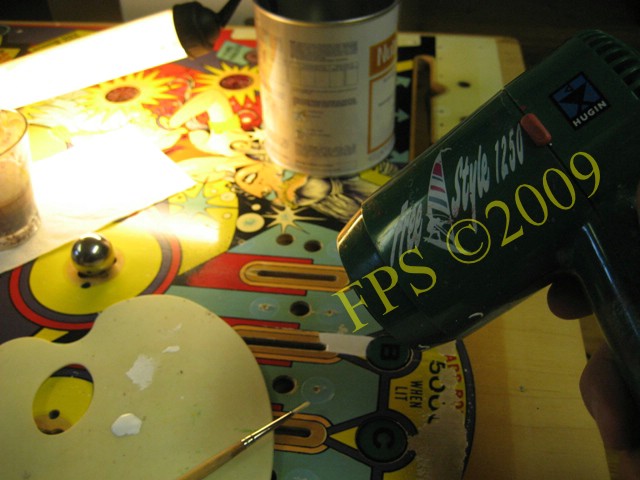
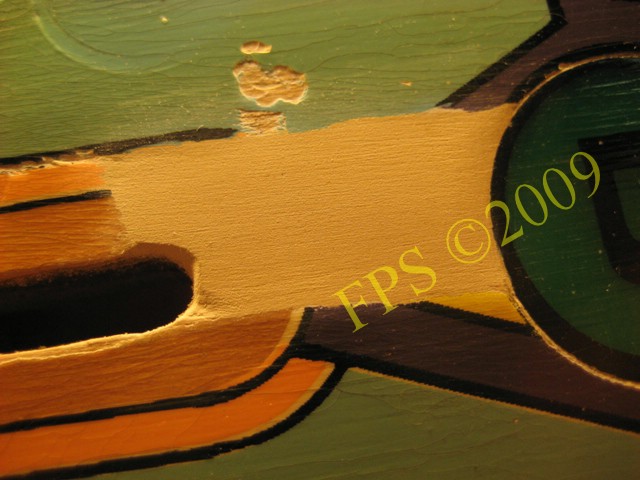
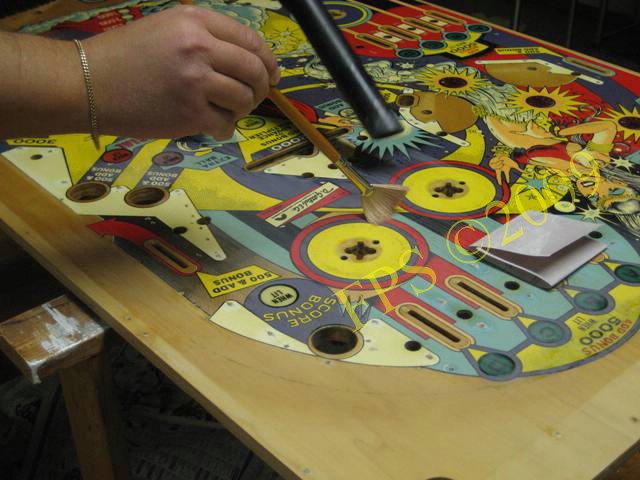
After the repaired surface has been approved I apply the first layer of white acrylic primer. To speed up the drying of the acrylic primer I use a hair dryer gently.
After two layers of acrylic primer I remove any brush marks and smooth the surface with sandpaper P1200 grit.
The surface after painting with acrylic primer.
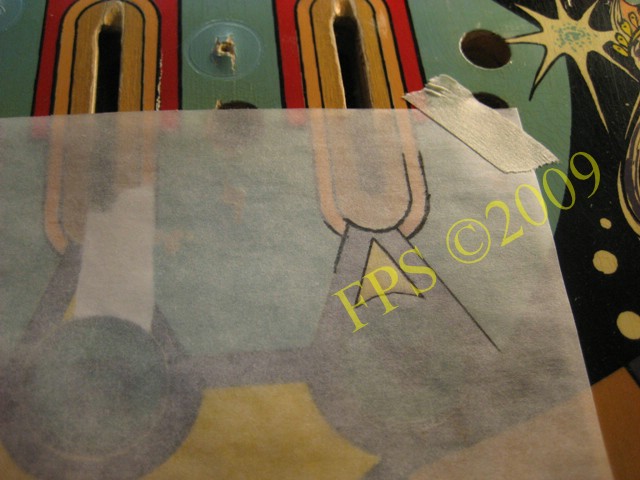
I draw the outlines of a the area above insert "A" to use as a template on a "sandwich" paper with a graphite pen.
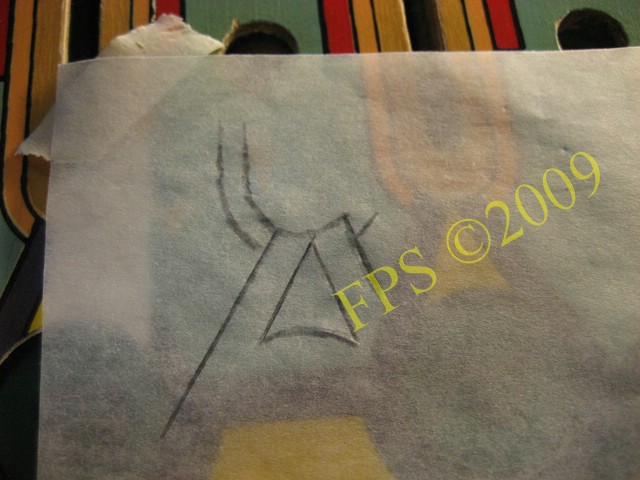
Then I turn the "sandwich" paper and fills in the outlines on the backside of the paper with a graphite pen.

The paper is placed over the area which shall be painted, when I draw the outlines again a print is left on the playfield which I can paint after with black paint.
Outlines printed in graphite which a I will paint with black paint.
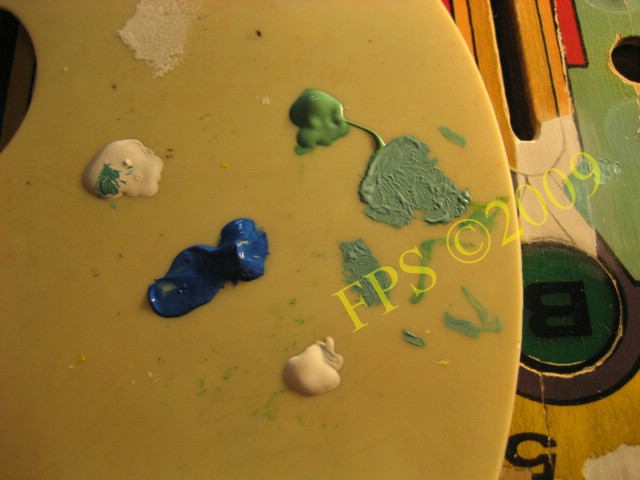
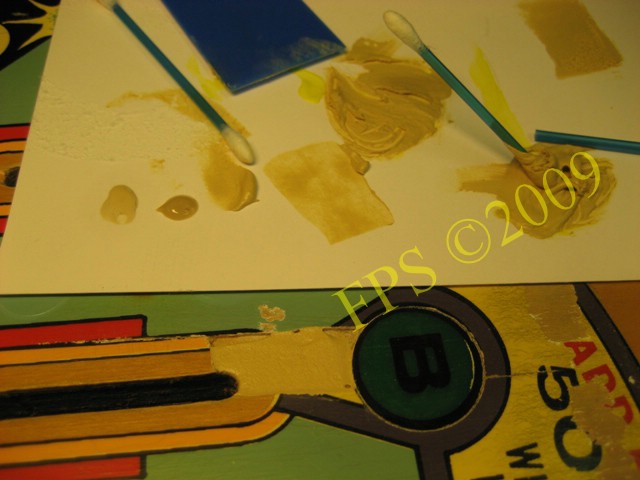
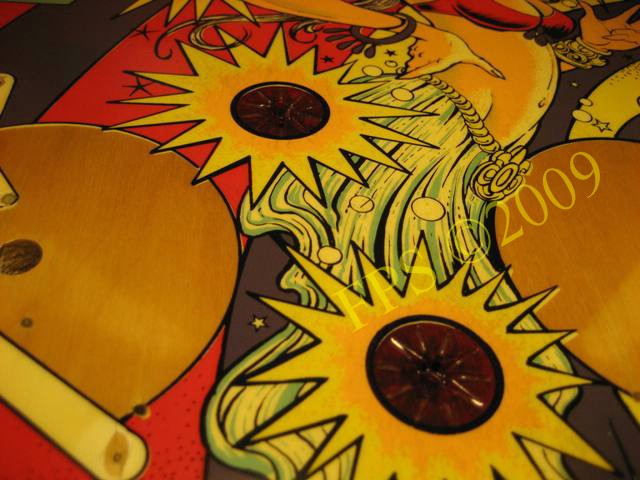
I start by make a attempt to paint the blue-green colour first. It is always difficult to find the right shade of bright colors on the playfield, in this case I had a mint green color on the shelf which I used as a start color. To mix the right shade I added more blue (Coruleum blue) to the mint green colour and after that I light it up by add white paint.
Here is the first layer of paint and we see that it went out too green.
I mix in more blue and white paint and find almost the same shade as it was from the original, if you compare the color of surface where the plastic post has been situated we see that they match each other pretty good. That my color does not match the sorrunding area is because the color has been yellowed with time. This is thankful since I can add a thin yellow (Cadium Deep Yellow) / Brown (Raw Sienna) lasures over the paint touch up and have it look aging as sorrunding area.
Here is the blue-green paint touch up after a lasures has been applied. Before the lasure was applied I painted thin strips with black paint in a attempt to simulate the cracks found in surrounding areas on the playfield.
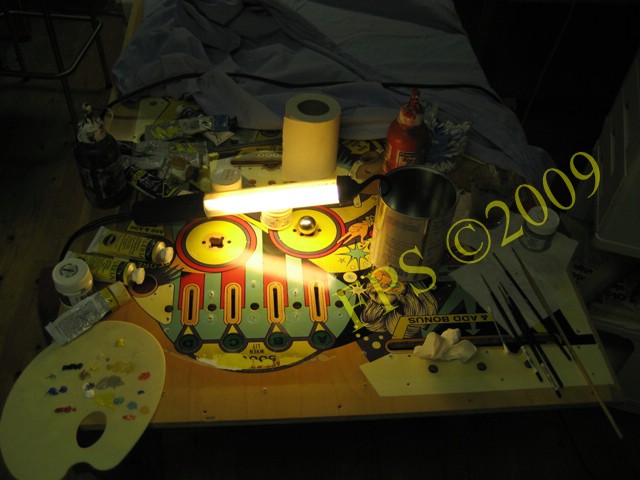
Works with the painting.
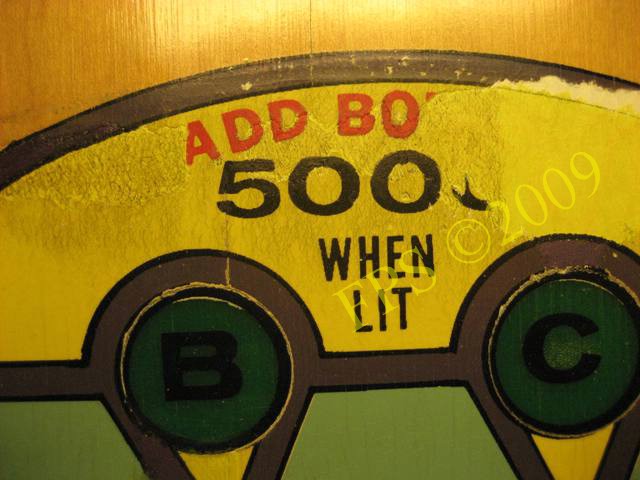
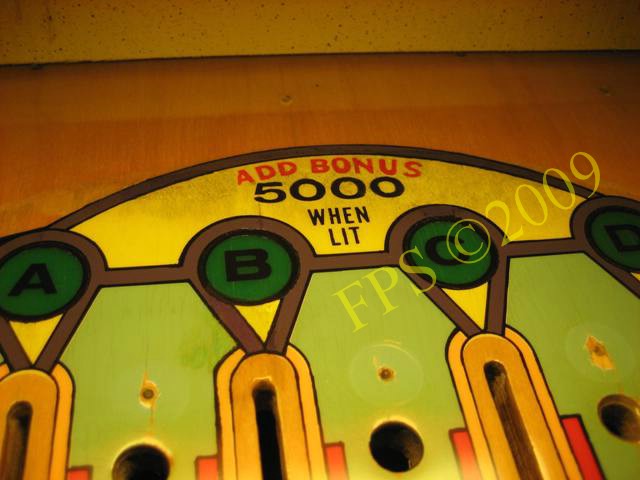
Here are the fields with yellow and purple colour filled. Has begun work to restore the areas around the "add bonus 5000". Begins by adding a few shades of yellow to get as close a colour match as possible.
 |
 |
To recreate the so infamous "ball swirls" in the playfield surface I use a graphite pencil 0,5 mm. These swirls is visible in the surrounding yellow surfaces as small black lines. First I sharpen the tip of the graphite pencil with a razor blade to get it really sharp. Then I draw without pressure short curvy lines in the yellow and then I gently wipe away leftover graphite from the pencil with a damp cloth. Then I apply a thin layer of yellow paint over the graphite lines. Now I believe that the painted area will blend in with the surrounding areas.
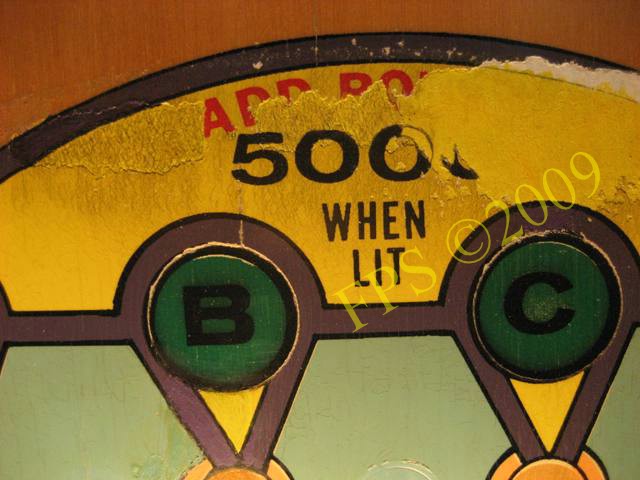
Here I have begun to draw contour lines of letters and numbers.
 |
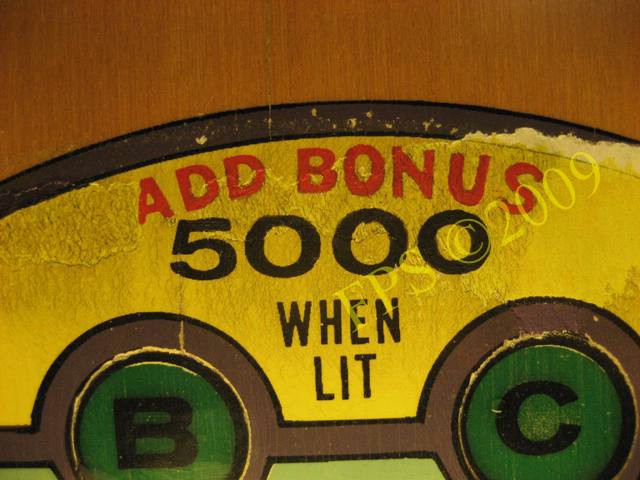 |
Now is the entire text of "add bonus 5000" re-created and it looks quite well I believe except for that it was difficult to paint inside the contour lines since the edge of the playfield damage cross the contour lines and made the surface uneven.
THE DUST NIGHTMARE
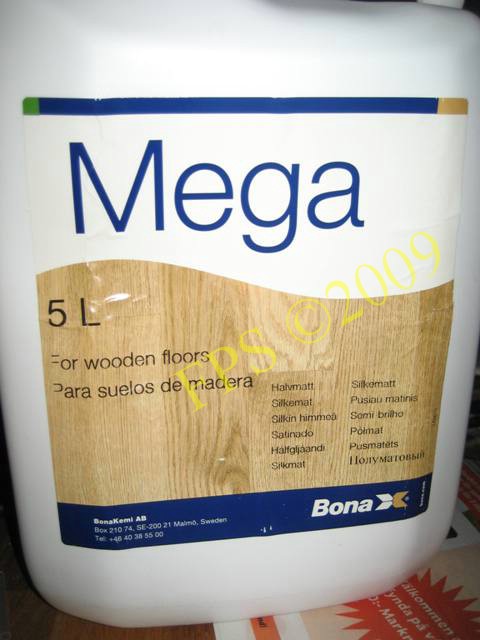
Now I will seal the playfield with varnish after the paint touch-up and had let it dry for a week. It was hard to decide if I should only varnish the surfaces of paint touch ups or varnish the entire playfield. Since I already know that this floor varnish (Mega) works well and has not destroyed the earlier playfields that I have paint touch up. I now began to think about trying to varnish the entire playfield to give it a new lustre.
What worried me most was that the varnish would not stick due to residue of silicon in the surface of the playfield, or that the surface of the varnish would not be even. After talking with a car refinishing firm and some paint shops for tips and advice I took courage to try to varnish the entire playfield. Should mention that car refinishing firm did not dare to coat the playfield with my floor varnish, they were worried about possible damage in the playfield and did not want to be responsible for that. A paint shop said that water-based varnish is more insensitive to any silicone residue and flows out. They recommended me to apply thin layers of varnish with a roller and then pulling out the varnish with a fine high quality emitting brush, 125 mm wide.
The varnish I use is a professional water-based floor varnish "Mega" used by firms that perform varnish of wooden floor. I have used this varnish on my pine floors and it gives a really hard surface when it got harden.
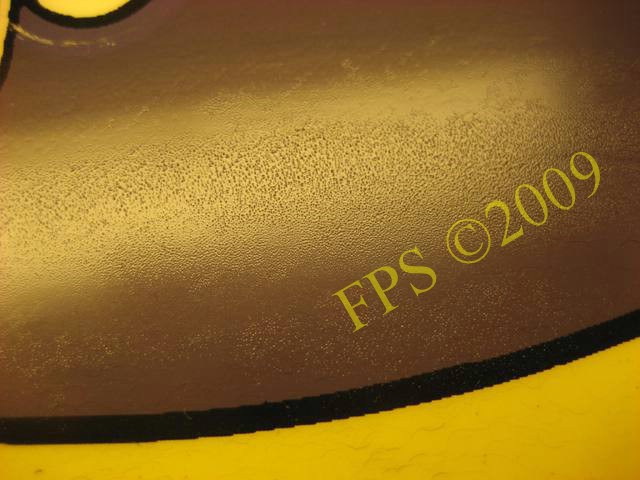
Here we see the playfield after two coats of varnish. The surface got pretty nice after these two layers of varnish but looking close some spots with dust can be find in the surface. I decided to sand away these spots with dust and then add a additional layer of varnish.
 |
 |
After the third layer of varnish has dried spots with small air bubbles was found which can be seen in the picture to the left. It was a disaster, I let the varnish dry for 14 days before I ventured to sand with P400 grit sandpaper over the entire playfield to remove these bubbles.

Here I am sanding with a P400 grit sandpaper.
The entire playfield sanded before varnish.
In order to remove all sanding residue I am using a vacuum cleaner and a brush. After that I wipe the surface with a wet towel 3-4 times before varnish is applied. To be sure that the surface is completely dry and free from moisture before varnishing I blow the playfield gently with warm air from a hairdryer.
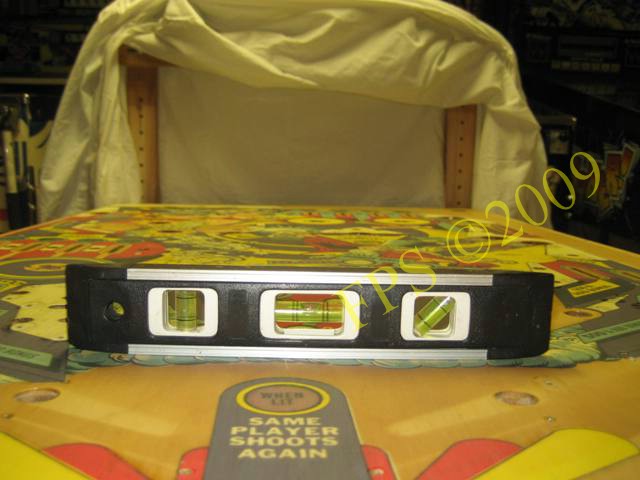
It is important that the playfield is in completely level before the varnish is applied.
 |
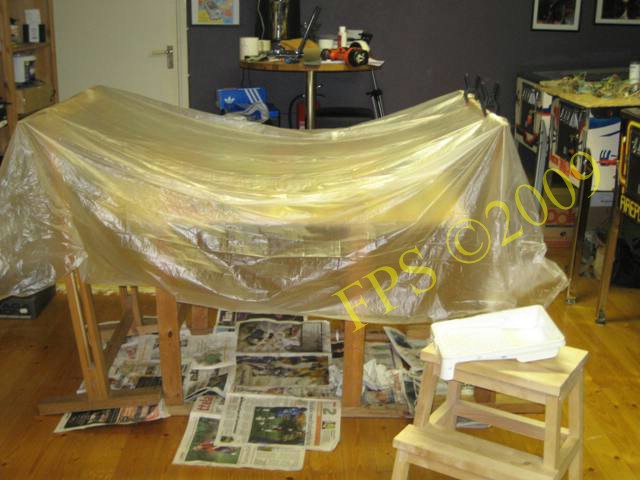 |
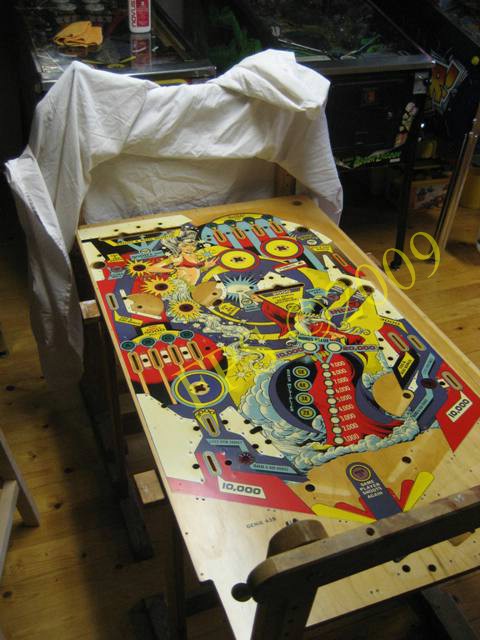
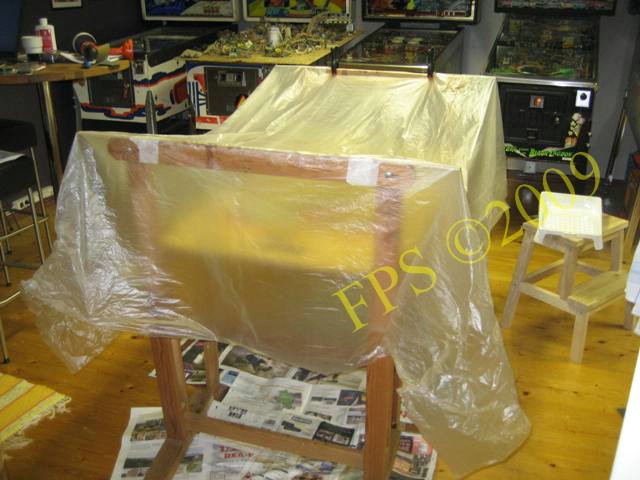
First I used a sheet to protect the playfield after varnishing and did not think that it might release dust while the varnish dries so to avoid this phenomenon I bought plastic used to cover up the doors when you grind. The plastic was a bit unwieldy to cover over the playfield after varnishing but it worked pretty well and I think that it is a bit of electrostatic and binds any dust to itself.
 |
 |
 |
 |
Above we see the final result after 10 layers of varnish since I was never happy with the results because of dust grains in conspicuous areas. To the last layer of varnish I used a foam roller which is less susceptible to relinquish small particles that can become visible at the surface than a conventional roller. It is difficult to show the actual result since the camera is always misleading how the reality really looks.
|
|
A comparison of how it looked before and after paint touch up.
Pleasure and Pinball
© FPS. All right reserved. |
Page Last updated:
2009-12-17 |