- Home Old school pinball
- Grand Prix (EM) 1976
- Firepower (SS) 1980
- Space Mission (EM)1976
- Genie (SS) 1979
- Magic Castle (SS) 1984
- Black Knight (SS) 1980 New school pinball
- High Speed (Sys11) 1986
- Earthshaker (Sys11) 1989
- CFTBL (WPC) 1992 Arcade Project
- JK-Cabinet with MAME Contents Firepower
- Playfield Refurbishing
- Playfield Painting
- Cabinet Refurbishing
- Playfield Parts
- Electronics
- Refurbishing Diary
- Finsihed project
- Dokument - Flyer
|
Language |
|
|
WMS Firepower Playfield Refurbishing - Part I!
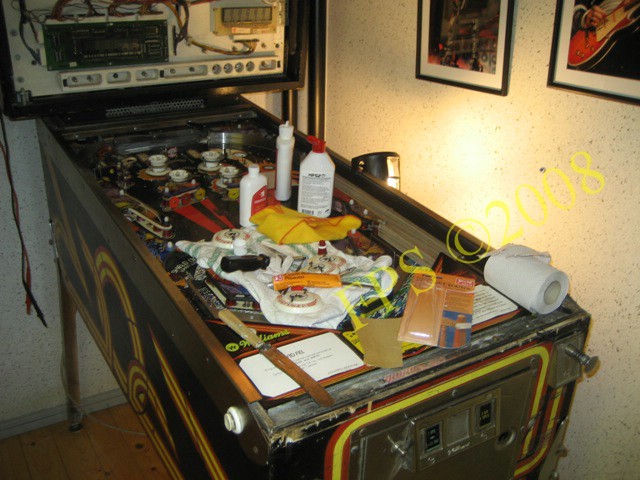
FIREPOWER PLAYFIELD
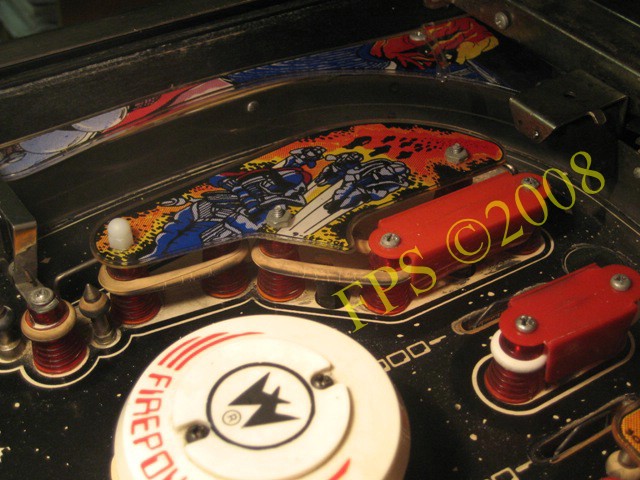
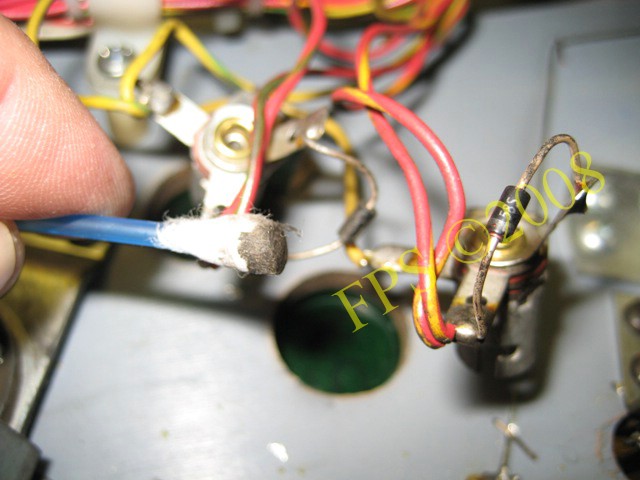
On older pinball's that nobody has maintained the rubbers is often dried and the playfield is very filthy.

Underneath the plastics on the playfield a lot of dirt, dust and carbon from contacts is collected and also on the contact it self.
 |
 |
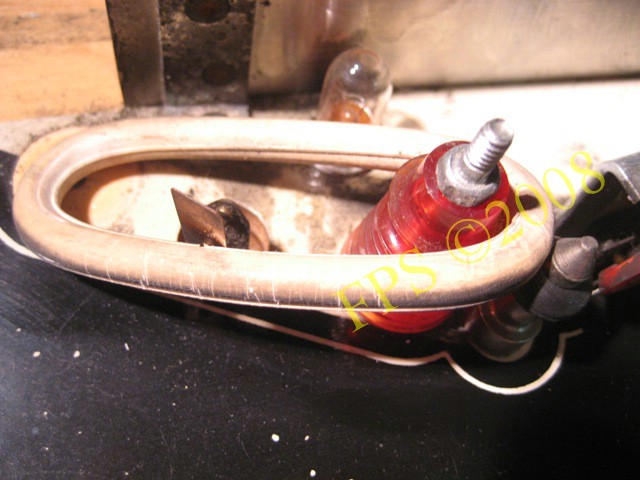
Pictures before and after cleaning notice how dried the rubber ring is and how much dirt it has absorbed since it was last replaced - the rubber can be an original?
 |
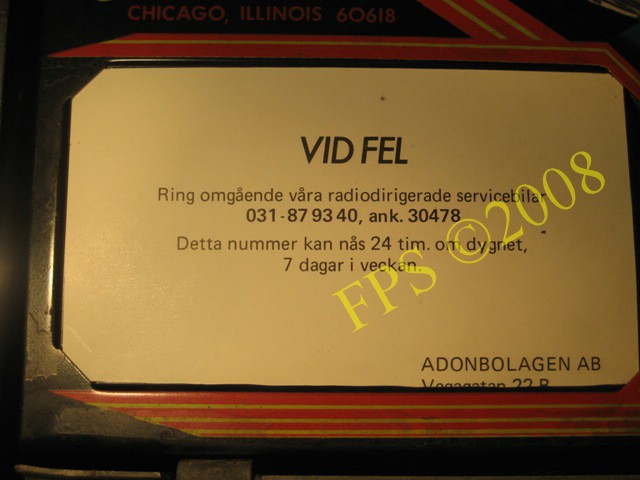 |
Original instructions on the left side of the Apron and some curiosity, operator Adonbolagens sign (when trouble) on the right side.
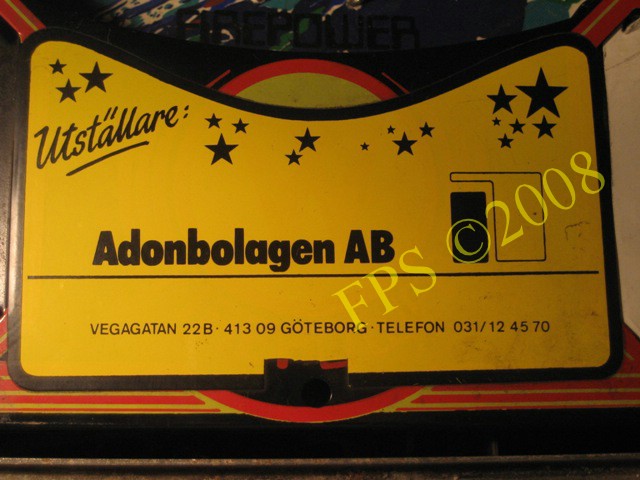
More curiosity - in the middle of the apron the operators stickers, Adonbolagen AB.
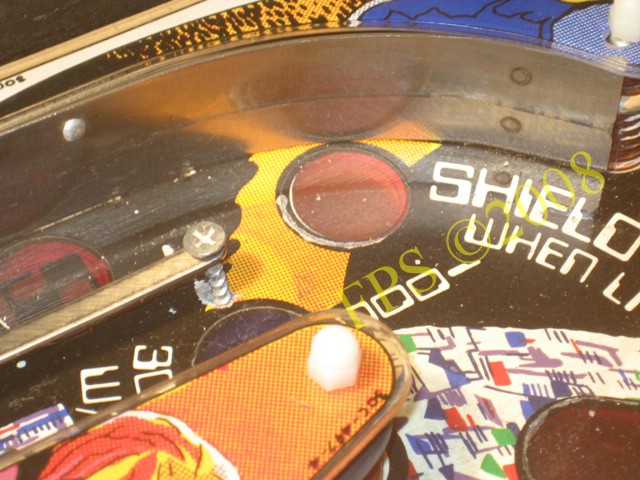
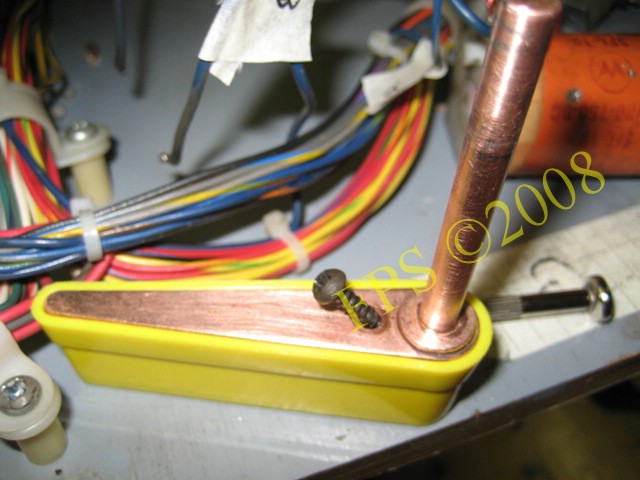
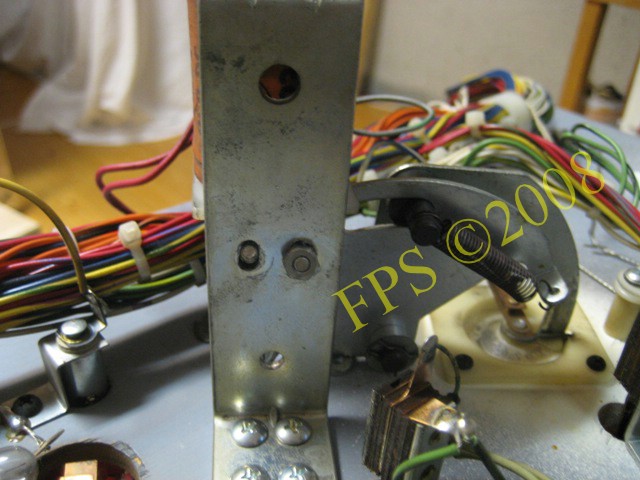
On the picture we can see how a big screw has been used to attach the metal guide which separate the in and out lanes. It took me over a year to find the original metal post which shall be used.
Tip If a Plastic post on the playfield is damaged. On older games the plastic posts is used underneath the playfield to attach the ramps which holds the lamps. This plastic posts is often in good shape and can be used as replacement for a broken one on the playfield.
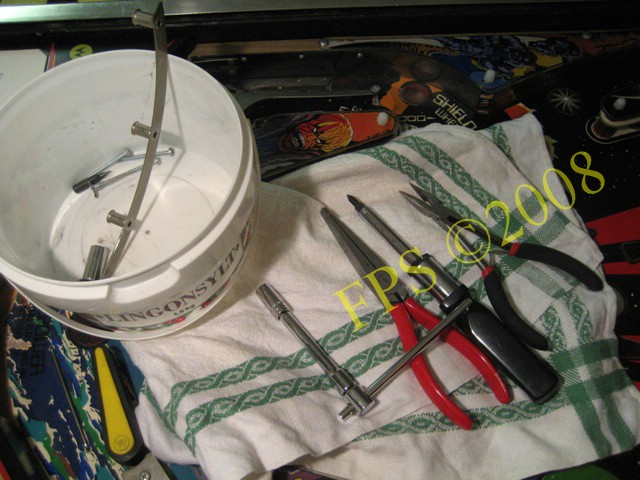
Here I remove all parts from the playfield We can see some of the tools used see further the tools page (link).
Working with the playfield.
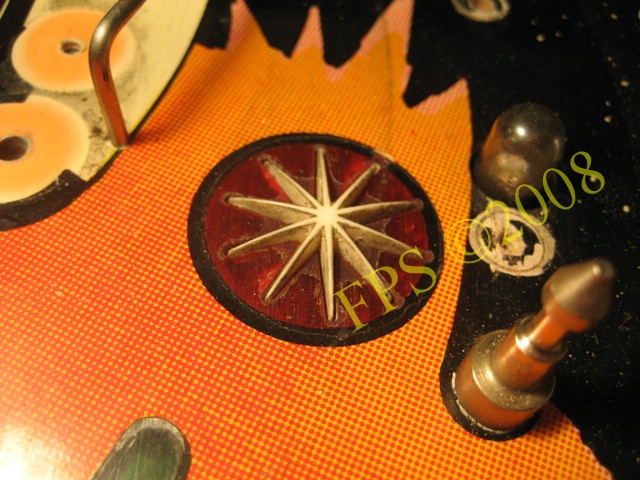
The star rollover collect a lot of dirt. We can see how the varnish has started to flake on the insert I will applies some layers varnish (when the white star is removed) to achieve a smooth and shiny surface.
 |
 |
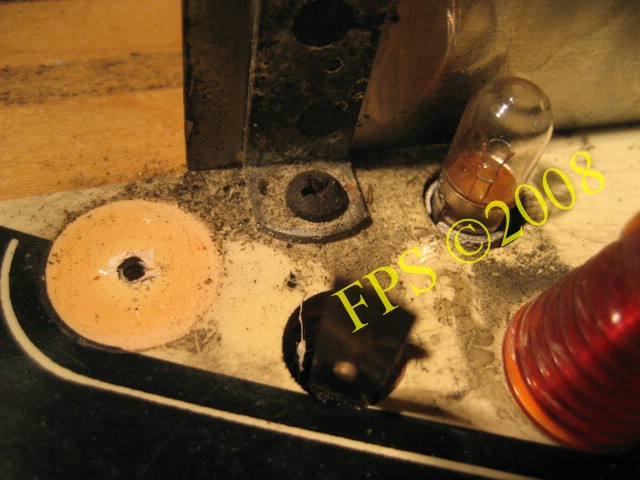
Underneath apron is a place for a lot of dust, carbon and dirt it is not common that the operators do refurbishing here - the ball will collecting dirt from here and bring it out on the playfield. It is of highest importance to keep it clean under the apron.
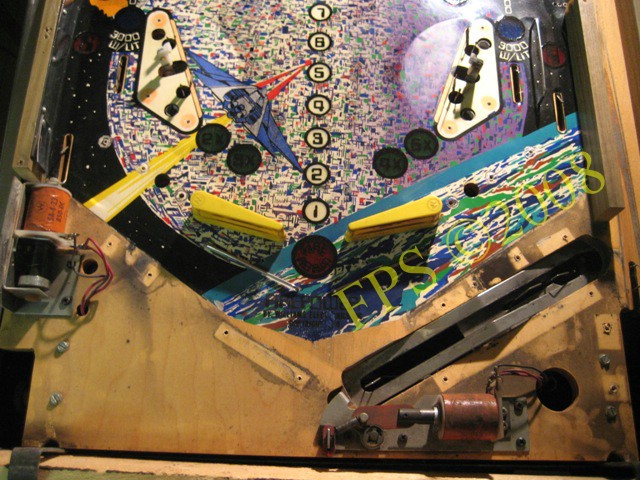
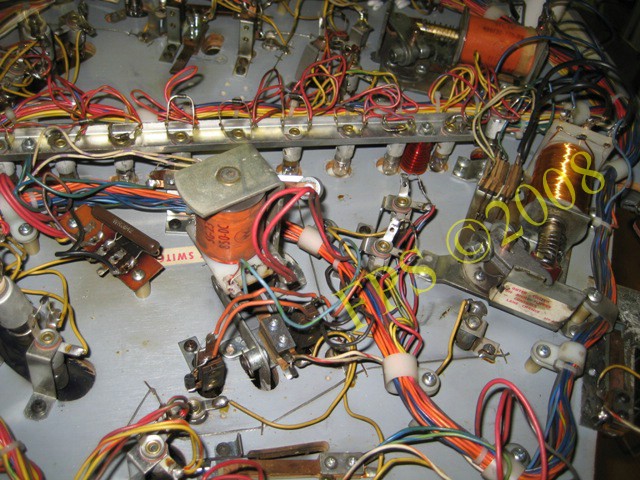
FIREPOWER UNDERSIDAN PLAYFIELD
Flippers - The feeling

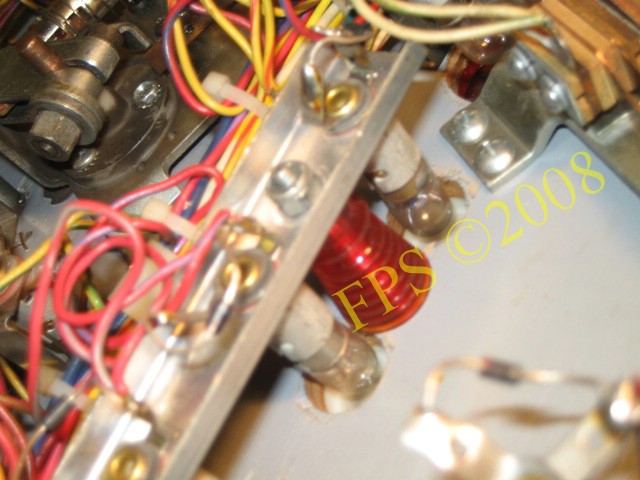
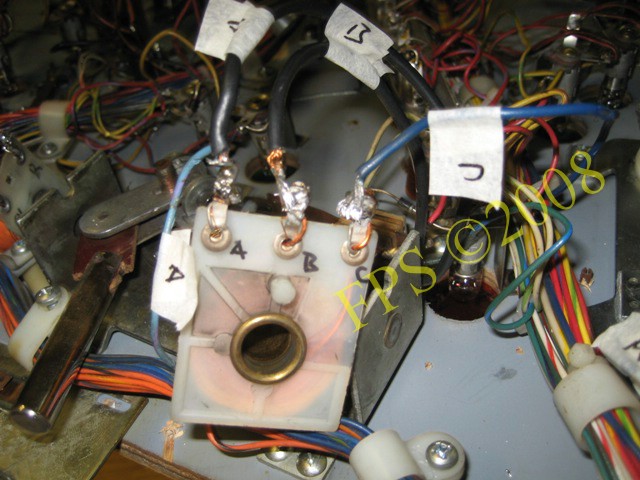
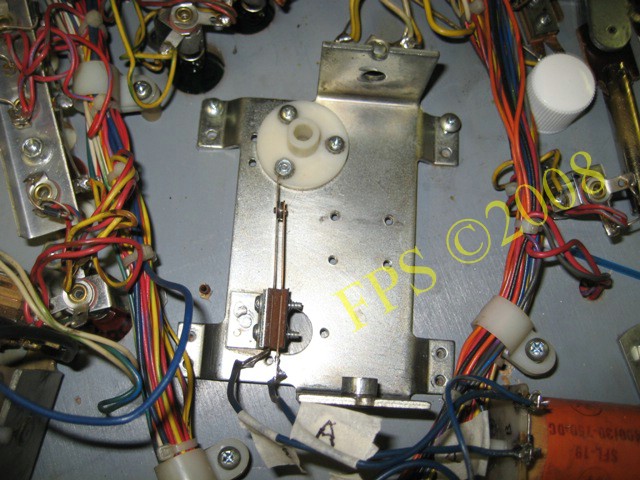
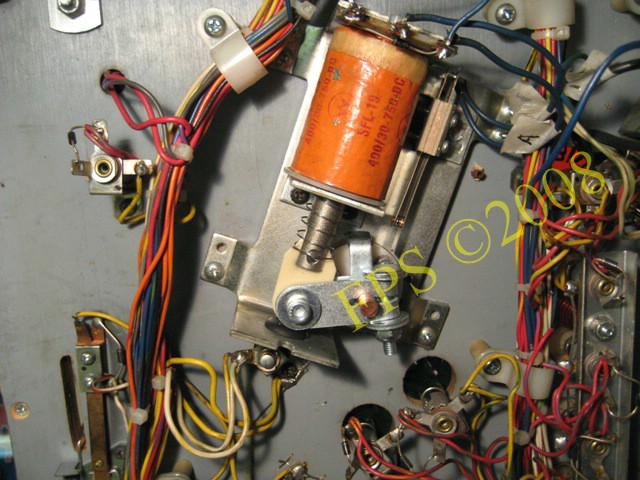
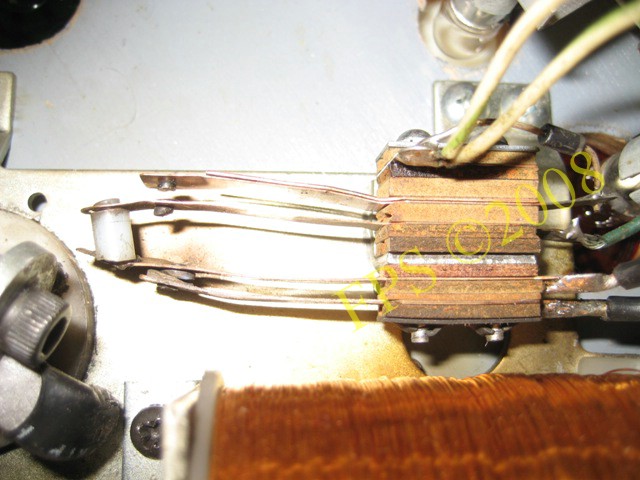
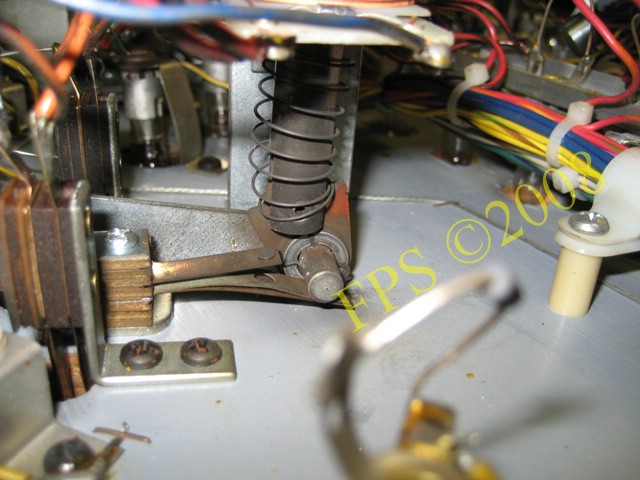
In the picture we can see all ingoing parts in the flipper unit. Williams Firepower 1980 use the second generation of flipper assembly. This flipper assembly can be replaced with a modern design, WPC style flippers. This will make the flippers feel better during play, they last longer and parts is more available for exchange.
 |
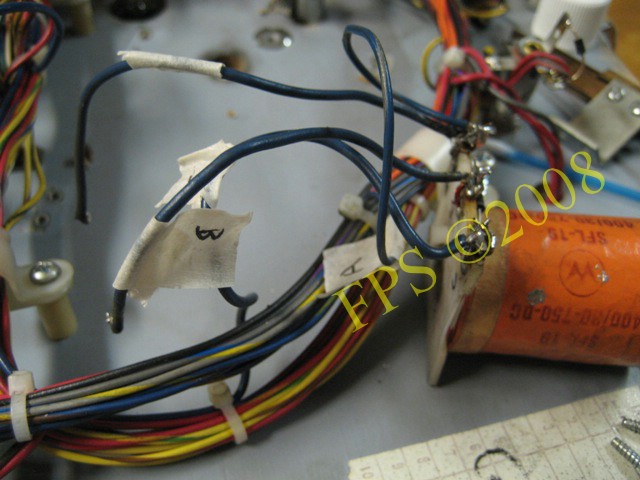 |
When soldered wires from the solenoid it is feasible to mark where the wires shall be situated. The solenoid consists of two "coils" with different amount of wire, low power and high power.
Flipper bate.
Left flippers, base plate, note that the coil stop is not possible to exchange on the second generations flippers.
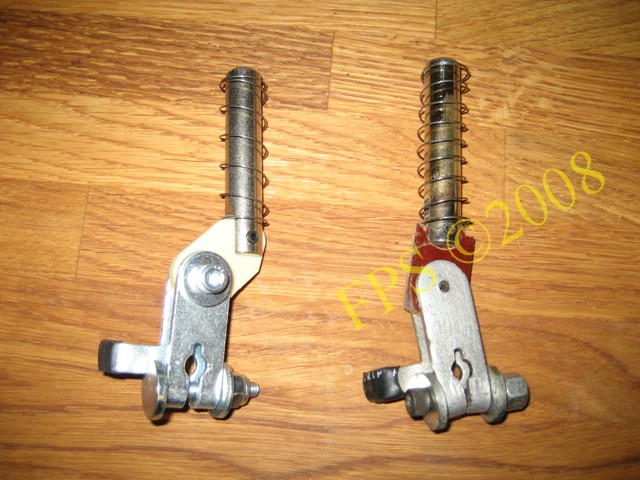
In the picture we can see a new plunger link and crank assy and to the right in the picture the one removed from the left flipper on my machine.
To achieve a correct play 1/32" in vertical direction a flipper gauge is used, white in the picture, it is important to have a play here to avoid slip-stick effect between flipper crank assy. and the flipper bussing.
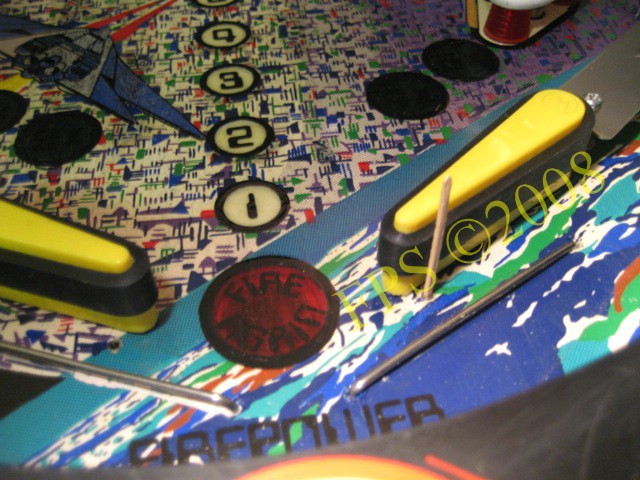
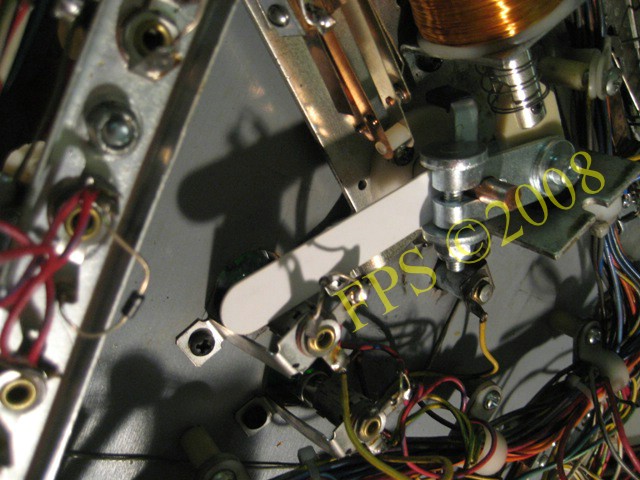
To get the flipper bate in line with the inlane a match or a tooth picker is used as a guide. The tooth picker is attached in the roll pins situated in the playfield surface. When the flipper bate is aligned with the tooth picker the flippers crank assy is tighten underneath the playfield.
Left flippers rebuild with new EOS switch and plunger link and crank assy.
 |
 |
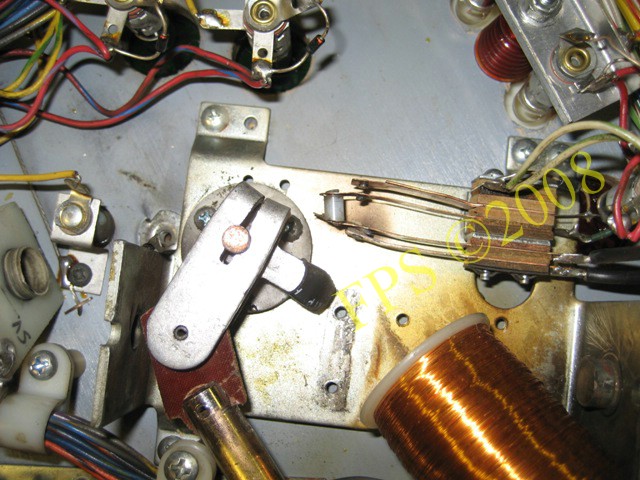
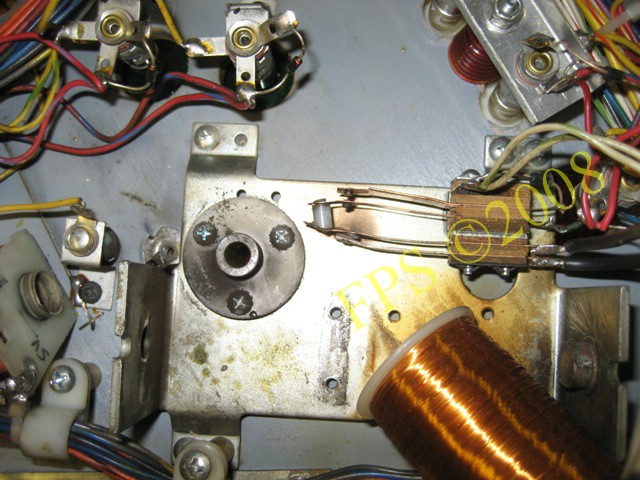
In the picture we can see End Of Stroke switch (28V) and lane change switch (5V) which is situated on the right flipper base plate. These switches had a lot of wear. If these two switches is shorted together then the probability is that some circuits on the driver board will be destroyed, for example switch matrix PIA at IC11. When adjusting EOS switch - ALWAYS TURN THE MACHINE POWER OFF!
The complete unit disassembled and parts will be cleaned and where applicable parts will be replaced.
 |
 |
A new End Of Stroke switch with lane change switch installed. When adjusting the EOS switch it shall open just when the flippers reach its most upper position. If the EOS switch is open to early the flippers has a tendency to be weak and it is almost impossible to shoot the ball into the upper parts of the playfield. It is also important that the switches in the cabinet for the flippers is in good shape for optimal performance of the flippers - no presence of oxidation.
All parts/details underneath playfield is reviewed and cleaned.

Sometimes a broken leaf solder lug or loose wire can be found. I replace the broken solder lug with a new one.
As usually a lot of dirt is collected on the backside of the inserts.
 |
 |
A unit that need to be disassembled and cleaned.
 |
 |
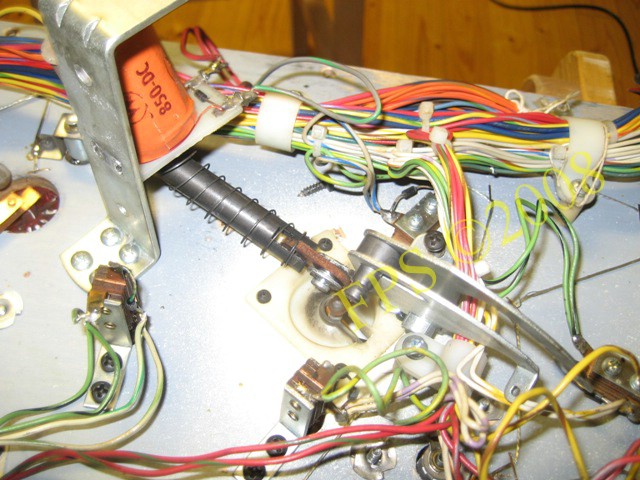
Overviews, in the right picture the ball lane feeder.
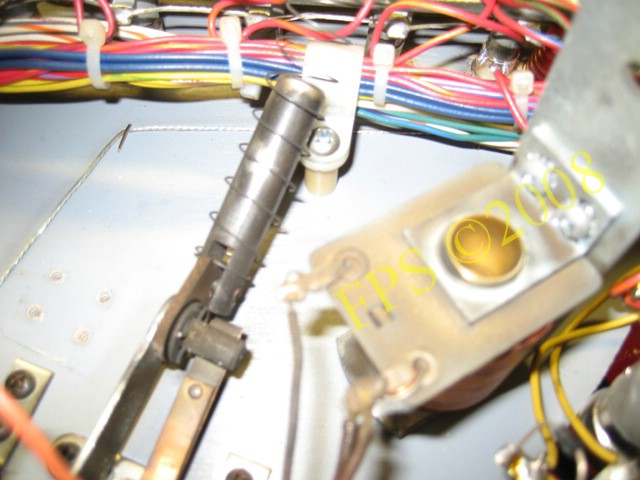
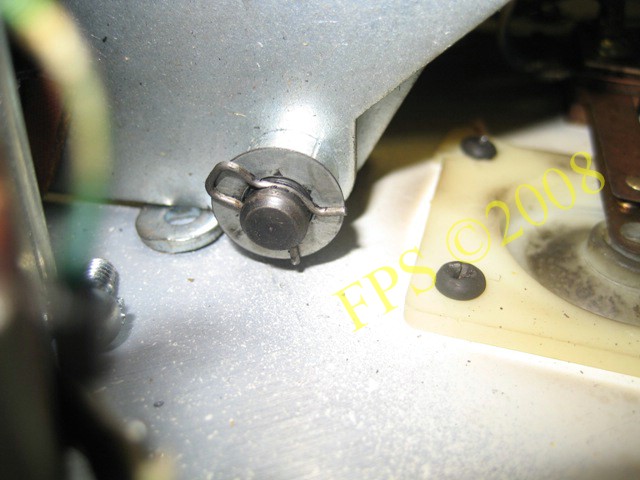
BALL KICKER
Blocking diod 1N4004
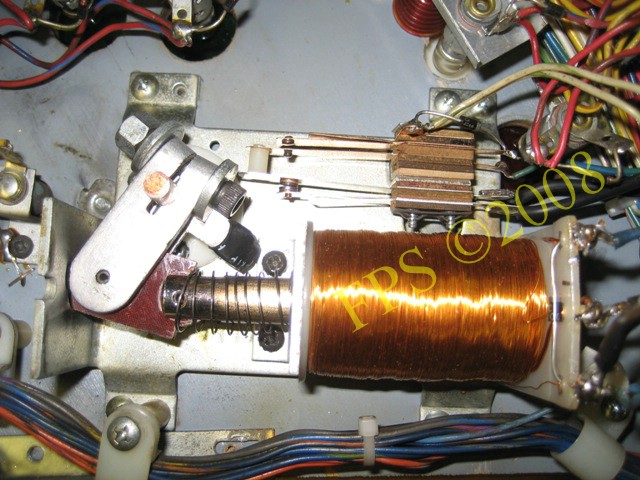
Here I have started to disassembly ball kicker unit. First the screws holding the solenoid is loosen.
Then the hairpin clip for ball kicker mounting plate and ball eject cam is removed.
Now the parts can be cleaned.
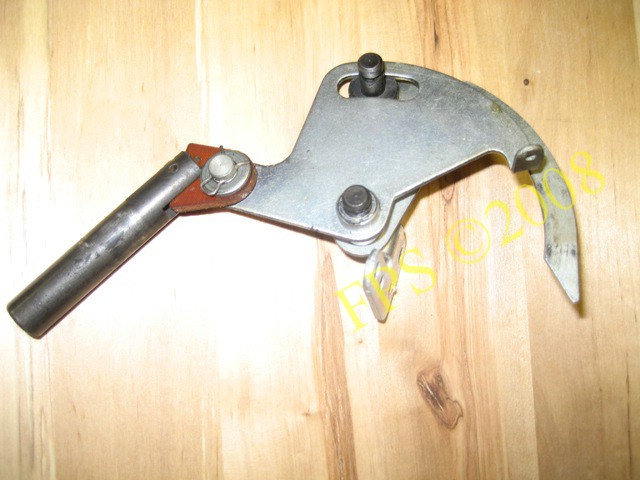
Ball kicker with plunger.
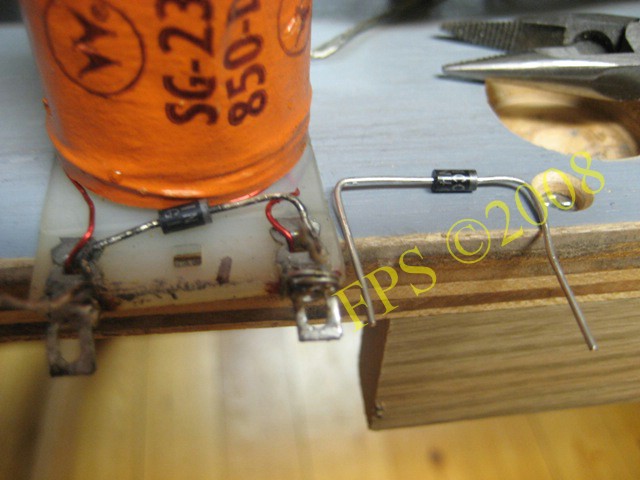
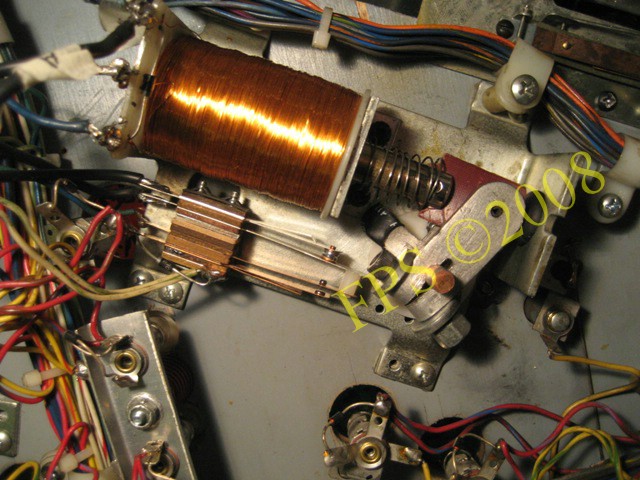
Diode 1N4004 is exchanged. The coil diode prevents a broken coil's voltage to go in backwards direction and ruin a transistor on the driver board. If a voltage back flash should occur from the coil it will unmerciful kill its associated transistor on the driver board. This diodes cracks due to vibrations from the coils. To check if a diode is cracked it can be done by hand. If the diode is fallen in pieces or is loosen it is broken. The best way to check the diode is by continuity measure with a multimeter to see if it is open in both directions, and if this is the case then exchange it.
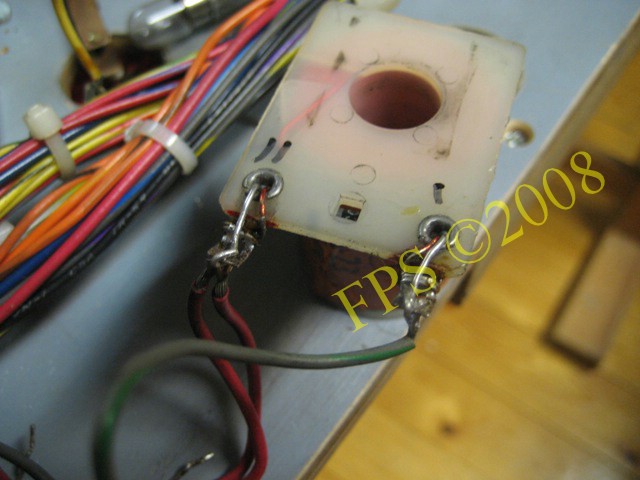
To remember on which side of the coil the wires shall be soldered, two red wires (power wires, daisy chained) and green wire (Ground wire, to driver board) make marks with a marker pen.
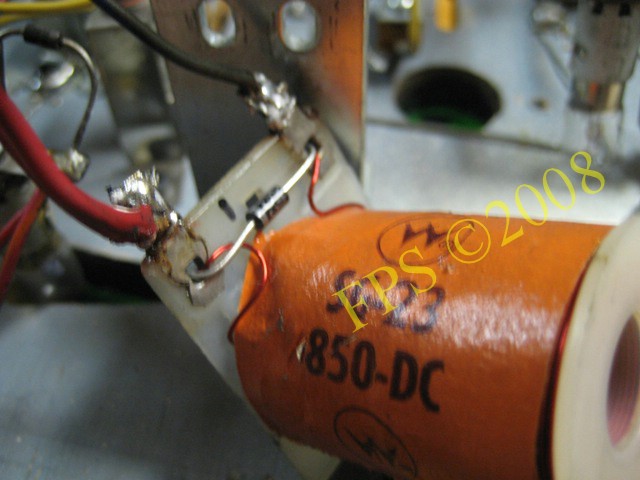
Here I have marked where the banded side of the diode shall be situated to avoid making a fool of my self. The banded side towards the power wires.

Working with exchanging all coil diodes.

As usually all lamps is exchanged from #44 to #47 style. #47 lamps consume less power and generate less heat which save components on the driver board.
Pleasure and Pinball
© FPS. All right reserved. |
Page Last updated:
2009-03-25 |