- Home Old school pinball <1985
- Grand Prix (EM) 1976
- Firepower (SS) 1980
- Space Mission (EM)1976
- Genie (SS) 1979
- Magic Castle (SS) 1984
- Black Knight (SS) 1980 New school pinball >1985
- High Speed (Sys11) 1986
- Earthshaker (Sys11) 1989
- CFTBL (WPC) 1992 Arcade Project
- JK-Cabinet with MAME Contents Grand Prix
- Playfield Cleaning - Part 1
- Playfield Cleaning - Part 2
- Cabinet Refurbishing
- Backbox Refurbishing
- Troubelshooting
- Finsihed project
- Documents - Flyer
|
Languages |
|
|
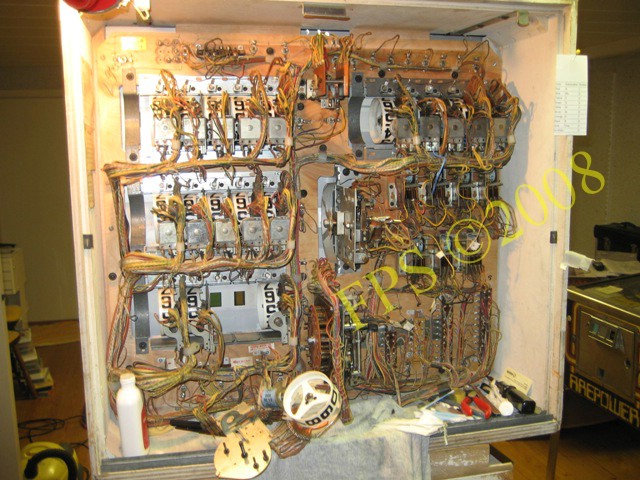
WMS Grand Prix EM Backbox Refurbishing - Part IV!
SCORE WHEELS TIMES TWENTY
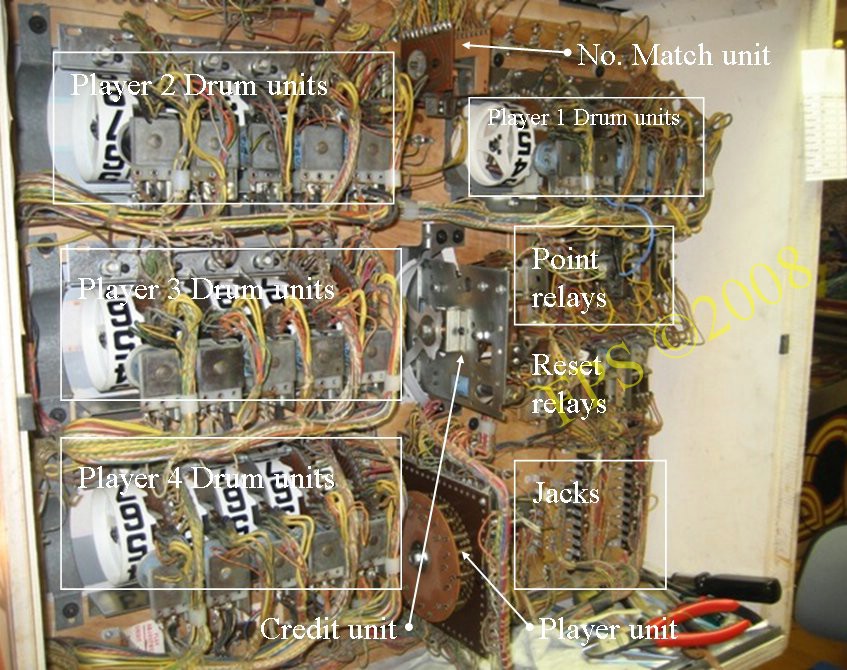
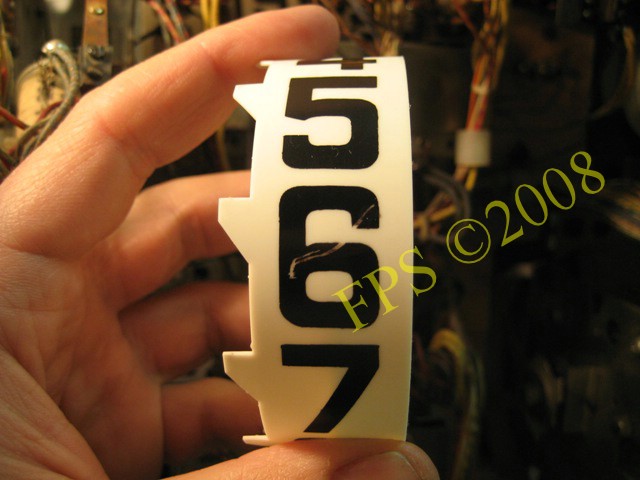
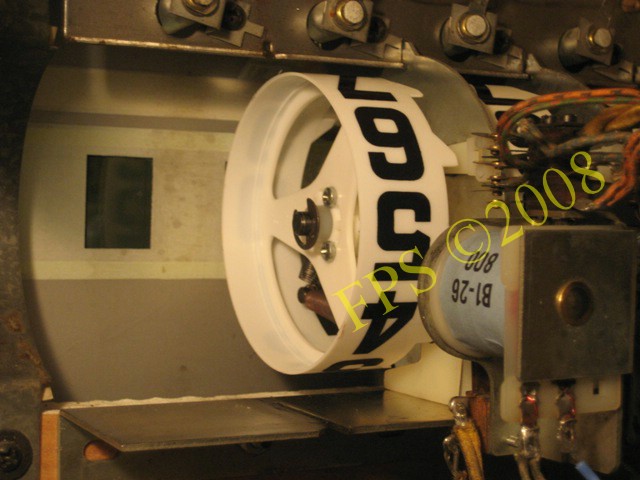
On the picture we can see all score wheels which count/show the points for each player, most common on electromechanical pinball's is that 4 score wheels and a fixed number 0 is used to increase the points. 5 numbers is showed in the score glass, ex 0-99.990 points. Older pinball's did not used this extra zero instead they only used 3 score wheels and some kind of index to show higher score. The Score wheel consist of a score reel or drum unit with a Plastic score drum reel that has the numbers 0-9. A solenoid moves the wheel so one number is showed in the score glass each time it is activated. Grand Prix and some more of the latest pinball's manufactured in the late 70´s the points where increased with another score wheel to be able to show even more points 0-999.990, this to increase peoples interest for the electromechanical games before the electronically games start to be introduced around 1977-79.
 |
 |
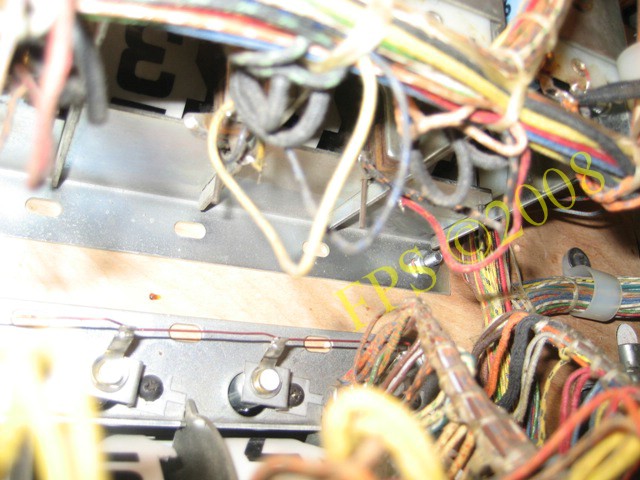
The pictures shows how much dust/dirt and solvent/grease that is collected on the score wheels and particular on the switches.
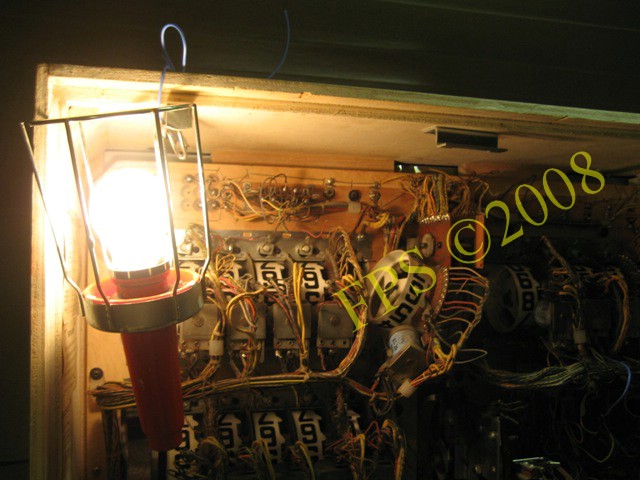
Good light is necessary when working with the Score wheels.
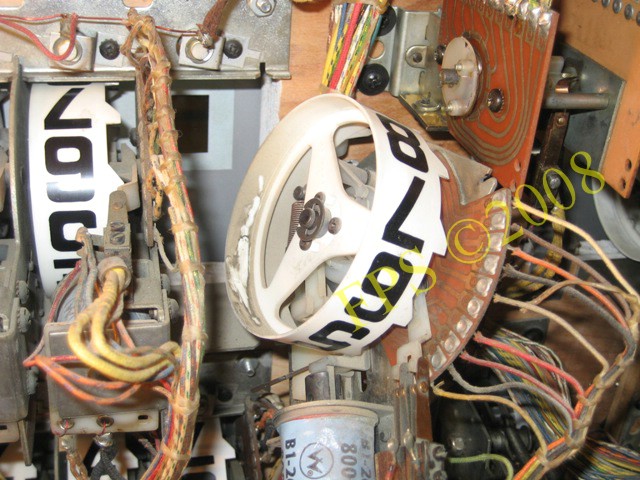
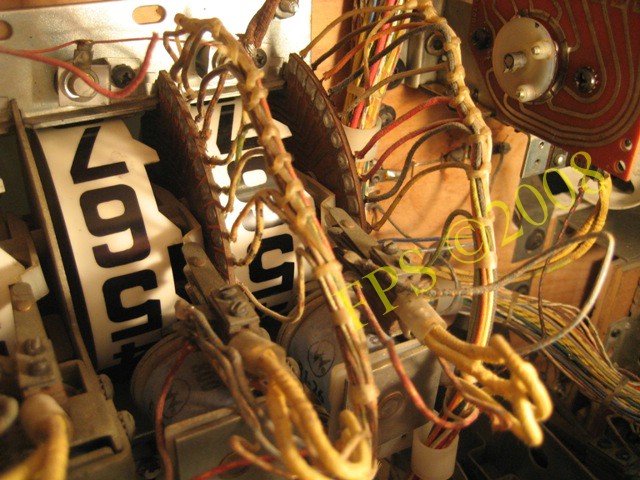
In the back box it was really filthy and it is showed well on the Plastic score drum reel.
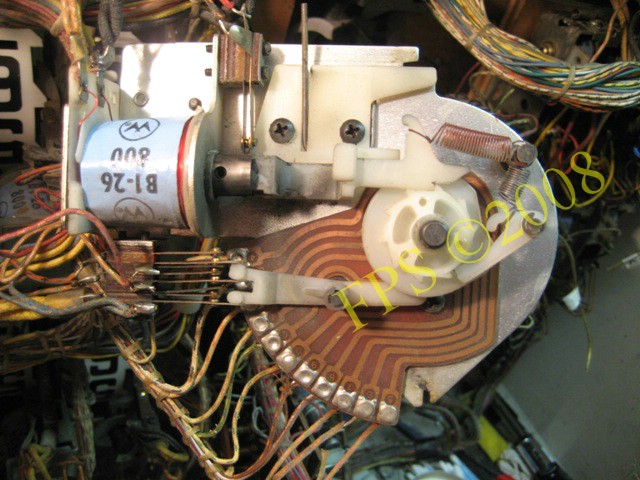
All drum units is attached in a trace in the above and locked with an pin in below. When removing the score wheel the pin need to be pushed in side and then the complete unit can be lifted out from its above seat.
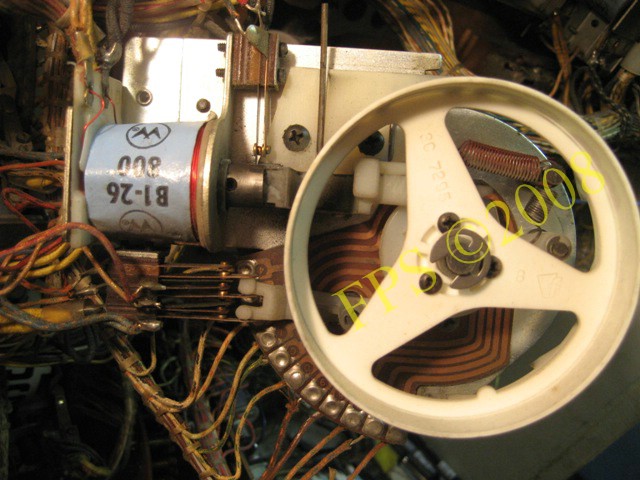
The picture show drum unit with all ingoing parts.
I will make an attempt to describe the importance to keep the score reel switches clean, correct adjusted and verify that they will open and close correct to avoid problem when the pinball is counting the score or at start of a new game. This is to be applied for all switches in the pinball machine. Filthy and sluggihs score reel is almost one of the main root cause when problem during start of a new game. For example if the score motor in the pinball is moving continuously at start of a new game without stopping this can be deduced to the score reel, the score motor is waiting for a signal from the score reel switches that the unit has entered the zero position. The score motor sends a signal to the reset relay in the back box which in next step sends a signal to the Score reel that it shall step the drum unit to the zero position. If this does not happens and the score motor not get an signal for fulfillment it will keep on running. This can be due to dirty or a misadjusted switch. The score wheel has an End Of Stroke (EOS) switch which make the unit to step one number when a signal gives from a switch on the playfield.
Adjustment of switches,
When I clean the switch blade I use a q-tip soaked with Acetone or a piece of blotting paper also soaked with Acetone which I pull between the switch blades. If necessary I grind the blade contact points gently with an Flex stone file. Before adjusting the switch make sure to tighten the switch stack screws since the backlit discs dries and the screws start to come untighten during all years. NEVER use any kind of contact spray on the switches.

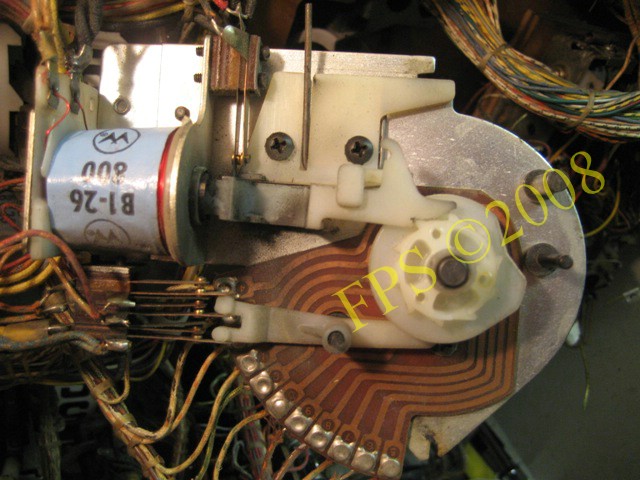
Here on the picture we can see that all three switches is open N.O - Normally Open thus is number "0" in the position to be show able in the back glass score window if the score wheel had been seated in its position.
 |
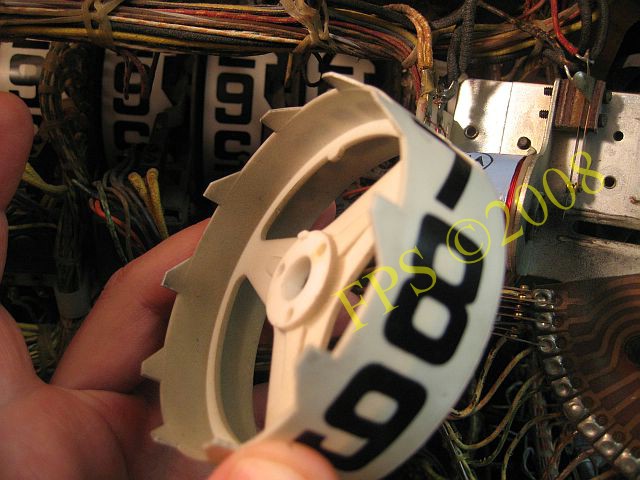 |
Then I start to disassembly the unit for a thorough cleaning. This moment will be repeated 20 times since there is so many score wheels on the Grand Prix. On the picture has the Plastic score drum reel been lifted off by pulling off the locking washer from the axle.
Then I loosen the two springs.
 |
 |
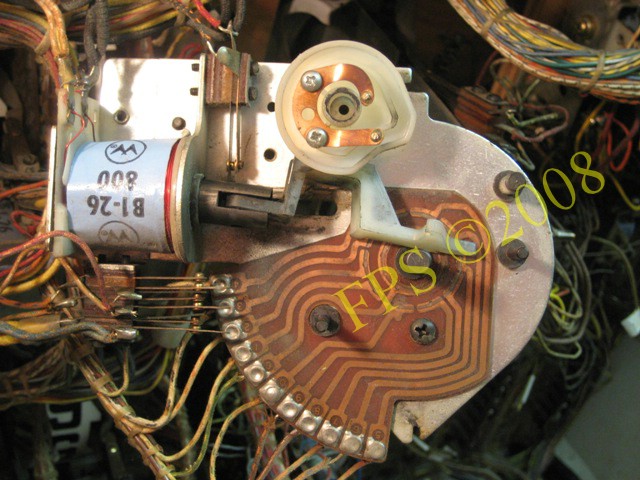
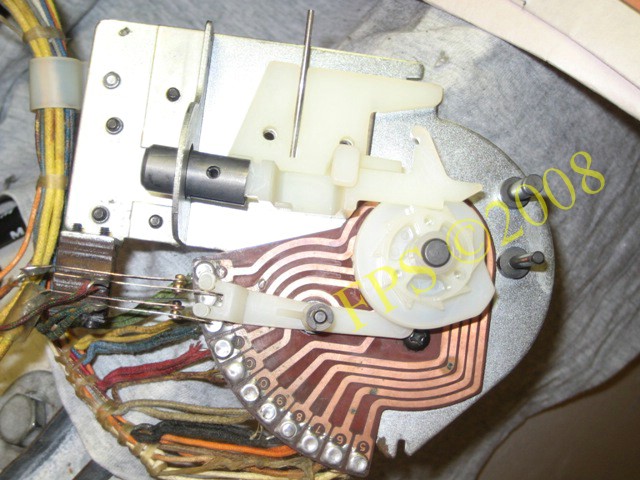
On the picture to the left we can see how the ratch with switch blade has been lifted off, which can be described as a wheel with cogs and it turns when Plastic score drum reel steps up. The ratchet is in contact with the different paths on the PCB. We can see how the switch blade" has made a trace in the PCB and these need to be gently grinded with a sand paper and cleaned with a q-tip soaked in Acetone. Below the ratchet we can find the drive pawl and the plunger. The picture to the right show that not all units has a PCB, in the case for Grand Prix it is only the 10.000 and 100.000 drum unit who has PCB.
 |
 |

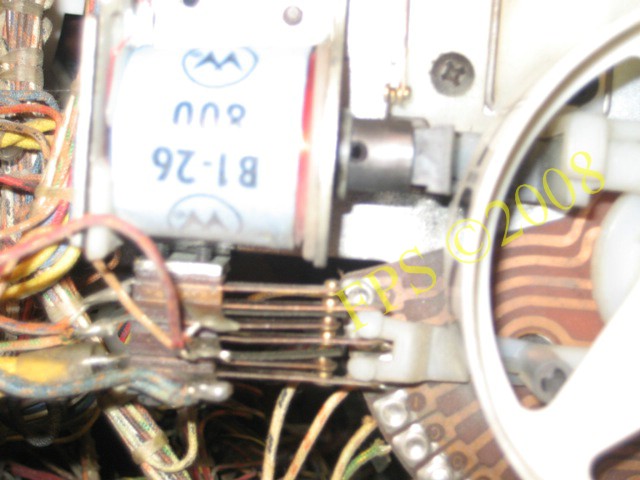
All ingoing parts is filthy and sticky since a lot of lubrication and grease has been added during the years. We can also see that the blue wire has been solder direct to the switch blade since the switch solder ear has been brooked. Another McGyver solution - I replaced the switch blade with a new one and soldered the blue wire to the ear. The lower picture show why it is important to be extremely sparse with lubricant/grease in a electromechanical pinball. The rule is to use extremely sparse with lubricant between metal/metal parts and avoid to lubricate at all between plastic/metal parts. I use a Teflon based grease which is used by competition cyclists, this grease do not bind moisture or dust like a regular grease. The recommendation from Shaggy and Norm is to use Super Lube - now when I have the believe I use exclusively Super Lube to mine pinball's.
Switch actuator - Ratchet stop pawl.
Sometimes has the Plastic score drum reel scratches on the numbers these can be touched up with a black marker pen. I use a black Sharpie pen.
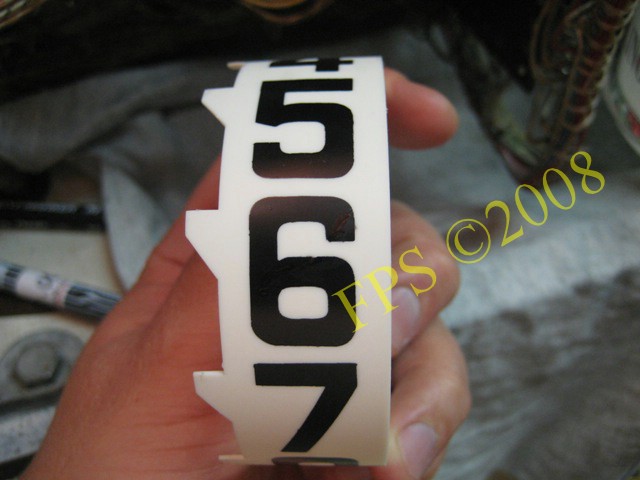
Number "6" after touch up with the Sharpie pen - looks like new through the score window in the back glass.
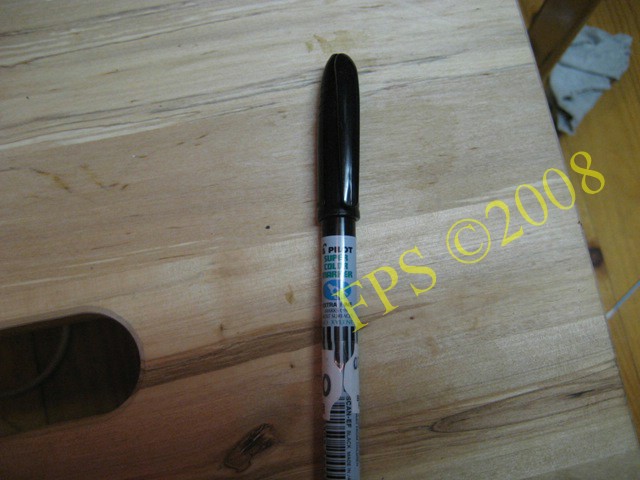
My Swedish version of the Saphire pen is of the brand Pilot.
 |
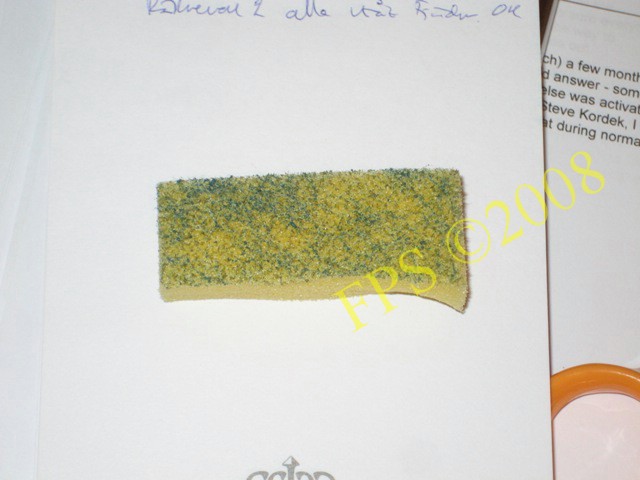 |
All ingoing parts is cleaned with Mr. Muscle. Notice the use of a toothbrush and the green part of the Scotch brite pad to wipe rub off all dirt from the parts. Afterwards all parts is rinsed with washing up liquid and water. The other part of the pad get a surface with an more coarse structure which can be seen in the picture to the right. Useful on hidden spots of the playfield to remove heavy dirt.
 |
 |
PCB after cleaning and a complete drum unit reassembled.
 |
 |
Here is the parts (links) assembled and then I can check that the switches is opening and closing correct by pulling the plunger into the solenoid manually - also check that there is a feasible play between the switch blades in open state.
 |
 |
It works fine to let the units hang - just be careful to not wiggle them to much because then the wires can come loose from its solder point. A lot of q-tips is consumed.
It looks nice after cleaning of the score reels when they are in place again, this will secure the function, signal is given to reset relays when the score wheels is in position zero at start of a new game. The reset relays send signals to relays on the bottom plate in the cabinet. If no signal is sent to the score motor the risk is that it keeps running and no ball will be presented in the shooter lane which has been mentioned earlier.
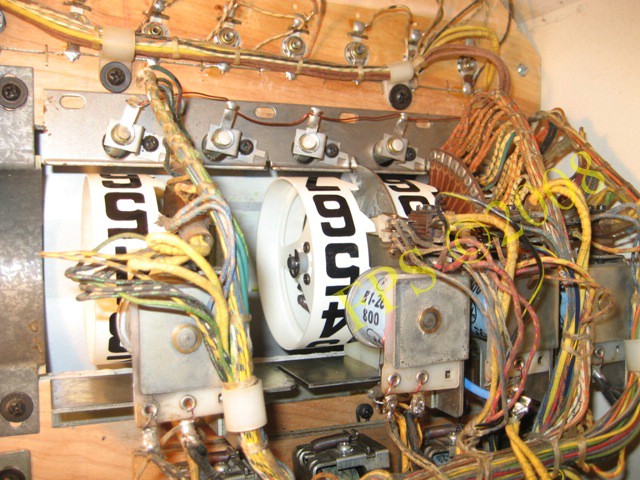
Two score reels assembled after cleaning. Notice the lazy dog with color codes for the wires used in a pinball machine. Excellent to have in hand when comparing the electrical wiring towards the schematic or the manual to verify that the correct wire is connected to correct soldering point. On older pinball's it is common that wires has loosen from the soldering points or a soldering ear has broken and wires has been resoldered without guidance from the schematic or manual. With risk for own special solutions for a occurred problem. I pull all wires gently to check that they not will come loose from their soldering joints, due to all vibrations in the game it is rather common that old solder joints will crack with a broken wire as result. For example the blue wire in the picture is one of this special solution somebody has done during the years.
A cleaned score reel reassemblies and put in place again. The Plastic wheel is stepped manually by pushing the plunger into the solenoid to verify the switches as earlier described.
 |
 |
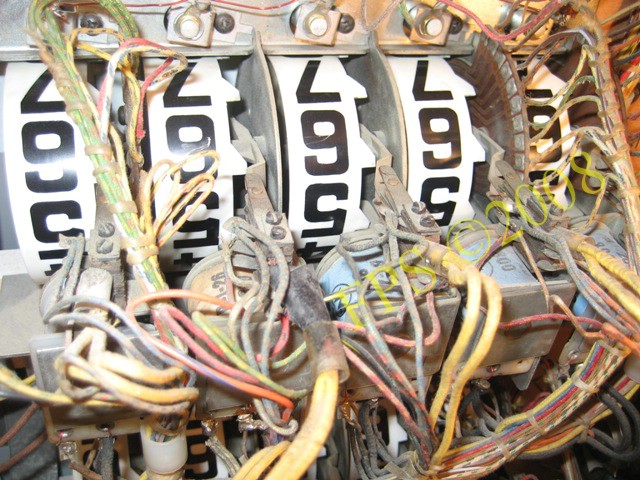
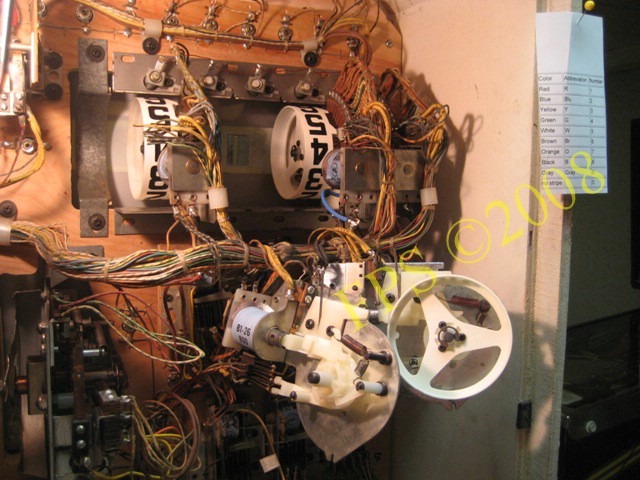
In the picture to the left we can see all four players score reels, it needs five score reels for each player to show points 0-999.990, when 0-990.990 is reached it starts from zero again. When I bought the game the previous owner thought the machine was not working due to missing coils (solenoids) for drum units on player four which is the one down to the left in the picture. Okay, I ordered new coils and coil stops and assembled but the pinball was as "dead" as before. Then I realized that the pinball needed a complete refurbishing of all drum units together with all other relays and units. A tip is to cover the hole between the back box and the cabinet to avoid dropping a screw or something else which can be hard to find in the cabinet with risk for damage when starting a new game.
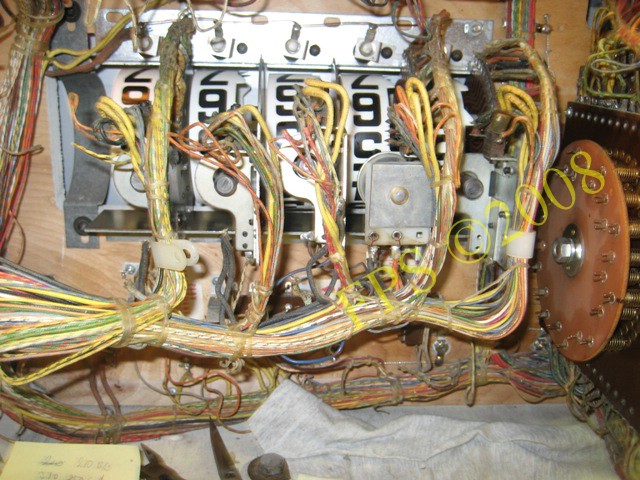
The picture show the missing solenoids for player four score reels.
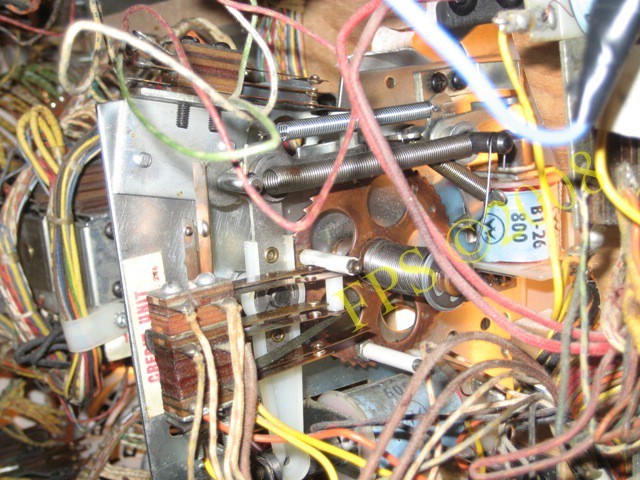
100 POINT RELAY AND X-RELAY

The picture show 100 points relay which is missing a switch blade. It is not unusual that a switch is misadjusted or is broken due to all stress which occur on the material during all years of playing on the pinball. Everything inside the pinball shakes and vibrates. The blades in a switch shall have a distance between 1/16" approximately 1.6 mm but it is not necessary to be exactly this distance so I adjust if necessary a distance around 1-2 mm between the blades. Avoid to adjust if not absolute necessary to get something to work again, there is a risk to make the adjustment wrong with malfunction and you do not even longer know why. Do not forget to tighten the screws before adjustment of the switch blades.
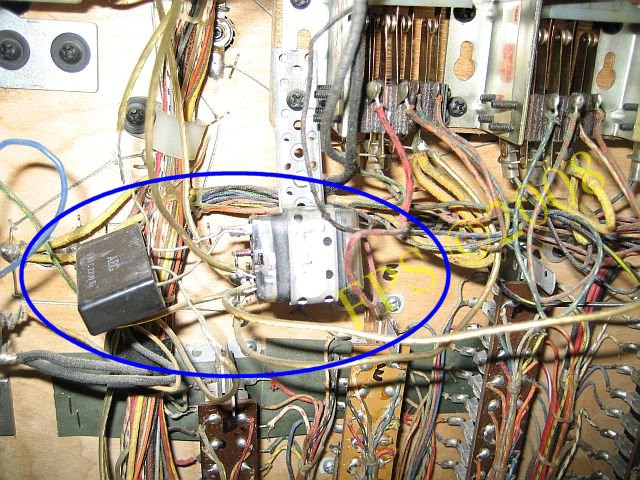
In the back box around the point relays I recognized a relay of today which was labeled X-relay. There was an bridge retificer soldered directly on the X-relay. I could not understand what it was, I made research on the parts numbers on the internet with result only what the components was. I could either figure out what kind of solution this was done by some McGyver or read "Mr. repair dude". The X-relay was soldered to the point relays and further to the mechanism plate in the cabinet. Later I thought it could be a substitute solution for the broken blade in the 100 points relay. When I removed the X-relay I was unsure if this would affect the scoring or give other effects on the pinball. When the X-relay was removed I made new wiring according to the manual and the schematic and replaced the missing switch blade on 100 points relay. After a test play everything worked well so the removal and connecting of new wires and a lot of thinking had succeeded.
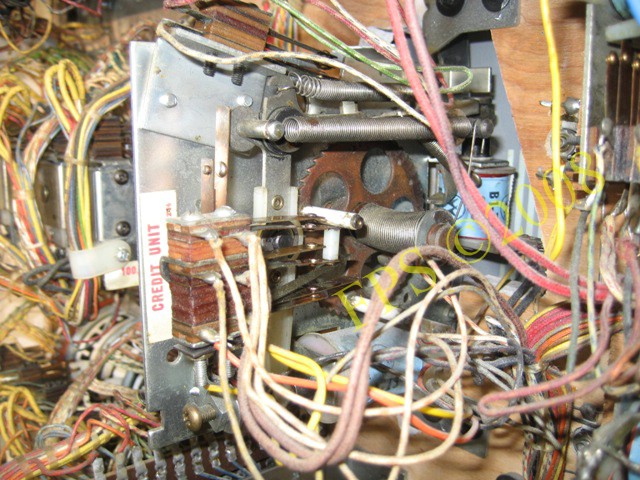
FREE PLAY - CREDIT UNIT
Normally coins is used to achieve credits, different amount of credits is given for a coin depending on how the jacks is configured in the cabinet. If no credits is given for a coin for any reason or a coin acceptor is missing it is possible to set the game in free play by connecting the two upper switches on the credit unit. I use a banana clip. A new game is given each time the start button is pushed.
 |
 |
The picture to the left shows credit unit and the picture to the right shows the switch, notice how dirty the blades on the switch is.

Here we can see credit units EOS- End of stroke Switch.
Now is the solenoid reset coil which reset the unit and the switch removed. The lower spring is damaged and will be replaced.
The spring which help the unit to reset is now removed - important is to notice the springs pretension and where on the wheel it was situated - normally the pretension is 3-4 turns. I make a mark with an marker pen to now where it was situated.
 |
 |
Now I remain to remove the rest of the parts.
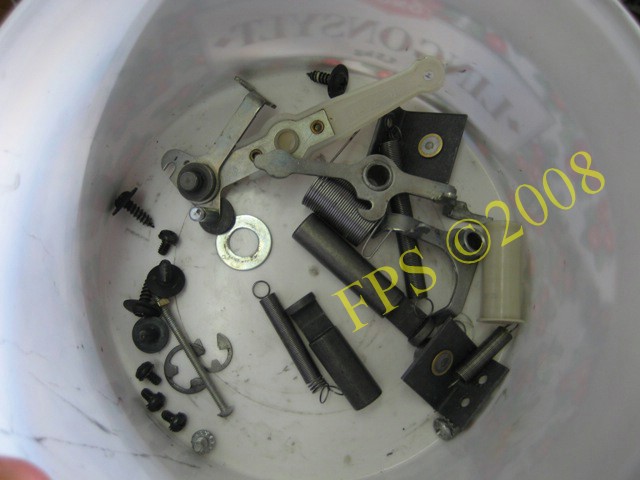
All parts collected before cleaning.
All parts and the credit unit console is now cleaned.
Now we can see how clean the switch is after refurbishing.
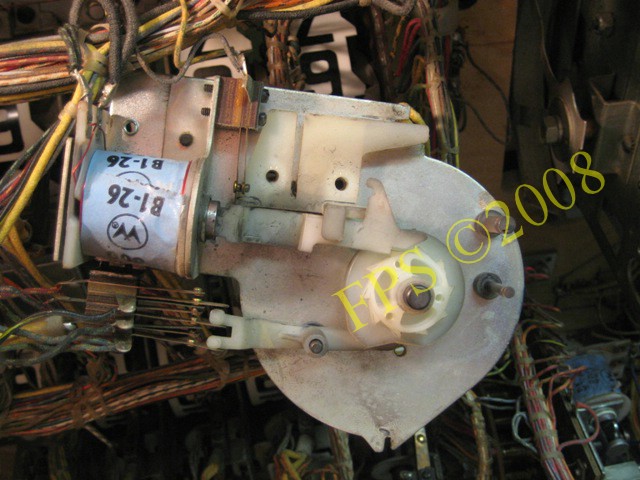
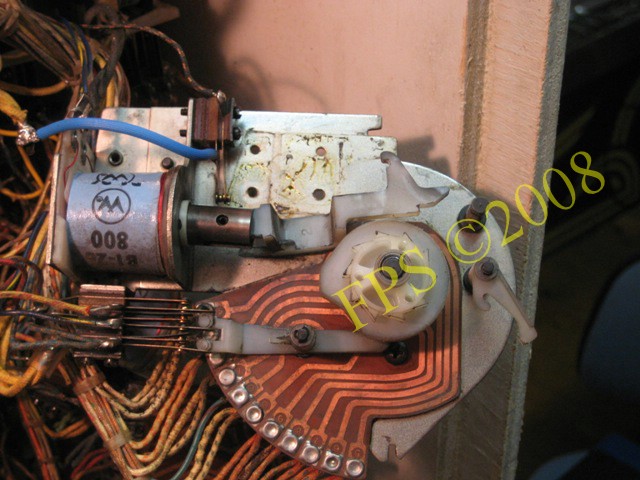
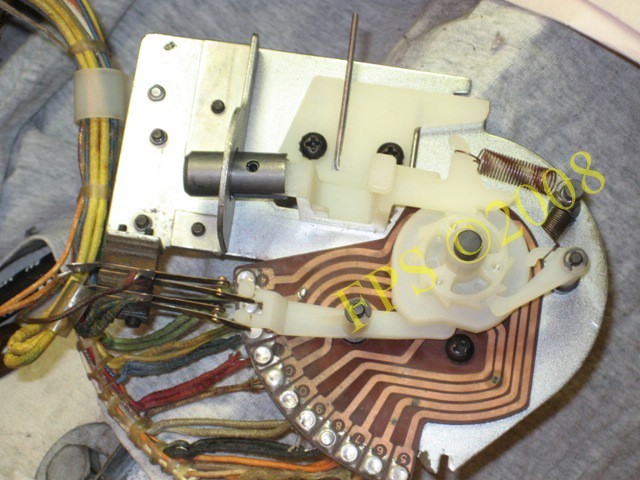
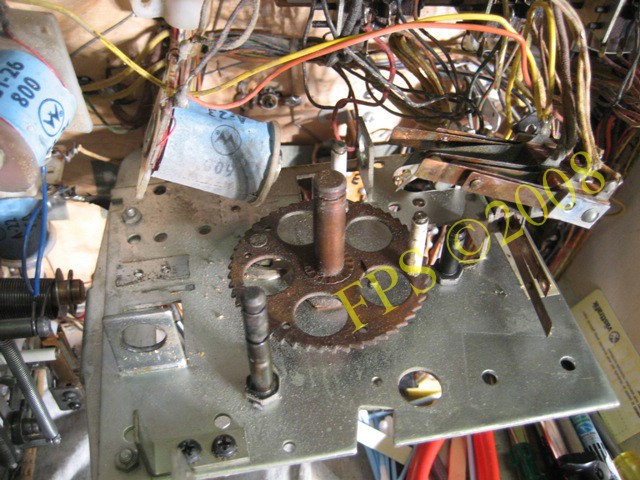
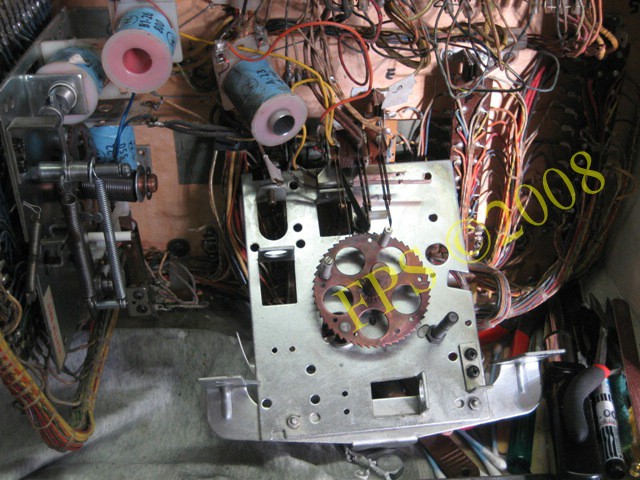
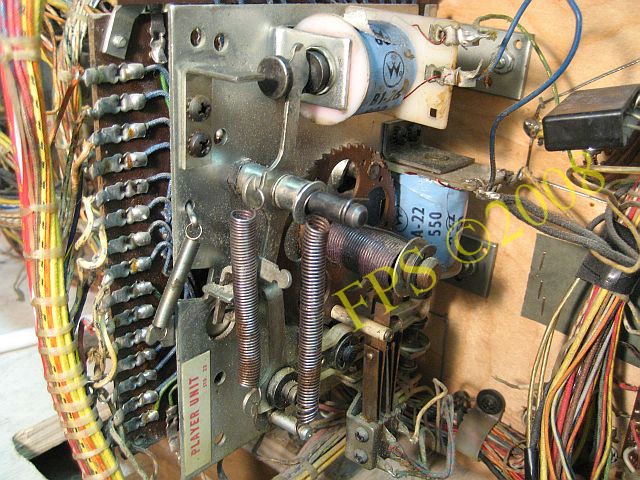
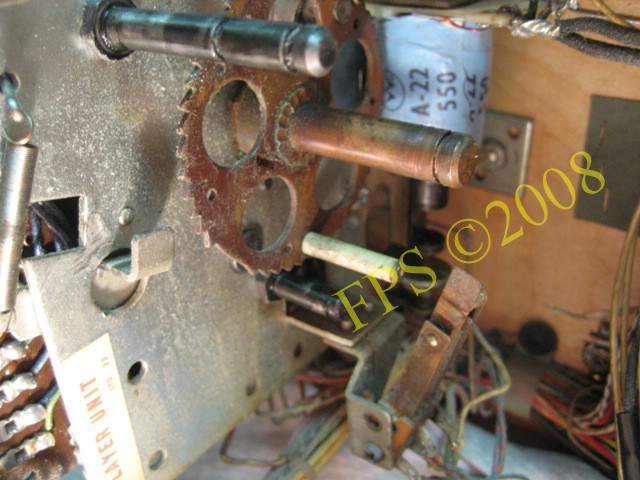
PLAYER UNIT REFURBISHING
 |
 |
Player unit before refurbishing.
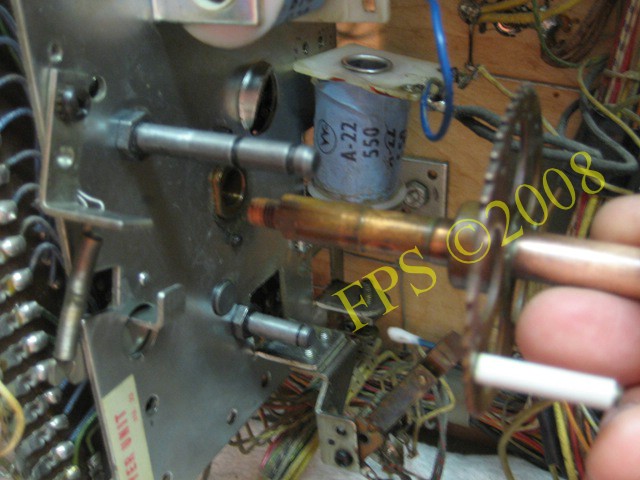
Before disassembly of the player unit I mark the springs position with an marker pen. When loosen the spring it is important to count the springs pre-tension, count how many turns the spring is loaded with then you can apply the same amount of turns when reassembly the unit. Normally it is 3 turns sometimes 4 turns if the spring has started to be weak.
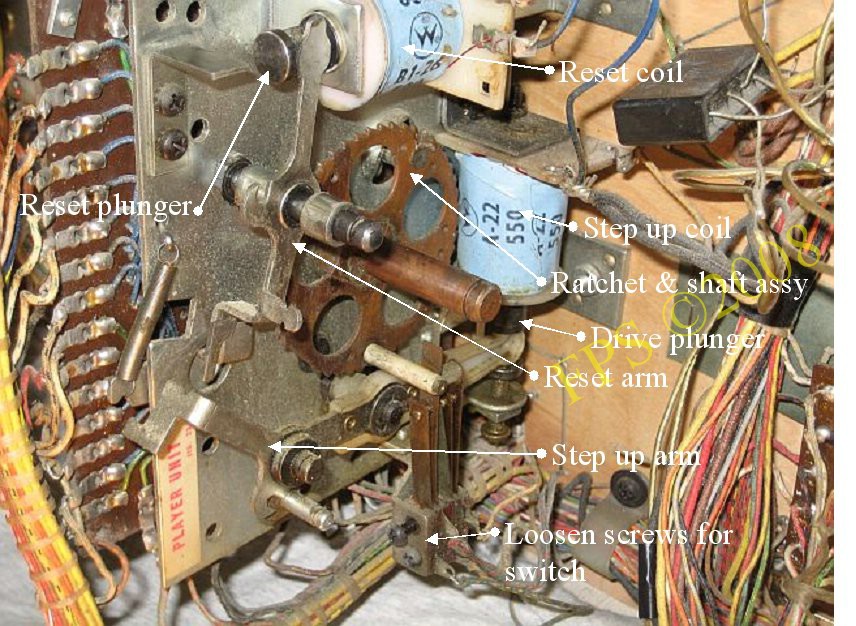
On the picture is the springs removed and the rest of the parts can be disassembled. Note that I remove the upper sccrew and only untighten the lower screw slightly on the switch stack which allow me to turn the stack and make space to remove the Step up arm.

When the switch stack is put at side I can remove the Step up arm.
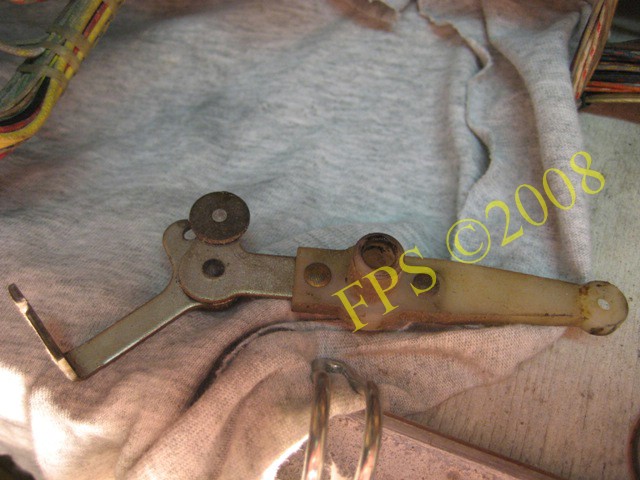
Step up arm is really dirty with old lubrication.
 |
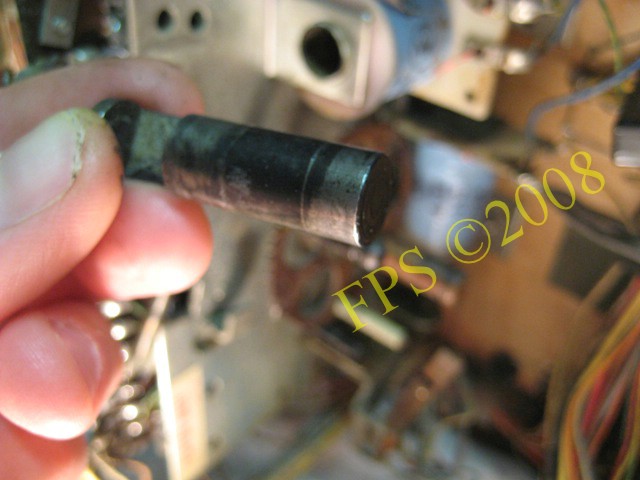 |
Drive plunger is full of dirt which give an "chewing gum effect" when then plunger is pulled in the coil sleeve by the solenoid.

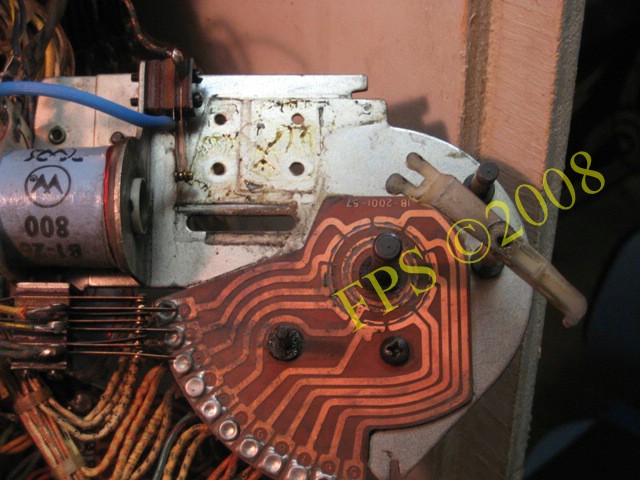
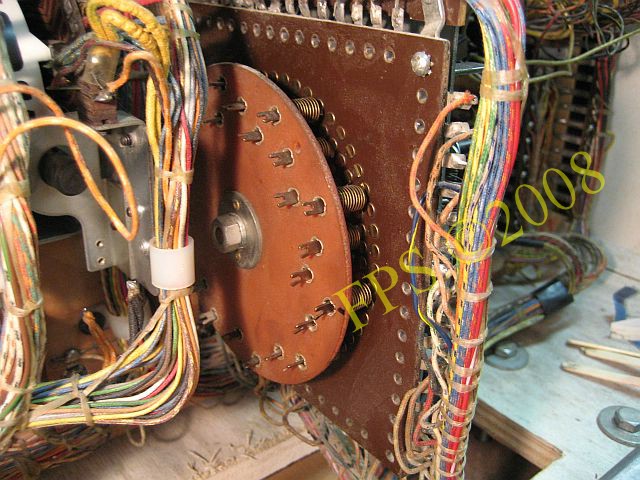
Before I remove Player unit disc with snowshoe type wipers I make an black mark with an marker pen when the disc is in it´s start position to make sure that I achive the same position when reassemble the unit.
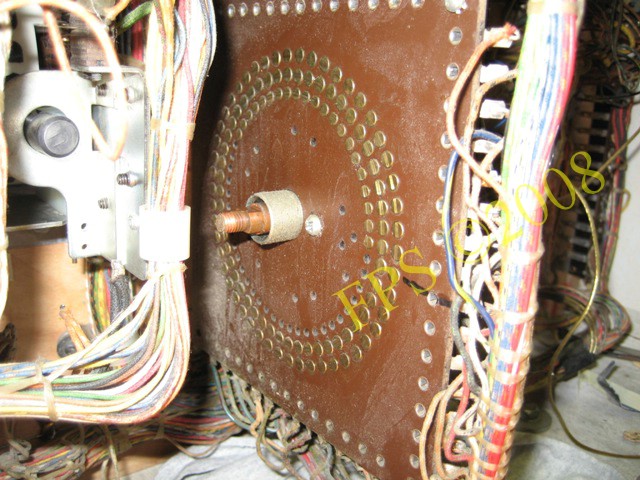
Rivet type biscuit before cleaning. All rivets need to be sanded with a fine sand paper to remove all corroision and dirt, afterwards I clean the rivets with Aceton.
 |
 |
The disk before and after refurbishing. Make sure that the disk souk up a lot of cleaning solvent and push on every single shoe to remove all dirt.
 |
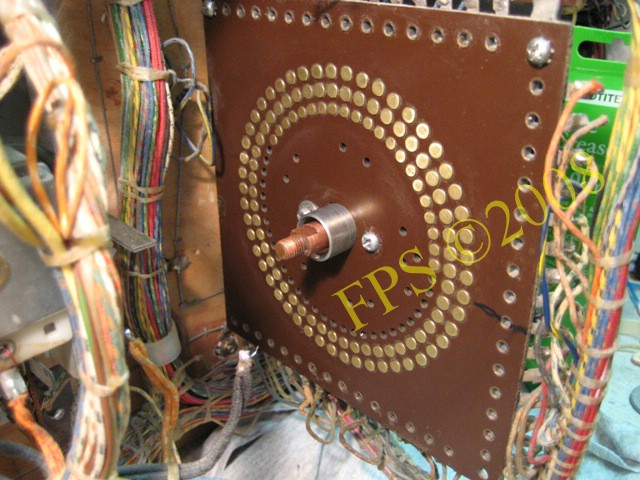 |
On the picture to the left is all the rivets sanded and on the picture to the right we can see the rivets after cleaning with Aceton.
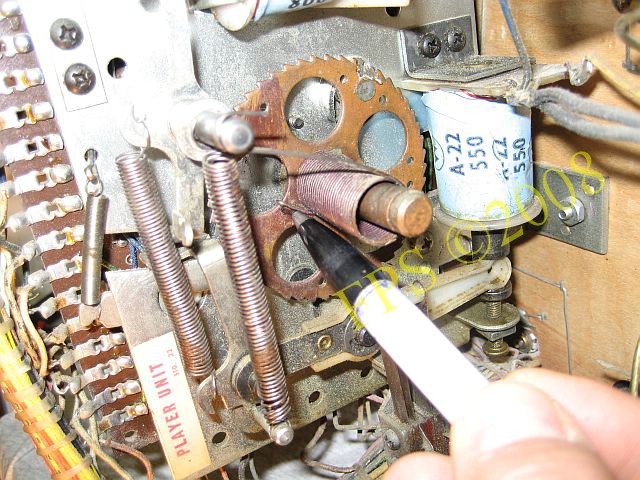
The Ratchet and shaft assembly is disassemblied.

I use a grease with Teflon which is used by competition cyclists of the brand Weldtite but nowadays I use a grease of the brand Super lube also with Teflon which not absorbe moisture. You rember the rule metal/metal and plastic/metal when lubricate.
Pleasure and Pinball
© FPS. All right reserved. |
Page Last updated:
2008-08-05 |